1/48 Accurate Miniatures TBF/M Avenger

Ad: This forum contains affiliate links to products on Amazon and eBay. More information in Terms and rules

Maglar

Tech Sergeant
1,570
8
Jan 29, 2009
Florida
Ahoy mates, today I bring you the start of this build. I was contemplating on joining Gb #22 late, but decided on this instead. I have not been modeling much due to college but have found the summer courses to give me more free time than I anticipated so here we are. I hope all of you have been well and I look forward to documenting this build.

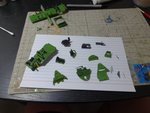
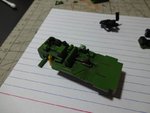
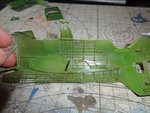
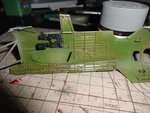
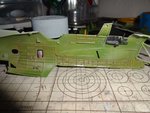
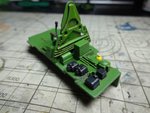
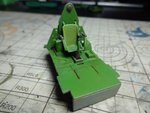
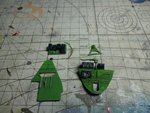
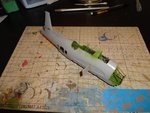
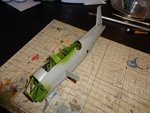
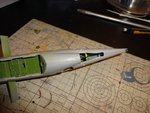
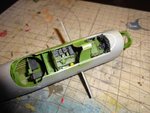
Pics - General pictures of the cockpit assembly. There is currently a gloss cote on for the oil work I am doing so expect more revealing pictures when I reach that stage. This is my first build from this manufacturer and I love the detail and instructions along with the pre-cut masks (I've never had the pleasure of using them before).

:D
 

Attachments

  • DSC00943.JPG
    DSC00943.JPG
    110.1 KB · Views: 180
  • DSC00944.JPG
    DSC00944.JPG
    108.5 KB · Views: 192
  • DSC00946.JPG
    DSC00946.JPG
    94.3 KB · Views: 198
  • DSC00950.JPG
    DSC00950.JPG
    127.4 KB · Views: 188
Thank you all. Here are some more to finish off the day.

For the weathering I used random brown / white dots of oil paint that were mixed together with tons of thinner. I then used a hair dryer to evaporate the thinner and then played around with a q-tip to remove excess and display what I wanted. After that I dry brushed higher surfaces with yellow for a subtle highlight. I do not like using black for washes because it looks out of place. There was some silver dry brushing used for details and rivets.
 

Attachments

  • DSC00954.JPG
    DSC00954.JPG
    134.4 KB · Views: 195
  • DSC00957.JPG
    DSC00957.JPG
    131.1 KB · Views: 181
  • DSC00962.JPG
    DSC00962.JPG
    113.8 KB · Views: 199
  • DSC00961.JPG
    DSC00961.JPG
    105 KB · Views: 176
  • DSC00965.JPG
    DSC00965.JPG
    133.2 KB · Views: 177
Got the fuselages halves together and next step will be seam filling. Got a busy week ahead so I don't figure much will be going on but i'll be plugging away when possible.

I applaud accurate miniatures on putting the window framing slots on the outside so the windows can be installed last. No worries for masking or CA or falling out. :)
 

Attachments

  • DSC00966.JPG
    DSC00966.JPG
    132.3 KB · Views: 164
  • DSC00967.JPG
    DSC00967.JPG
    130.1 KB · Views: 155
  • DSC00968.JPG
    DSC00968.JPG
    126.9 KB · Views: 173
  • DSC00972.JPG
    DSC00972.JPG
    117.3 KB · Views: 160
I wish others would do that. The PBY I'm doing now has 7 fuselage windows installed very early and there's no way to fix them if they move. Your build is coming along nicely.

Geo
 
Got the engine painted up and the cowlings together. Engine got a light silver drybrush. Next will probably be some more gluing of major pieces to fuselage and then gap filling. Heading out of town this weekend for the 4th, so progress should stall for now.

I can't wait to start hitting the bigger parts of this build as the cockpit was slow as usual but now it's taking shape!
 

Attachments

  • DSC00977.JPG
    DSC00977.JPG
    132 KB · Views: 177
  • DSC00981.JPG
    DSC00981.JPG
    96.2 KB · Views: 168
Wok, Wayne, Andy, thank you! I hope the engine distracted you from the screaming glued fingerprint on the cowl (which was politely and immediately handled by the sand paper department). :):lol:
 

Users who are viewing this thread

Back