1/48 mpm Fairey Fulmar Night Fighter MK.II

Ad: This forum contains affiliate links to products on Amazon and eBay. More information in Terms and rules

TimEwers

Airman 1st Class
224
0
Aug 28, 2010
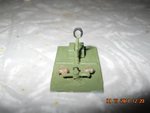
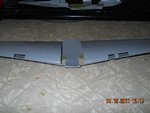
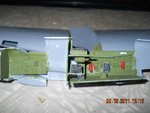
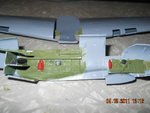
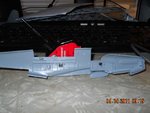
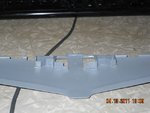
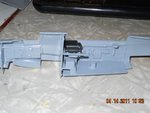
Dang sure got to be carefull with this one and go slow no rushing it. Right now the only thing I'm waiting on is the rest of the paint I had to order, say it will be here Friday. But this is what I got done so far.
 

Attachments

  • Picture 057.jpg
    Picture 057.jpg
    100.1 KB · Views: 213
  • Picture 055.jpg
    Picture 055.jpg
    94.6 KB · Views: 220
  • Picture.jpg
    Picture.jpg
    94 KB · Views: 237
Don't expect much I'm a out of the box builder and from what I can tell from test fitting once the parts are together you won't see a lot of the detail that is there.
 
good luck with this one,having just built 2 in 1/72nd i will follow this with interest
 
well here is where I'm at right now
Pict 1 you need to trim the back equipment table and bulkhead for a good fit
2 some triming was needed on the front fire wall as well
3 wings went together without too much fuss but no locating tabs so you need to be careful in lining them up.
4 the feet restraints on the pedals so far has been the hardest to do on the photo stuff.
5 not shown I put the tail planes together and test fitted them and either they will need trimed or the openings in the plane will need to be widend as it's a very tight fit.
and from test fitting the wings and body this plane is a large aircraft, dang sure bigger than either the Spitfire or the Hurricane.

but this might be the last one this year I can do as I got my hours at work cut again so modeling will take a back seat for a while.
 

Attachments

  • Picture 066.jpg
    Picture 066.jpg
    86.3 KB · Views: 214
  • Picture 067.jpg
    Picture 067.jpg
    87.3 KB · Views: 208
  • Picture 065.jpg
    Picture 065.jpg
    94.6 KB · Views: 220
  • Picture 063.jpg
    Picture 063.jpg
    95.6 KB · Views: 206
  • Picture 064.jpg
    Picture 064.jpg
    98.5 KB · Views: 198
Sorry for lack of updates but here is where I'm at with the kit.
no 1If you build this thing do not follow the directions on putting the cockpit together. Put the control panel in first before you put the floor in otherwise your not gonna be able to fit the panel in afterword good thing I don't do contest as it's getting left out.

No 2 make very sure you got the sides lined up I did not quite have it lined up and you can tell from certain angles makes the wing off set,also makes the air intake not set right as well.

no 3 in looking at pictures on line I'm thinking the tail is too long but sense I'm not that good and don't have the tools so I'm not fooling with it, needs to have about a mm cut off

no 4 the landing gear doors are too short if you want to have them closed and the opening is somewhat too narrow as well again those with more experience might be able to fix that.

no 5 the cover painting shows 6 antenna and there are 6 in the pe set but only 5 posts still figuring out what to do about that.

no 6 the landing light and cover are great but there is no backing part for it I did not relies that until I closed up the wing so again not too sure what to do about it.

But I'm gonna finish it got this far not going to stop, been trying some of the things I've read abut here on building it mainly the nail remover puttying trick, works but I need more practices with it I guess which is why It's taken this long for me to build.

the green is humbrol 117 not sure if that is right or not as the numbers they give in the instructions are old numbers.


Picture134.gif


Picture136.gif


Picture139.gif


Picture087.gif
 
Generally not to bad at all. But these seams of the fuselage halves always need more attention before painting. Just for the future.
 
A problem is there anyway of fixing a cracked canopy?, it looks like it's mainly along a frame line, when I paint it would it cover it or would it still be visible thru the paint.
 
Dip the canopy in Future floor polish and let dry at least 48 hours. If still noticeable, repeat. If it is a hairline crack there is no cleaving of the plastic, it should disappear especially after careful masking and painting. The added value (besides getting rid of a nasty crack) is a superb, glass-like canopy. Hope this helps... good luck.

Mark
 

Users who are viewing this thread

Back