1/48 Revell Corsair F4U-4 [Late]

Ad: This forum contains affiliate links to products on Amazon and eBay. More information in Terms and rules

Maglar

Tech Sergeant
1,570
8
Jan 29, 2009
Florida
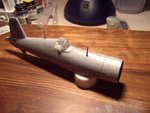
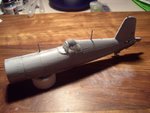
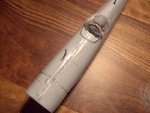
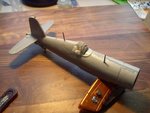
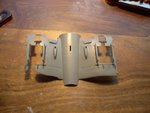
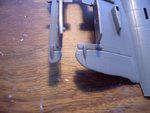
I couldnt model in the dark anymore guys, this thread is totally happening haha! Some basic shots of where i'm head, still stumped on the main fuselage seam on top, I have cleared most of the damage but I still see it and it ticks me off (Tips regarding filler / milliput most welcome). Once I get the wings on I am going to undercoat it in a metalizer for better final results and we'll see how well it blends but i'd like to knock the problemeb out of the way. I saw styrene strips for sale at my LHS but I didnt know my purpose in applying them, i'd like to master putty. I also have found a megaflaw (I think) in the wing setup which will be seen later. This corsair is going to have the moveable wing parts which will be a joy!
PS: You didn't miss anything special with the cockpit, its the smallest ive ever touched and the pilot is stiffer then a 2 by 4. :|
 

Attachments

  • PICT0529.JPG
    PICT0529.JPG
    78.3 KB · Views: 219
  • PICT0530.JPG
    PICT0530.JPG
    79.3 KB · Views: 235
  • PICT0531.JPG
    PICT0531.JPG
    76 KB · Views: 216
  • PICT0532.JPG
    PICT0532.JPG
    77.1 KB · Views: 229
Just respecting the ethics of scratch building, used my chest hair for that smoke effect. :D
 
Oh, southside.. i'm not that wild mate! Nah, actually its cotton balls to prevent paint from getting in which you probably knew. Cotton takes the shape so much better then stiff tape, you can jam cotton into anything and it will work, also easy to rip up for all sorts of angles. Only downer is its loose hairs, can get stuck on your paint job and such, im good about it though
 
The nose looks like crap from sanding, primer, then a silver to see if it was even. Silver hides nothing! I need to practice more with my repair skills, the nose is still uneven a bit after all the work, more!!!
 
Looking good Maglar. Just for the future a such kind of gaps can be filled in with mixed talc powder and light grey paint.The kind of a putty is very easy to apply and sanding.What is more it gives smooth surface.
 
This is the same kit im using for the group build. But i have also paid for etched parts as well.

If anyone is interested i have the decal kit up for grabs for this kit. As i dont need them!!
 
Wurger is quite right about the talc/paint mix for fillers - you can use talc/clear varnish also. With the cotton balls, if you dampen them first, it'll prevent the fibres sticking to the paint, or you can use damp tissue, or, as Wurger does, thin foam.
 
I'll look into it wurg, going to have to do some rivets later! That stuka is looking more tempting everytime I look at it.. :D
 
Slid on the back wings, did another putty fill on the front seam and nothing filled so I guess its perfect up top. But I got to the bottom wing assembly and... YAY REVELL! [The plastic mites must have gotten to it when it was in the box :mad: ]
 

Attachments

  • PICT0545.JPG
    PICT0545.JPG
    78.2 KB · Views: 191
  • PICT0546.JPG
    PICT0546.JPG
    83.8 KB · Views: 185
  • PICT0547.JPG
    PICT0547.JPG
    81.9 KB · Views: 196
Oh... but it couldn't happen when it was in the box.Simply it is sombody's wastage.A such thing occurs when there is a wrong temperature of plactic or moulds.I think it is quite easy to correct the mistake.
 
Wurger is right, it's known as a 'short shot', when not enough liquid plastic reaches the edges of the mould tool, or the temperature is incorrect.
It should be easy to rectify once the wings are together, but if you contact Revell, maybe enclosing a photo of the part(s) affected, they should send a replacement part, maybe even a full kit.
 

Users who are viewing this thread

Back