1/72 F-5E Aggressor Testors/Italeri

Ad: This forum contains affiliate links to products on Amazon and eBay. More information in Terms and rules

kgambit

Tech Sergeant
1,719
2
May 29, 2006
North Carolina
Username: kgambit
Name: Dwight
Category 2 Intermediate
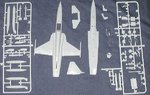
Model: F5E Tiger II
Scale: 1:72
Manufacturer: Testors (reboxed Italeri)
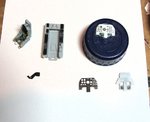
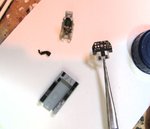
Aftermarket add ons:
- TwoBobs F-5E Nellis Aggressors
- Eduard PE SS178
- Hasegawa weapon set replacements for the Sidewinders and/or the ACMI data wing pod

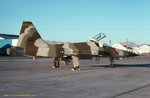
Camo Scheme: "Snake"

I've actually been working on this one on the side as I continue finishing all of the detail work on the interior of the F-111. :) The only issue with this one will be the timing of the decals. They're supposed to be ready for IPMS Nationals - we'll see.
 

Attachments

  • 72f5ebt.jpg
    72f5ebt.jpg
    51 KB · Views: 277
  • 72f5ea.jpg
    72f5ea.jpg
    71.1 KB · Views: 257
  • 66_F-5E_01566_66FWS_COMMANDER_3_DEC_1976_www_kepfeltoltes_hu_.jpg
    66_F-5E_01566_66FWS_COMMANDER_3_DEC_1976_www_kepfeltoltes_hu_.jpg
    52.9 KB · Views: 242
What's gonna be your loadout? I recommend nothing. Beautiful lines on that bird.

Haven't decided Matt. Hadn't thought about doing it without a loadout but that's an idea. Otherwise it would be two sidewinders or a single sidewinder and an ACMI data pod. The kit sidewinders look like tree logs so those are getting scrapped regardless. :lol:
 
Great to have another F-5 in the mix. Looking forward to this. You may get finished before me despite the late start!
 
Great to have another F-5 in the mix. Looking forward to this. You may get finished before me despite the late start!

Well I'm not doing any of the kit bashing you are so it's not a far comparison. This is almost a straight OOB build except for a few bits of PE, the aftermarket decals and scratch building a back plate to the instrument panel so the PE front will sit properly. :)
 
What's gonna be your loadout?

Going to go with your suggestion on this one and leave the pylons empty. Not even an ACMI pod on the port wing.

Almost finished with the office. Cockpit tub has all the instrument panels done, seat is finished. front instrument panel needs to be finished as well. This one has to be drybrushed and it's not looking quite as good as I want it too. THe instrument dials will make it pop when it's put together. You can see the clear film that comes with the PE on top of the bottle cap along with the white plasti-card backing I had to to make for it. Once those two are mated, the PE front goes on top and then all three pieces are mated to the kit supplied instrument panel in the lower right corner. Ejection seat is finished. All the PE is on including those three little yellow handles. GAK - THOSE were a nightmare!

In progress pic - slightly overexposed but you can see the film detail on the instrument panel better. (aw damn it - I could have sworn I got all of those PE Nubs off! Blast!):
 

Attachments

  • IMG_0710v3.JPG
    IMG_0710v3.JPG
    70.7 KB · Views: 187
Here's how the composite instrument panel will look when it's all glued together. It's slightly misaligned but this is just a dry fit. I also got rid of those darn PE nubs too! Ultra sharp exacto for the ones on the starboard side panel and a small square file for the ones on the rudder pedals. :)

Now to fix that damn seam in the seat! Arrrrgh!
 

Attachments

  • IMG_0711v2.JPG
    IMG_0711v2.JPG
    60.2 KB · Views: 221

Users who are viewing this thread

Back