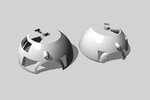
3D printing Interior of ball turret for B-17 G Fearless Fosdick...

Ad: This forum contains affiliate links to products on Amazon and eBay. More information in Terms and rules

Night Fighter Nut

Master Sergeant
2,762
523
Nov 3, 2009
Plano Texas
Per request from a friend, I am starting this thread to chronicle the creation of the interior of a B-17 G ball turret in 1:48 scale. I have never created anything in 3D before, much less printed anything in 3D. This is more a journal of my learning curve as I have at least three things to do in order to complete this build. My goal, aside from creating the parts, is to develop the skills needed to enhance my modeling by creating parts of assemblies that do not exist and perhaps making them for others when no other alternative is available. Imagine printing up the night binoculars for a P-61 in any scale or better yet creating a model of yourself and putting it into the cockpit of your favorite plane. :)

1st I have to learn how to use a 3D software program.
I started this by researching different 3D programs available, the cost of such programs, reviews of different programs, and the complexity of said programs. At the moment I have loaded three such programs onto my computer which are all free. The one I'm leaning towards is Blender. For a free software, it is being continuously updated and improved and is actually more powerful a tool than some that you have to pay money for.

2nd I have to learn how to use a Slicer software program.
A Slicer program takes a 3D object and puts it into a configuration that allows the printer to print your subject one level at a time with its accompanying supports as it is printed. Some print jobs can take as long as 9 hours. I have two programs I'm learning or teaching myself. One is Chitubox and the other is Photon Workshop. One requires a free subscription and the other you can get from AnyCubit website for free. There are others but from what I have read about them, these two are the ones I will need for the printer I have.

3rd I have to learn how to properly work the 3D resin printer.
After lots of research on several 3D printing community websites, I have purchased an AnyCubit Photon S 3D resin printer. It was reasonably priced for beginners to 3D printing in resin with a resolution of about 75 microns.

I'll write all the learning mistakes and triumphs as I go along with some photos from time to time to show my progress. Any pointers or guidance would be great not only for myself but for anyone else who had thought about adding 3D printing to their modeling.

Thank you in advance for your patience.
 
Last edited:
If you don't mid some advice from someone who's been wrestling this for over a year… 3D printing is a blessing and a curse. To produce the parts you're seeking to do in 1:48 would be less than satisfactory using the machines available for home use. String printers (filament additive machines) can't produce thin structures or with a resolution of 50 microns or less. The inexpensive machines cannot even reach 50. They're good for 100 microns or more (generally more). If you're intending the ball turret to a solid ball with some surface detail, you could maybe produce one. But if you want a hollow one with gun mount detail and glazing, you're only choice is a UV resin printer. UV resin printers are basically an optical process. They can produce layer resolution down to 10 microns (expensive machines can get down to five). 10 microns is 0.0007" and is basically invisible to the naked eye. In the last couple of years resin (SLA=stereolithography printers) had seen an enormous price drop. You can get a first generation Elegoo Mars UV printer for $260 USD.

This price drop from over $3,000 to $300 in the last two years was due to a technological innovation. Instead of using a laser to "draw" each layer of the object in a bath of UV curing polymer, or a DLP system to project each layer into the resin, some clever guys adapted a cell phone LCD screen and driver system to create and image of the pixels, that when exposed to each layer of resin, would create an object. The LCD is in direct contact with the vat holding the resin. The vat's bottom is lined with a clear teflon film called the FEP due to its chemical composition. The FEP must not hold the curing part. It must release it easily as the part is being created. The only moving part is the build plate attached to a vertical rail and lead screw driven by a precise stepper motor that sits below the deck. The first layer has to adhere to the build plate. The LCD screen sets up the first layer by a series of clear and masked areas. A powerful UV light source lies behind the LCD and shines through the clear pixels to create the first exposed layer. When the UV hits the resin it hardens into a cured solid. Not too cured… it must remain slightly un-cured so the next layer adheres and joins with it. The light turns on for the exposure time required by the specific resin. When the first layer is done, the build plate (Z-axiis) rises about 5mm, and then returns exactly one layer-thickness above its previous position to let fresh resin fill the gap. A new pixel image appears on the LCD, the UV goes on to expose the new layer, the layer cures, and the Z-axis rises again, and this repeats for as many times as needed to create the object. The object forms upside down and rises out of the ooze. It's quite amazing. It takes a long time depending on how high the object is, what layer thickness is being used and how long is the exposure for each layer. I'm using a resin that requires a 9 second/layer exposure and generally print at 40 microns.

It's a simple process…. simply complex. Lots of variables have to be just right for a complete object to form as you want it too. The most important is keeping all aspects of the object attached to the build plate. If it detaches, it falls to the FEP and just lays there. No new layers can form since the previously cured layers are blocking the UV light and block any fresh layers pf resin from backfilling the space. A very simple object with no overhangs can be attached directly to the build plate. Most model objects we want to create are not simple. To hold more complex objects as they form requires an elaborate series of supports that grow along with the object itself. Most slicer software can apply supports automatically. But supports placement and size are one of the most important and troublesome aspects of resin 3D printing.

After the object is done all you need to remove all of these supports. My Elegoo Mars came with a nice pair of flush-cut pliers. On objects with decent mass, support removal is no big deal. But on model parts, especially in our scales, the act of removing the supports can also remove detail as well. In the extreme, taking off the supports destroys the model. I have many examples of this. To correct it, I often have to create the model in pieces so each piece can be positioned so its supports attach in non-critical areas. I'm creating a 3-story staircase complete with landings, spindles, handrails, etc. To position the part on the printer so no supports were on the spindles (this was 1:48) I had to split each flight into the steps and stringers as one piece and a chunk of steps and the spindles/handrails as the other. This took a lot of trial and error. Here was the drawing that I produced on SketchUp.

3rd Stair Scheme.png


And here is an image of the actual support set up as seen in the slicer. The slicer takes a graphic file (STL) and converts it into the individual layers of pixels that will be displayed by the printer's LCD. Notice that there are no supports on the spindles. I found that clipping the supports broke the spindles. I've since gone to grinding of the supports on fragile parts with small diamond coated burrs. My final design went to a fully square spindle since this turned design was too thin and fragile to exist in this scale. While this picture shows the objects from above, but in reality, this would be hanging down on the build plate when the job is complete.

3rd Stair Sliced.png


If you're going to create a part that doesn't exist as a 3D printable drawing, you're going to have to draw it yourself. If you've never used a 3D graphics program I need to warn you, regardless of which program you're going to use, it too has a steep learning curve. 3D printers require objects that meet a very tight set of parameters. The object must be a complete "solid". I used quotes because the word "solid" in 3D work has a specific connotation. It means that if you dropped the object in water, no water at all would leak inside. This means all faces and edges much be in complete contact. You can download lots of interesting drawings from the SketchUp 3D Warehouse, but most will not print as they are. They must be edited to ensure they're solids and that no faces are "not-normal". Not normal faces are when the backside of the face is facing outwards. To just make a SketchUp drawing look good, these two parameters don't matter. But to print it, they are essential. The best way to understand how faces can be reversed, think about putting on your socks. If you had them oriented correctly the "normal" side would be facing outwards, but if you pulled them up in the opposite directly, the inside face would be outward. As I said, in drawing, face orientation is not critical. But a SketchUp drawing must be converted to an STL file which describes in computer language the physical outside shape of the object. If a face is reversed or object is not solid, it appears as a void. Voids can't produce solid objects. What doesn't show on the STL converter picture doesn't print either. In the slicer a bad surface will show up as a black hole.

Here's the completed staircase with some added components. It took many weeks to finally get it all together. To hold the UV resin parts together I use Bondic UV cured adhesive. It's the same compound as the native resin and literally welds UV parts together.

HBTRR Staircase completed.jpg


I think my response has gone on enough, so here are a couple of things that I've produced to give some more depth. If you have any questions I'm free to any questions that I can.
 

Attachments

  • MMCL 3D Print Article Part 1.pdf
    3.8 MB · Views: 126
  • MMCL 3D Print Article Part 2.pdf
    6.2 MB · Views: 119
Last edited:
Great and thanks... The printer I have, the Photon S, is a UV resin printer. I agree the filament type is not very good for any kind of detail. Those who have used it believe the quality of printing is amazing. Just the Slicer program is not very great but as I understand it Chitubox is a better slicer program that would work with this printer.
 
So now for an update. In my investigations with Blender, I have found that it is a great program but has more options than you can shake a stick at. I will learn it in time but it's a bit overkill for what I'm trying to do at the moment. Now I come to the free program called FreeCAD. This seems to be a free version of AutoCAD and is more used for mechanical type of drawings. That fits more in the area of what I'm trying to do at the moment. YouTube is great for tutorials. I found this one very helpful... ...

FreeCAD seems to be just what I need to do the mechanical drawing of the inside of this ball turret. Now to get some key measurements of the space I want to fit this in. One of the parts from this kit is the pair of guns that are attached together for this assembly. I can use this as a means of a standard for the rest of the drawing.
More to follow as time permits. Thanks
 
Ok, now to resurrect this thread. I have made some progress and for the next few months will be focused on this topic.

First for my model references. These are photos I've gleaned from around the world wide web showing the interior of the ball.
949fda6c430764167d49b6fc05ef1b4b.jpg

03-11-11132.jpg

090710016_7_8.jpg

USAFMuaseumRestorationFacility015.jpg

2759606827_fcdf9b765f.jpg

01SperryBallTurret.jpg

As you can see there are a couple of differences between them but they are relatively the same design.

I could show both guns mounted or, like this last picture, show only one gun and what the seating arrangement looked like. I don't plan to show any crew. Any wiring would have to be scratch built.

Now for the important measurements I need to work with.
20201231_132919.jpg

20201231_132949.jpg

20201231_133104.jpg


Using a caliper, the measurements I get to work with are these:

Inside the ball along the Z axis is .85" or 21.63mm
Inside along the X axis is .77" or 19.56mm
Inside along the Y axis is .47" or 11.94mm. This is from center plain to the front window.

Distance between gun openings is .46" or 11.61mm
Length of the gun receivers is .486" or 12.34mm
Width between gun receivers as originally modeled is .458" or 11.63mm
Height of gun receivers as originally modeled is .127" or 3.22mm

Thanks for following
 
I've spent the last several days working with my printer. Mostly getting it set up properly with the latest firmware and getting the platen adjusted properly and zeroed. I also have learned a few tricks for longer FEP life and habits to form for producing good prints often.

To start with, here is what I'm working with. As mentioned earlier, I'm using the Anycubic Photon S

Photon_S-_7_540x.jpg


Technical Specifications:
● Printing Technology: LCD-based SLA 3D Printer
● Light-source : UV integrated light(wavelength 405nm)
● XY DPI : 47um (2560*1440)
● Y axis resolution : 1.25um
● Layer resolution : 25 ~ 100um
● Printing speed : 20mm/h
● Rated Power : 50W
● Printer size: 230mm*200mm*400mm
● Printing volume : 115mm *65mm *165mm (4.52″*2.56″*6.1″)
● Printing material : 405nm photosensitive resin
● Connectivity :USB Port
● Package Weight: 9.5kg

They have two types of resin, both are sensitive to 405nm. One is regular resin which has a nasty smell to it which is why you want to work in a well ventilated area. The other is plant based and the smell is not so strong... Of the first type there are other resins within that have different properties like clear or opaque in different colors as well as a different hardness.

In my studies I have developed rules of thumb to follow when using this printer.
1. Always shake well the resin you are about to use to ensure it is completely mixed. Apparently it settles when left on a shelf for any length of time.
2. Always store resin bottle in a cool dark area. This prolongs the use / shelf life of the resin because they do come with expiration dates.
3. Isopropyl Alcohol used for cleaning up must be 90 to 99% proof.
4. Its a good idea to wear protective glasses as well as a face mask, (same type we all have to wear now with the China Virus). You really don't want to get that resin in your eyes from any splashing that may occur.
5. Periodically relevel the print plate to better ensure a good print.
6. Check your UV lighted print screen before each print to ensure there are not any unlit areas.
7. Don't always print in the same place. It would wear out the FEP film on the bottom of the vat faster.
8. Put three drops of PTFE lubricant onto the FEP film and spread around with a very soft brush. It's ok if it beads, the protection is still there and this will also help increase the life of the FEP film.
9. Clean the resin vat between prints and keep it clean when not in use. Some people leave resin in the vat over night and while this in itself won't harm it, being lazy will eventually cause problems.
10. If you are going to use different kinds of resin, it would be a good idea to have more than one vat to prevent cross contamination.
11. Use a glass scraper to remove resin from the glass print screen surface. But be very careful about it.
12. Use trays to hold equipment to contamination.
13. If possible, put a slight bevel on mount surface of the print so that it would be easier to pop the print off the plate with done.
14. Use, if you can, micro fiber cleaning clothes to clean the FEP film. Cotton and paper will scratch the screen and cause problems later.

Last night I printed my first practice piece while following all my rules of thumb and the print came out perfectly the first time. I used my paint booth to help blow the fumes out and kept the room cool. The smell wasn't that bad when I did that.

I also learned that if I add supports to my STL file in the Chitubox slicer program and save it as an STL, I don't have to use the Photon program to do the same thing. Just save the altered STL file in the Photon as a PW file, while not changing anything, and the printer will work with it.

I also figured out that if I look at my 3d picture upside down and slowly go up with a piece of paper, I can figure out quicker where I need to add supports as nothing should float in free space.

Here are pictures of my first print.
20201230_170748.jpg

I should mention that there is not direct line from the computer to the printer. Files are loaded on a thumb drive and plugged into the side as you see in the picture above.
20201230_171718.jpg

20201230_201433.jpg

20201230_203751.jpg


I put the print into an ultrasonic cleaner filled with alcohol. Cleaned it really well.

Thanks for following.
 
Last edited:
Sorry for the delay folks, I have had my plate full you might say. Wife had surgery, my daughter in the Navy was told she might have cancer but are not sure yet, and my part of Texas was subjected to a few days of snow and sub freezing temperatures ( global warming... :) not. ). All things to keep me busy. Playing World of Tanks to pass the time during all this mess didn't help either.

Moving on. I also spent time researching STL files to practice printing more difficult subjects. This was to better understand Chitubox slicer software and to see if it is compatible with my printer.

Found a horse STL file so I downloaded it and ran it through Chitubox. Printed it, cleaned it up, and painted it with embellishments.
Preprint horse.jpg

horse after chitubox.jpg

20210117_094405.jpg

20210117_111741.jpg

20210127_162115.jpg

So there is a step by step process.

Now for the turret... Here is what I was able to find, taken from the service manual.
ballturretdiogram.jpg


I still have a ways to go but I have moved a step closer.
 
I am glad you are doing well, NFN.
As a test case, I have converted my old ball turret data into a couple of STL files.
Please try these if no problem with your machine ( Please delete the .txt before use). You may change data as you want, of course.
By the way, I feel so sorry about your family's health condition.
Praying no serious concern about your daughter after all.
 

Attachments

  • B-17G_ball_turret01.JPG
    B-17G_ball_turret01.JPG
    29.4 KB · Views: 104
  • Ball_turret_image02.JPG
    Ball_turret_image02.JPG
    20.4 KB · Views: 151
  • Ball_Turret_scale-1_20th.stl.txt
    3.8 MB · Views: 109
  • Ball_Turret_scale-1_48th.stl.txt
    3.9 MB · Views: 94

Users who are viewing this thread

Back