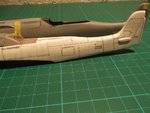
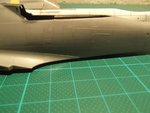
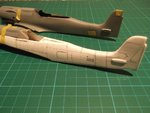
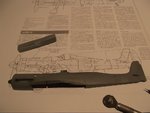
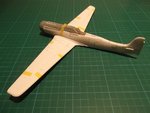
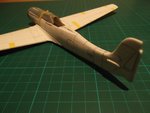
A pair of 1/48 Ta 152's/ Ta 152 H-1 also painted!

Ad: This forum contains affiliate links to products on Amazon and eBay. More information in Terms and rules

Ohm-men

Senior Airman
444
117
Jan 11, 2014
Antwerp
So now that I wrapped up the Blenheim Mk IV F, it's time for something new.
Since I started the Hobby Boss Ta-152 C1 a while ago and picked up a Falcon Vacu Ta-152 H, I decided to build these side by side.

First the well known HB Ta 152 C1;
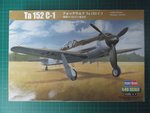
DSCF4249.JPG

A very nice injection moulded kit with great detail a somewhat esoteric subject, as this is just a prototype.

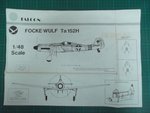
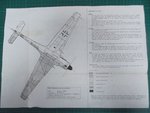
Next, the Falcon Ta 152 H;
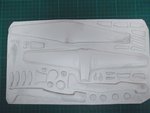
DSCF4240.JPG DSCF4241.JPG DSCF4242.JPG

I'm guessing this model pre dates the Dragon (Trimaster) Ta-152 H by quiet some years. I also think this is on of the earliest Falcon Vacu kits produced. A bit crude in execution and the builder must make the smaller details himself...

But...Falcon's Ta 152 H is pretty accurate in outline. So...how about some hacking up the crude detail and replacing them with spare injection parts...
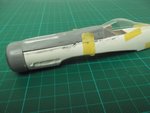
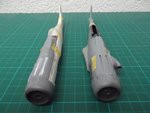
DSCF4248.JPG

Et voila... the spare upper nose and engine ring of the Hobby Boss Ta 152 C fits like a glove...
Ofcourse some adjusting had to be done, as the Ta152 C carried armament on the fuselage, had a DB engine and a larger engine barrer, but nothing a file, some sanding paper, plastic rod and some filler could take care off...
The instrument pannel casing (or whatever this part is called) was taken from a started/wrecked Dragon/Revel Fw 190 A8/F/G kit that was given to me by a befriended modeller. I'm gonna use a much as I can from this kit to use on the Falcon Ta-152 H

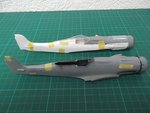
And this i how it compares to the Hobby Boss kit;
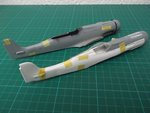
DSCF4245.JPG DSCF4246.JPG DSCF4247.JPG

Not bad eh...
The construction of the falcon fuselage and the hacking involved only took about an hour and half and was done using a sharp No. 11, a pencil and a ruler and some sandpaper.
I used the Hobby Boss Ta 152 C fuselage as a guide to sand the Falcon Ta 152 H fuselage to the correct thickness.

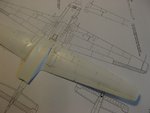
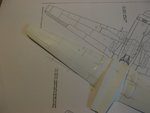
Falcon's wings were easy to do as well, again the Hobby Boss Kit was used as a guide.
And i think that the spare prop in Eduard's Fw 190 A5 kit is a good match for the Ta 152 H broad wooden prop. It seams to compare well with the Hobby Boss prop.
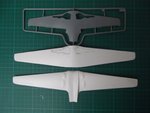
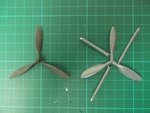
DSCF4250.JPG DSCF4251.JPG

Next I hope to get some primer on the Falcon Ta 152 H fuselage and wing and scrib it. I also want to use my newly aquired RB rivetting wheels to add some extra detail.
 
Already looking good. I have that Falcon kit as well and you're right as to predating DML and others. When it was introduced, that was the only way to get it in 1/48.
 
It's a good start Jerry; It will be interesting to see how you combine the two types of kits, to make one.
The reference of injected plastic, will always be useful to achieve what you have proposed to do.
I must confess that I had not seen a Vacu kit before. o_O

I'll be around watching your projects going.

Greetings to Belgium :thumbup:
 
Thanks all!
I have a question/request. Does anyone here know where to find scale plans/3-vieuw detailed drawings of the Ta 152 H?
I looked thru my library, but drew a blank.
I have a pretty good idea on how the fuselage pannel lines go, but for the longer wings, I have no clue... Given the fact that the Falcon wing are rather devoid of detail, it would be nice to "up" this a bit.
The only plans I found where drawn by a japanese artist (which I found in a quiet huge volume dealing with the best known WWII aircraft) but these are not as detailed as I hoped.
I just put the air intake of the Falcon H together and it looks a bit suspicious to my eyes. Though I think the Aero Detail drawings of the D-14 might be useful for this as I think it had the same intake as the H, though this book does not contain any specific drawings for the Ta 152 versions.

Since I'm also keen on giving the RB "Rivet'R" wheels a try, I'm more or less looking for a detailed 3 vieuw of the Ta-152 H and I "might" do the rivets as well...
I think that besides the wings and parts of the Falcon fuselage, not much else of the vacu kit parts will be used. The Dragon/Revell donor kit looks to have taken care of most items needed.

And this comming Saturday the rather huge "Flanders Modelling Festival" will take place, so I might be able to find something useful to further detail the Falcon kit... + most likely some other stuff as well as there are a lot of vendors there and a lot of modellers clearing out their collection of unbuild kits, decals and detail sets. So fingers crossed...
 
Geo usually provides some great stuff but let me know if you need something else. I do have 3 view diagrams in my Ta152 book by Hitchcock but they aren't that really that great for scaling panel lines.
 
Very interesting project! I have no experience with vacuform but I've built the Hobby Boss D-9 kit and found it to be a decent kit overall. I've used the RB Rivet-R tool on many builds and find it to be a very reliable and easy to use tool. If you take your time and lay down your rivet lines carefully, you may be able to work the tool freehand without the use of a straight edge.
 
First of all a BIG thanks to Wojtek en Geo for helping me out with some info on the Ta-152 H! :thumbup:
And I went by the "Flanders Modelling Festival" today. A rather huge modelers fest. A wide selection of new and used kits...Though painful for one's wallet...

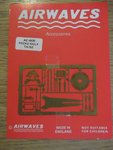
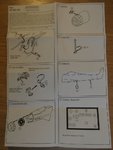
Anyway, the FMF is usally a good place to find real bargains. And for my Ta 152, I found the following; @ € 1,- I would be stupid not to have bought it.

DSCF4314.JPG DSCF4315.JPG

It's intended to be used with the Trimaster/Dragon/Italeri/... kit. Though since I'm gonna use Trimaster/Dragon Fw 190 parts, I'm sure it will pose no problem.
Looks like it has some real useful content.

And I got some extra RB-Production goodies as Karaya had a booth there. So I picked up the Scriber and the Scriber file set.
So some extra useful additions to my toolbox.

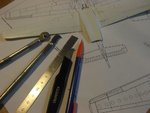
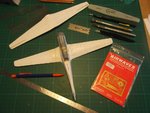
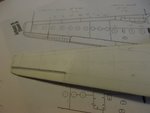
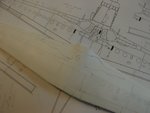
So armed with some Ta 152 H line drawings I went to work. My previous expirience with scribing kit parts made it clear that some good preparation "before" actualy start scribing has far better results and less filling and sanding mistakes afterwards. (+ less cursing, bad language, etc...)
Thus I drew all the to be scribed lines with a lead pencil and a rules, double measuring everything. I want this kit to be somewhat on par with the Hobby Boss Ta 152 C-1 as it will most likely sit next to the Ta 152 H once finished.

DSCF4313.JPG DSCF4308.JPG DSCF4309.JPG DSCF4310.JPG DSCF4311.JPG DSCF4312.JPG

Lower and top wing are almost done. I just need to do the fuselage. But, I think I'm gonna do the interior first.
Perhaps a bit more difficult, but I think the vacu fuselage will be easier to handle once the cockpit tub, injection nose parts, etc... are glued in.
+ It will have the benefit of not screwing up the pannel lines where the fuselage halves join.

So, what about the RB-Productions Rivet-R and the Scriber.
I must say they do live up to their reputation. They are affordable, easy to use and great results can be achived with them.
I'd say the scriber is better then the Trumpeter and the Olfa P-Cutter (Tamiya scriber) + you get 2 extra scriber points with RB-Productions set.
If you have some expirience with photo etch, then assembling the scriber will pose no problem, as it comes in it's package as a etched steel fret.
The Rivet-R is also easy to use. I like the fact that the set contains 4 different wheels, so various rivet patterns are possible. I noticed that a Fw 190 has wider spread rivets then a Blenheim for instance. You can easely see where the wheel goes and it can be used with a ruler or freehand. the "drawn" rivet pattern looks good and a quick sanding job with a #1000 or so (dry or wet) will eliminate the hills and leave the pits.
Since all RB sets are designed to be used in the Exacto/Swan Morton holder (the one you use with the typical No. 11 blade) they lay good in your hand.
(I have no affiliation with RB-Productions. It's just my expirience with their products)
 
I managed to get some work done.
Armed with a few scale plans, I started putting rivetts on both fuselages.
The Hobby Boss was quiet easy, as I could easely follow the pannel lines and add the rivetts.
The Falcon had no such detail, so I needed to scrib the pannel lines first.
For the fuselage I used an older Polish publication I bought along time ago, "Klub 1/72 Skrzydlatej Polski"
this small booklet deals with the MiG 3, Fw 190 A and the Hawker Tempest. It's crammed full with scale plans and detailed drawings.
I scaled up the 1/72 plans with 150% to get 1/48 scale plans. I also used some Aero Detail and Kagero scale plans.

I measured all the rivett detail and drew it with a lead pencil on the fuselages and went over these lines freehand with the rivett wheel.

DSCF4316.JPG DSCF4317.JPG DSCF4318.JPG

The rivett detail apears a bit stark in the pictures on the Falcon "H" fuselage, this is due to th ehigh contrast between the white fuselage and the black pencil marks. It's pretty subtle and will look good under a few layers of paint.
The Hobby Boss "C" fuselage was done the same way, as apart from the noses, these are identical.

DSCF4319.JPG

And a few pics of how the Falcon "H" stands now.
As far as the Vacu parts go, I don't think I'll use more of the falcon kit then what's in the pictures now. (appart from the Canopy)
All other parts will be injection moulded Dragon/Revell/Eduard parts as these have better detail.

DSCF4320.JPG DSCF4321.JPG

I still need to add the rivett detail to the wings of both models. Though once the first lines are drawn, it's not a difficult process.
Perhaps a bit time consuming, but I hope it will add something extra once the models are painted.
Looking at pics of of wartime Ta 152's, the rivetts are quiet visible. But as these end up like the ones I added to the Blenheim, I think the work won't be in vain... We will see...
 

Users who are viewing this thread

Back