Airfix1/72 scale F4U corsair

Ad: This forum contains affiliate links to products on Amazon and eBay. More information in Terms and rules

TimEwers

Airman 1st Class
224
0
Aug 28, 2010
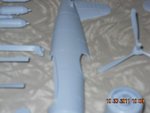
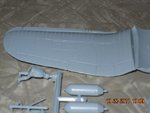
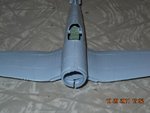
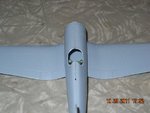
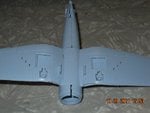
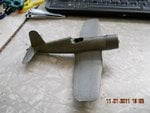
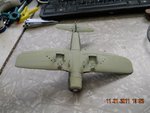
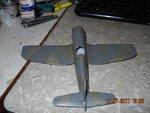
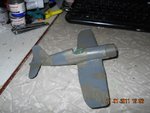
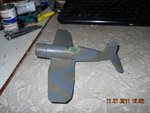
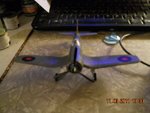
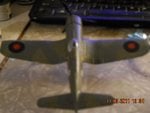
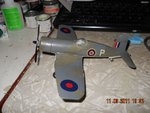
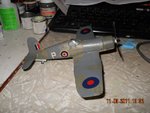
This is my first airfix kit and it is pretty basic did some test fitting and found the canopy is a tad too small, seems to be a little bit warped and there is quite a step in fitting the bottom wings not gonna be easy to fix. And are the rivets to over done kinda look that way to me, and how hard would it be to scribe the cowling as there is no detail at all on it and I have never done something like that.

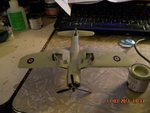
But anyway here are the pictures
 

Attachments

  • Picture 452.jpg
    Picture 452.jpg
    81.5 KB · Views: 176
  • Picture 447.jpg
    Picture 447.jpg
    126.9 KB · Views: 184
  • Picture 448.jpg
    Picture 448.jpg
    97.3 KB · Views: 192
  • Picture 449.jpg
    Picture 449.jpg
    108.6 KB · Views: 172
  • Picture 450.jpg
    Picture 450.jpg
    102.3 KB · Views: 230
  • Picture 451.jpg
    Picture 451.jpg
    90.6 KB · Views: 169
Unfortunately this a re-release of an old kit ( issued in 60's/70's methings) with new decal sheet of markings. So no wonder these rivets look like nails. Anyway, with some effort it might be a very nice model of the FAA camo scheme.
 
Yep... you are right Karl. These wing tips should be re-shaped again by sanding for these first ones.
 
Yep, pretty basic kit Tim, but got some Hasegawa parts going spare if you want them - engine, cowl, cockpit, canopy, undercarriage and drop tank.
Drop us your address in a PM if interested.
 
Last edited:
Well here is where I'm at. It's a good thing I don't build for contests I wouldn't win anything. I'm thinking I might have cut too much off the wing tips but I Don't know it is my first airfix kit. gonna have to head to the hobby shop next week for more paint tho as my humbrol primer and sky have already gone bad. But do have one question about the bombs what color should I paint them as the instructions don't say would they be OD
or another color?. just wonderen.
 

Attachments

  • Picture 500.jpg
    Picture 500.jpg
    105.8 KB · Views: 168
  • Picture 478.jpg
    Picture 478.jpg
    93.9 KB · Views: 152
  • Picture 479.jpg
    Picture 479.jpg
    94.1 KB · Views: 169
  • Picture 482.jpg
    Picture 482.jpg
    93.9 KB · Views: 162
  • Picture 483.jpg
    Picture 483.jpg
    92.8 KB · Views: 163
  • Picture 484.jpg
    Picture 484.jpg
    91.3 KB · Views: 160
  • Picture 495.jpg
    Picture 495.jpg
    100.5 KB · Views: 169
  • Picture 496.jpg
    Picture 496.jpg
    102.3 KB · Views: 150
  • Picture 497.jpg
    Picture 497.jpg
    104.7 KB · Views: 159
  • Picture 498.jpg
    Picture 498.jpg
    105.5 KB · Views: 173
  • Picture 499.jpg
    Picture 499.jpg
    103.8 KB · Views: 213
The best solution is to compare the model wing and its scale drawing, just by putting it on drawings directly. But it looks good to me too.
Just for future projects.... some sanding is always needed for leading edges of a wing and sometimes for trailing edges too. All fusselage seams have to be sanded gently as well. As you have noticed these became more noticable when you applied paints.
 
Last edited:
Nice work on a cool subject. I use to hate Airfix kits for all kinds of reasons but now I love them. Yes they take a lot more work (not always) but it helps build skills and since they are so cheap I'm not afraid to mess them up. Keep up the good work
 
Where I am at got most of the main decals on and with my mk47 eyeball I hope the red dot looks centered does to me. Don't understand why those things are separate unless it's just to aggravate us to no end and they did. But here are the picts
 

Attachments

  • Picture 506.jpg
    Picture 506.jpg
    93.5 KB · Views: 140
  • Picture 509.jpg
    Picture 509.jpg
    86.2 KB · Views: 179
  • Picture 501.jpg
    Picture 501.jpg
    105.6 KB · Views: 147
  • Picture 502.jpg
    Picture 502.jpg
    104.7 KB · Views: 138
  • Picture 503.jpg
    Picture 503.jpg
    98.8 KB · Views: 154
Regarding the clipped wingtips, I noticed in the photo of the instruction sheet there is reference to the wing tips being cut off. Airfix provide a scalpel symbol and a dotted line across the tip, but no dimensional reference to how far in from the tip to cut.
 
Yep, agree with Terry, and thank God for it! Don't know how many kit decals I bought were duds because the rings were off-printed.
(Another bonus is the easy conversion to early RAAF and RNZAF roundels by the omittance of the red centres :) )
 

Users who are viewing this thread

Back