Are Koster products still available?
Also not sure about it. But I would try to ask him via the net.
However the correction for a such big model is so easy that I wouldn't spend my money for anything I could make myself.
Follow along with the video below to see how to install our site as a web app on your home screen.
Note: This feature may not be available in some browsers.
Ad: This forum contains affiliate links to products on Amazon and eBay. More information in Terms and rules
Are Koster products still available?
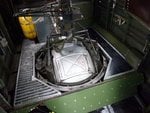
the observation windows and waist will present quite a challenge. I don't have the necessary tools nor skills to accomplish that. is there anyone who'd be willing to help me out?