GB 41 1/48 A6M2-N Rufe - PTO from 1937

Ad: This forum contains affiliate links to products on Amazon and eBay. More information in Terms and rules

Luftace43

Senior Airman
315
133
Mar 16, 2018
Username: Luftace
First name: Chad
Category: Advanced
Manufacturer: Tamiya
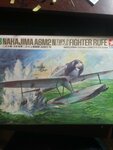
Model: Nakajima A6M2-N Rufe
Scale: 1:48
0311192208.jpg

I plan on building this as one of the aircraft assigned to the "R Area Air Force" operating out of Rekata Bay sometime in 1942-43. Still haven't decided which particular aircraft yet but I am leaning towards the over-all grey scheme. This was a special unit made up of float planes that are most remembered for their night harrassments of Guadalcanal.

Chad
 
I will be doing some minor improvements on this kit but nothing too serious as I have the more detailed Hasegawa kit in the stash and will spend more time detailing that one. Here is what I have done so far.
0311192211.jpg
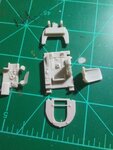
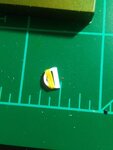
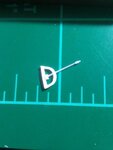
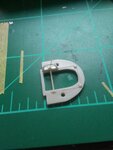
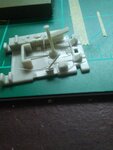
The basic cockpit components freshly cut from the tree.

0315190016.jpg
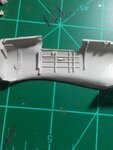
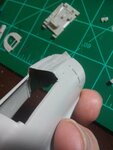
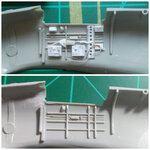
The starboard fuselage half has decent rib and stringer detail as well as the flap position indicator (center) and a cockpit lamp (upper left) molded in.

0311192224.jpg
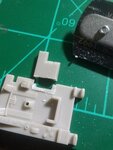
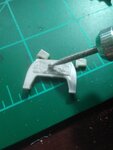
The cockpit floor has the radios and their control panel molded onto some sort of pedestal that is not representative of the actual configuration. Also, this would cover up most of the previously mentioned nice structural details. Out comes ye ole razor saw.

0314192354.jpg
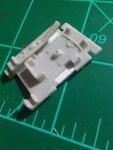
The gap left in the floor is filled with a strip of styrene. The left-hand console was molded solid as well so I cut out part of the "wall" in front of and on the side so it appears more like the simple flat panel it is supposed to be. I will add a couple wires in the open space later. The gap in the floor that also resulted from modifying this area was again simply plugged with a strip of styrene just like the opposite side.

0314192355.jpg
Sorry, I got over zealous so have no before picture, but this is showing the thinned coaming above where the instrument panel will be. I did this with a rotary tool and will have to fix a few small boo-boos where the tool slipped and bit the edges in a couple places. They aren't very noticeable from this angle on purpose. :lol:
0314191404.jpg
0314192256.jpg

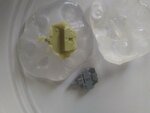
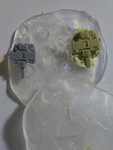
Trying out a new technique I have made a copy of the Hasegawa kit's instrument panel from Milliput using a thermoplastic molding product called Oyumaru. You boil the stuff in water for a couple minutes and it becomes rubbery and workable like clay. Press your master into the hot blob and allow to cool. I made a two part mold so made indentations to serve as keys. Once cooled i press another hot blob over it. Once completely cooled the two sides are pulled apart and I take out the master piece. The cavity in both sides are packed with Milliput and the two halves pressed together. After curing you should have an exact copy with high definition that only needs some flash cleaned up. Tada!! Quick easy and cheap. This will look much better than the original flat Tamiya kit part this will replace.

That's all for now. Thanks for having a look.

Chad
 
Last edited:
Thanks guys!
The Oyumaru really is conveniate for reproducing small parts without the mess and expense of traditional silicone and resin methods.

I modified the kit instrument panel to accept the new one.

0315191531.jpg
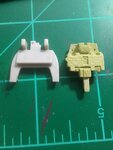
Here is a comparison before cutting commenced.

0315191534.jpg
I cut off the top where the gunsight mounts and the two gun butts. I ground off the inclined area with a motor tool and sanded it flush to leave me with a flat bulkhead.

0318191641b.jpg
I trimmed off the mounting post on the bottom of the new part and CA'd it to the bulkhead. I made new gun butts for the panel from styrene stock. I still need to add charging levers to these.

0318191642.jpg
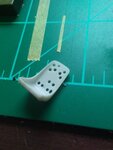
Using the kit seat I sanded the sides to make them thinner and also sanded off the molded on seatbelts. I marked and drilled out lightening holes. I glued a piece of stretched sprue to the back that will be part of the adjustable seat mount.

0315191603.jpg
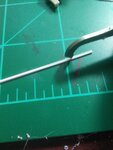
I needed to fabricate the seat adjustment lever as one isn't provided in the kit. I started by scribing a groove down the center of styrene strip.

0316190052.jpg
Using the Hasegawa kit part as a guide I formed the grooved strip around some appropriately sized paintbrush handles and heated with a hair dryer to bend it without the plastic breaking. I held the curve in shape with Tamiya tape while the glue dried, a strip of square stock forming the back piece.

0317192046.jpg
After letting it dry over night I sanded everything down. I drilled a hole in the curved piece and inserted a piece of stretched sprue for the lever. A couple of square styrene bits at the base of the handle and a piece of stretched cotton swab tubing at the end to represent the hand grip finished off the new part.

0318191641.jpg
I drilled some holes in the rear bulkhead and attached the newly made seat adjustment lever.

0318191641a.jpg
I added pieces of stretched sprue and styrene to further detail the cockpit floor piece.

inCollage_20190318_165441012.jpg
I scratch built the radio transmitter and reciever and as well as added the hydraulic lever and some plumbing to the starboard cockpit wall. This is a nice comparison illustrating what a difference some extra detailing makes to this old kit.

That's all for now guys. Hopefully I can start getting some paint on it tonight. Thanks for following along!

Chad
 
Thanks for the compliments all!

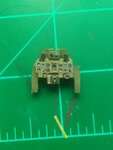
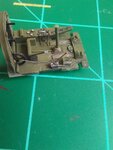
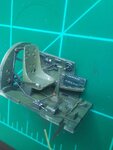
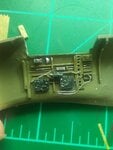
The cockpit is painted finished except for the gun sight and some levers that will be added later to avoid breaking them off.

0320191658.jpg
The instrument panel came out pretty decent with some careful painting.

0320191330.jpg
0320191705.jpg
Cockpit floor and starboard sidewall in place. I still have to add the seat harness.

0320191704.jpg
Port sidewall. The radio transmitter and receiver didn't come out as well as I'd have liked but that's ok, this is a quickbuild of sorts for me.

0321191334a-1.jpg
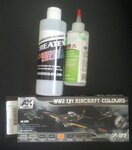
The cockpit was painted with AK Interactive's IJN colors, the overall cockpit with Nakajima Interior Green and the radios with D2 Deep Black Green. I really like these colors. For anyone else wondering Testors Acrylic thinner works well with these as well as Createx Airbrush Thinner. The paints also seam to be compatible with Pollyscale and Model Master Acryl paints. Good news for me since that is mostlywhat I have for paints. They spray nicely right out of the bottle, no thinning needed for regular paint coverage.
Hope that bit of info is helpful for others since I know I could find very little information on these as far as compatability so just jumped right in to find out.

The fuselage is being glued together now, more updates soon.

Chad
 
Great stuff Chad. Read some mixed reviews over at Britmodeller about the accuracy of the AK Luftwaffe colours.
Yeah, I read those as well. Luckily they seem to have done a better job with the Japanese colors though. I'm pretty happy with how they look.
 

Users who are viewing this thread

Back