GB-60 1/32 P-40B AVG - Zombie Build

Ad: This forum contains affiliate links to products on Amazon and eBay. More information in Terms and rules

N4521U

Colonel
14,109
6,659
Nov 1, 2009
Miranda, NSW
User Name: N4521U
Name:...........Bill
Category:.....Advanced
Scale:.............1/48
Manufacturer:.......Trumpeter
Extras:...... a couple ....

So i am moving this to the Zombie Build so i am "forced" to complete it!!!!!

As if I don't already have enough in S2F!
I just felt like doing a large scale build. Since I couldn't find a Hurricane Mk.1,
this is the next one I would pick. Not many P-40B's in 1/32 so it's a Trumpeter,
new kit, old dies and it has it's drawbacks.
A few extras to make things easier to detail.
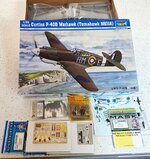
1-32 P-40b_1.jpg
Lotsa flashing to make it a bother as in the photo of the engine mount frames.
Some places need a scalpel to clean-up. A bit of a nuisance.
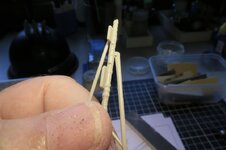
1-32 P-40b_3.jpg
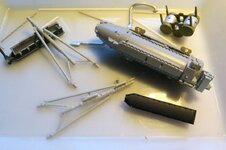
There are some exhaust aftermarket pieces, good ones unavailable.
Others too bloody expensive. These two photos show what I have
to work with from the kit. An hour was spent on the first and second ones.
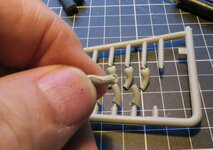
1-32 P-40b_4.jpg1-32 P-40b_5.jpg
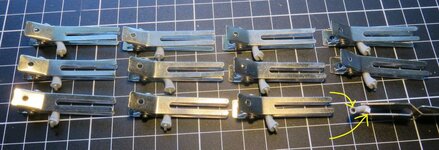
I do have a lot if the engine parts together and painted. They parts are
nicely pinned so as not to get them mixed up. Same die flash tho.
1-32 P-40b_6.jpg
The parts are nicely detailed as well. Over all, time will tell.
AVG markings, paint will be easy, just like my GB entry.
Off we go.
 
So it starts. I keep finding why we are paying
so much for modern, new tools kits. Parts
have a better chance of Fitting, trouble free.

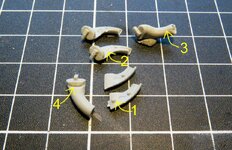
As mentioned above, these #@* exhausts.
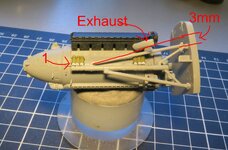
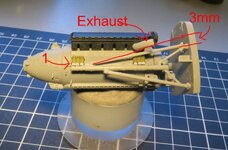
First photo. I had to remove the pin (1) so this
half would fit into (2), as shown @ (4). I did leave
the top pin in to keep the open end aligned.
Gap (3) will be filled with Gel CA glue and sanded.
1-32 P-40b_7.jpg
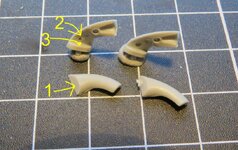
Second photo. Not only removing tab (1)
I also had to file back the surface to fit in
snugly @(3). I did have to sand back the
face (2) to get the halves to a smaller gap.
1-32 P-40b_8.jpg
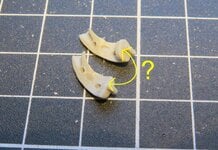
Third photo. What, the last assembly and
the top of the exhaust mntg plate is
missing. Will mod to ad a piece to replace.
1-32 P-40b_9.jpg
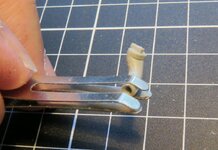
Used my Granny Clamps with a Custom bend
to lightly hold the halves to set with Revel glue.
Then filling gaps with Gel CA and sanding.
1-32 P-40b_10.jpg
The motor nounts do sit on the horizontal support
tube. There was a gap. I punched a few dots and
glued them in place, eh!
Looking at the builds of other kits, one builder
moved the top motor support tube up about
3mm. As in actual fact the Real tube IS up the
fire wall, but way more than the 3mm. If it were
raised more the exhaust stack would be an
Interfere fit. Two solids cannot occupy the same
space. I cannot justify spending That time to
relocate that tube.
1-32 P-40b_11.jpg
I have a feeling this is going to test my metal.
Again!
 
Thanks guys.
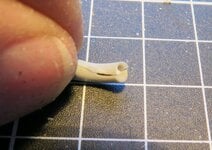
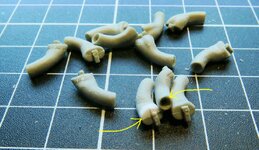
Fiddled on and off today with them pesky two part exhausts. What a trial these were. My fingers hurt.
Fist gluing the halves together. Bottom right is the block to fix the illformed part, and the hole as it looks
from the spru. Second photo arrow points to shaped block in place and thee finished exhaust hole.
It just happens to be the size of the round Dremel burr tool. I then thinned the wall. I have seen these
exhausts with a rolled seam front and back I'll have to look into that.
Been puttzing around with other assemblies, rudder, tail wheel, they look a bit easier to work with!!!!
1-32 P-40b_12.jpg1-32 P-40b_13.jpg
 
Just out of curiosity; it was mentioned that the mounts on the real a/c are higher than the scale model you're working & from the photos, you really gave a good illustration as how the exhaust & mounts will conflict if the mounts were adjusted higher.

How does the real a/c "solve" this arrangement? Are the exhaust lower? Or higher?
I think it's just the scale of things in plastic. Engine, exhaust, mounting tubes the lot. Like the scale of all the parts in the cockpit. Unavoidable unless we build in 1/4 scale. Even then how do you fabricate the skin at one quarter thickness???? And not lose your mind building!
 
Well, forgive my ignorance, but I have
these engine mounts bassackwards!!!!
The Short tube should be on TOP!!!!!!
Sometimes I wonder about my gray matter!
1-32 P-40b_11.jpg
I painted the exhausts, SMS steel.
I also have been fine tuning the cockpit kit.
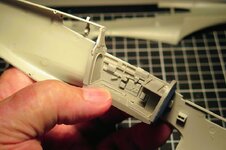
I tend Not to make it an Assembly as much
as fitting and attaching the sidewalls on
each side, then seat back, floor and IP as
a glued up unit. Holdover from my first kits
where there ended up being big gaps.
Nothing is attached at the moment. I will
detail and add before installing.
1-32 P-40b_14.jpg
 

Users who are viewing this thread

Back