Heller 1/72nd F6F-5 Hellcat

Ad: This forum contains affiliate links to products on Amazon and eBay. More information in Terms and rules

Matt308

Glock Perfection
18,961
91
Apr 12, 2005
Washington State
I've been dredging up my old models from the late 70s and early 80s out of my attic.

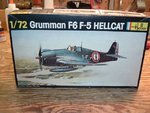
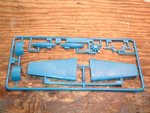
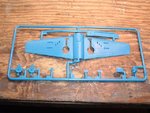
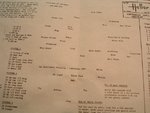
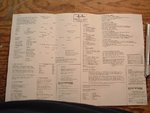
Here is a nice little French model of the famous F6F-5. Molding is all raised panel lines, but the overall context is rather nice. The instructions are "exploded view" that requires medium modeler skill to understand the contruction sequence. The best of the instructions are in la France', and the secondary instructions are in Franglish and very poor.

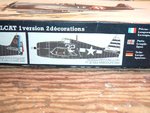
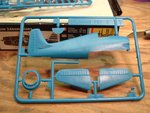
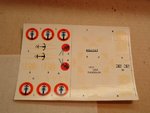
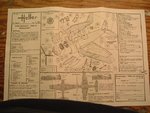
The cockpit appears to have average 1/72nd detail for this time period, but the wheel wells are totally absent of any detail. The kit comes in two potential builds, 1945 Frency Navy in Indochina or 1945 US Navy at the WWII closing. I chose the latter having found the exact airplane 32 in numerous books. In each one she looks rather sharp and devoid of lots of weathering.

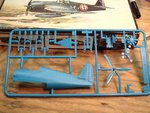
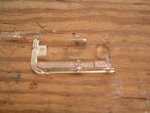
The kit does include underwing zero-launch rockets, bet these look a bit crude and best I can tell post war in model. I have decided not to include them.

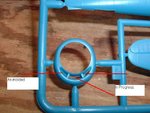
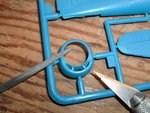
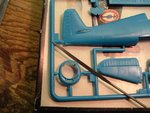
Here's some pics of the model box and content. Should be fun. I'm not seeking a real scratch build (not that I could accomplish one if I wanted to), but only a quick satisfying OOB.
 

Attachments

  • DSCF2131.JPG
    DSCF2131.JPG
    74.4 KB · Views: 262
  • DSCF2132.JPG
    DSCF2132.JPG
    75.6 KB · Views: 188
  • DSCF2124.JPG
    DSCF2124.JPG
    62.6 KB · Views: 176
  • DSCF2126.JPG
    DSCF2126.JPG
    79.7 KB · Views: 180
  • DSCF2127.JPG
    DSCF2127.JPG
    79 KB · Views: 203
  • DSCF2128.JPG
    DSCF2128.JPG
    81.4 KB · Views: 189
  • DSCF2129.JPG
    DSCF2129.JPG
    44.8 KB · Views: 175
  • DSCF2130.JPG
    DSCF2130.JPG
    48.3 KB · Views: 179
Note the discolored (yellow) decals. Well off to the the sunlit window they go for a few weeks to see if I can bring them back. Wish me luck.
 
Hello Matt308,

Be careful about the sunlit window thing. If you leave them there too long, the decals disintegrate when you try to use them.

This isn't a bad model in my opinion. I actually have at least one of this model myself. I believe the engine could use a little minor improvement with pushrods and rocker covers made of stretched sprue or styrene rod. (At least that is what I am planning for mine whenever I get around to building it. I also plan on putting in a pilot.)

- Ivan.
 
Thanks, Ivan.

Regarding the pushrods and rocker covers, I agree with you that the P&W radial is lacking. However, once the cowling is on, you cannot see much at all. Especially with the dark blue navy color. So in this scale it is lost in my opinion. But I would love to see your build of the same.

More of mine in the future...
 
Here's the instruction sheet. Leaves something to be desired. First the French side with the exploded view. Second the english side with text, but no drawing (third pic)?? :lol:

Certainly not one for the young ones without some help.
 

Attachments

  • DSCF2134a.JPG
    DSCF2134a.JPG
    52.4 KB · Views: 173
  • DSCF2134.JPG
    DSCF2134.JPG
    63.9 KB · Views: 182
  • DSCF2133.JPG
    DSCF2133.JPG
    86.7 KB · Views: 189
This should go rather fast. First up is to dip the cockpit canopy and windscreen in Future and let it begin to dry.

Next, the lower nose cowl inlets are solid. Even in 1/72nd this looks toy-like and wrong. So out come the needle files and razor knife to open them up and clean up the rough edges a bit.

In the first pic, you can see on the left how the original mould represented them solid. The middle and right cowl inlets have begun to be cut out.

The second pic shows all inlets rough cut.

The third shows the inlets cleaned up with the needle file and ready to go.
 

Attachments

  • DSCF2125.JPG
    DSCF2125.JPG
    56.2 KB · Views: 180
  • DSCF2135.JPG
    DSCF2135.JPG
    84.8 KB · Views: 171
  • DSCF2136.JPG
    DSCF2136.JPG
    61.5 KB · Views: 185
Next up, open cowl flaps.

Application of a razor saw to the outlines first.

Second, since the edges of the cowl flaps will show, it is imperative that you thin them out to scale. Don't want 4inch thick cowl flaps now do we. A little use of a flat file to take the edge down.

Third, score the insides of the cowl flaps to allow them to be bent outward without distressing that beaufiful French blue plastic. :rolleyes:

Result, fairly realistic cowl flaps for 1/72nd scale. Next up, the engine assembly.
 

Attachments

  • DSCF2138.JPG
    DSCF2138.JPG
    61.2 KB · Views: 124
  • DSCF2139.JPG
    DSCF2139.JPG
    58.5 KB · Views: 124
  • DSCF2140.JPG
    DSCF2140.JPG
    60 KB · Views: 122
  • DSCF2141.JPG
    DSCF2141.JPG
    58.6 KB · Views: 117

Users who are viewing this thread

Back