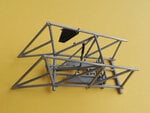
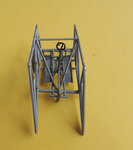
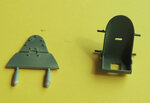
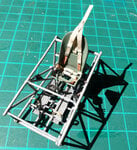
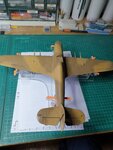
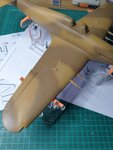
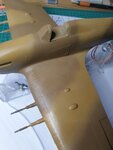
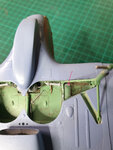
Hurricane Mk.IIc Trop from the FLY kit in 1:32 scale

Ad: This forum contains affiliate links to products on Amazon and eBay. More information in Terms and rules

al49

Tech Sergeant
1,552
338
Dec 16, 2009
Milan, Italy
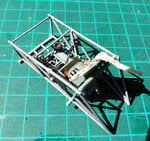
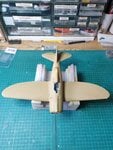
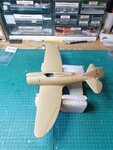
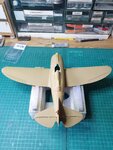
Started in August 2016 this kit remained sleeping in its box until a couple of days ago when, thanks to abundant time made available by the fact that we must stay at home due to the virus, I decided to continue.
My target is to build a replica of one of those bird that fought against Regia Aeronautica ones in North Africa.
Here following some pictures of what has been done so far.
2016-08-18 14.43.01.jpg2016-08-18 14.46.46.jpg2016-08-18 14.46.53.jpg2016-08-18 14.48.31.jpg
 
On this subject, I'm a bit in troubles with the gunsight. I cannot find a picture that shows me how and where it was positioned. Instructions aren't clear and there is no support supplied with the kit. Any suggestion from someone? Many thanks
20200418_151153.jpg20200418_151202.jpg
 
These are the best pics I have of our restored bird Alberto. Note the sliding green glare shield, something that I was not aware of before our project. Note that this is an earlier sight with the round glass. Your's might be the later one with the square glass but the mount is the same.

20190909_133159.jpg
20190909_135859.jpg
 
Last edited:
These are the best pics I have of our restored bird Alberto. Note the sliding green glare shield, something that I was not aware of before our project. Bote that this is an earlier sight with the round glass. Your's might be the later one with the square glass but the mount is the same.

View attachment 577919View attachment 577920
Many thanks. these are very helpful pictures.
 
Nice work Alberto, and good info from Andy. It's also reminded me to get back to my 1/32nd scale Mk1.
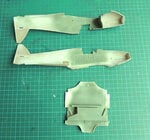
Note that the 'hole' in the bottom of seat pan should really be a depression, not an open area. This was to accommodate the 'pouch' covering the cones and pins of the parachute pack. where the 'ripcord' pins slotted into metal cones, and was designed to prevent pressure on the pins, which could get bent, preventing the pack opening.
Many thanks Terry for this very good point! Fortunately the cockpit is still open, so I can try to glue to the bottom of the seat a piece of pre-painted piece of plasticard that will "fill" the hole. If possible, I would prefer not to separate the seat from the structure that was very complicate to build.
 
Hi everybody,
I did some progresses on this build, see pictures here:
First coat of Mid Stone and Azure Blue on grey primer:
20200520_173525.jpg20200520_173531.jpg20200520_173537.jpg
IMG-20200519-WA0012[1].jpg
 
Finally I have a question for the experts: inside the wheel bay there are two pistons which stems is protruding towards something that doesn't exist. I checked on several walkarounds, but I found nothing, unfortunately. May be the stem should be cut close to the bulkhead, do you have any suggestion? Many thanks. Alberto
 

Attachments

  • 20200604_171833 arrow.jpg
    20200604_171833 arrow.jpg
    662.2 KB · Views: 102
Looks like an Re.2000 photo-bombed your Hurricane.

The jack is the main undercarriage retraction jack and is in the right place. What are missing are the parts that attach it to the diagonal strut circled.
20180323_112120 reduced.jpg
20180323_112134 reduced.jpg


Pictures by Richard de Boer Calgary Mosquito Aircraft Society.
 
Looks like an Re.2000 photo-bombed your Hurricane.

The jack is the main undercarriage retraction jack and is in the right place. What are missing are the parts that attach it to the diagonal strut circled.
View attachment 583933View attachment 583934

Pictures by Richard de Boer Calgary Mosquito Aircraft Society.
Many thanks. So I should add something similar to that diagonal struct and the job will be done.
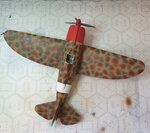
By the way, you mentioned a Reggiane 2000? Do you mean something like the one below? It's project that I started in 2018, remained sleeping in the cabinet until the virus forced me to stay home and I decided to continue it as well. I will start soon a dedicated tread on this subject.
 

Attachments

  • 20200602_161756.jpg
    20200602_161756.jpg
    569 KB · Views: 94

Users who are viewing this thread

Back