dirkpitt289
Master Sergeant
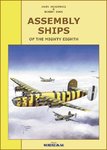
In this thread I'm going to be working on one of my favorite topics of the World War II era, Formation Assembly ships.
My first subject is going to be a B-17F #42-30145 or better known as the Green Hornet of the 486th BG, Sudbury, 1944. From 7 January 1944 she was on loan to the Royal Aircraft Establishment at Farnborough for "range tests". Returned to the USAAF in February, the aircraft was assigned as a hack with the 486th BG, where she was stripped of her armaments and had all its turretts removed. It was painted bright green with dark green decorative elements and named Green Hornet. Its main function was to preform communication relays, weather observation and transportation but some uncertain records noted that the Green Hornet was used as the Groups Formation Assembly Ship. If this were true, it would be the only case of an assembly ship being used by the 3rd AD.
For this build I'm going to be using the Academy B-17F "Fort Alamo II" kit.

The Kit
Molded in light gray and clear plastic, the Academy B-17 series feature scribed panel lines and flash-free molding. While there are a few ejector-pin marks on a few visible interior surfaces, these are minor and should be easily sanded away. The kit features a nicely detailed cockpit and nose section for this scale. Pilot, Co-Pilot, Navigator and Bombardier seats are all provided, along with control yokes and a decal-based instrument panel in the cockpit, a map table for the Navigator, and a Norden bombsight and control panel for the Bombardier.
The bomb bay doors are positionable, and there is a nicely represented catwalk that spans the forward and aft bulkheads. The two bomb racks that mount on either side of the catwalk are also present along with eight bombs to arm the racks. The corresponding bomb racks that mount against the inside of the fuselage are not provided in the kit.
The top and ball turrets are provided, as well as waist guns that are stowed inside of the waist windows.
I will not be doing any extensive interior work on this one. My focus will be on the exterior finish. I will start posting progress photos sometime next week as this weekend is booked solid.
Thanks for taking the time to stop and look.
My first subject is going to be a B-17F #42-30145 or better known as the Green Hornet of the 486th BG, Sudbury, 1944. From 7 January 1944 she was on loan to the Royal Aircraft Establishment at Farnborough for "range tests". Returned to the USAAF in February, the aircraft was assigned as a hack with the 486th BG, where she was stripped of her armaments and had all its turretts removed. It was painted bright green with dark green decorative elements and named Green Hornet. Its main function was to preform communication relays, weather observation and transportation but some uncertain records noted that the Green Hornet was used as the Groups Formation Assembly Ship. If this were true, it would be the only case of an assembly ship being used by the 3rd AD.
For this build I'm going to be using the Academy B-17F "Fort Alamo II" kit.
The Kit
Molded in light gray and clear plastic, the Academy B-17 series feature scribed panel lines and flash-free molding. While there are a few ejector-pin marks on a few visible interior surfaces, these are minor and should be easily sanded away. The kit features a nicely detailed cockpit and nose section for this scale. Pilot, Co-Pilot, Navigator and Bombardier seats are all provided, along with control yokes and a decal-based instrument panel in the cockpit, a map table for the Navigator, and a Norden bombsight and control panel for the Bombardier.
The bomb bay doors are positionable, and there is a nicely represented catwalk that spans the forward and aft bulkheads. The two bomb racks that mount on either side of the catwalk are also present along with eight bombs to arm the racks. The corresponding bomb racks that mount against the inside of the fuselage are not provided in the kit.
The top and ball turrets are provided, as well as waist guns that are stowed inside of the waist windows.
I will not be doing any extensive interior work on this one. My focus will be on the exterior finish. I will start posting progress photos sometime next week as this weekend is booked solid.
Thanks for taking the time to stop and look.
")