Special hobby 1/48 Fairey Barracuda MK.2

Ad: This forum contains affiliate links to products on Amazon and eBay. More information in Terms and rules

TimEwers

Airman 1st Class
224
0
Aug 28, 2010
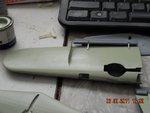
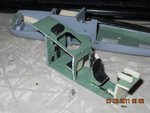
This will be a slow build as I am not too happy about the way the Fulmar turned out I hope by going slow I can avoid the mistakes I made with that one.

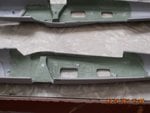
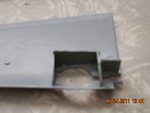
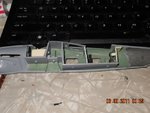
Dang sure going to make sure the sides are not warped which threw everything else off from that build.

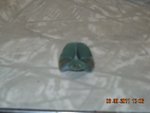
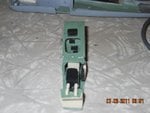
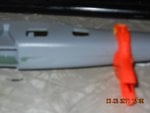
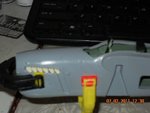
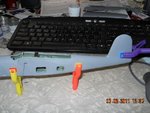
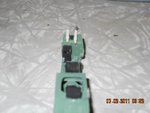
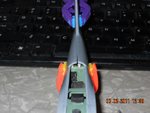
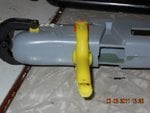
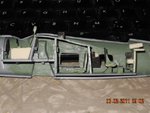
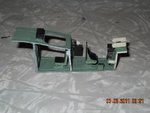
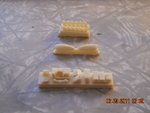
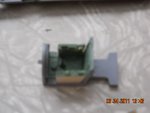
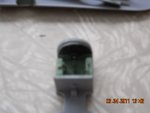
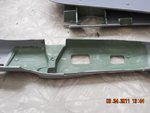
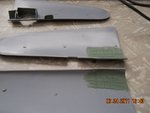
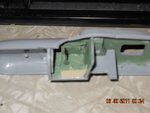
But anyway How do you remove these pieces without destroying them. I have only the basics of tools right now to work with. Kinda wish they had included the non resin parts but they did not.
 

Attachments

  • Picture 307.jpg
    Picture 307.jpg
    90.2 KB · Views: 275
Well here's what I have been able to do so far hen I can get a razor saw Ill work on the rest.
And here is the highs and lows so far as well.
High a interesting kit to be sure.
Low a bit too much for what you don't get.
1 no bombs or torpedo
2 no side wall detail even tho you can see inside quite a bit.
3 only the main decals are included no stenciling.
4 the inside parts need trimmed as they are all too big or the sides too narrow.
5 the rear mg's are nice but no way to show them in firing position the mount is just a box, which is a shame
6 Wings are going to be a problem as there is no attachment points from What I can see the only support is going to be the landing gear.
7 bomb and torpedo attachments look simplified could have included resin and or PE parts for that as the only pe parts you get are the seat belts and the dust covers for the engine intake and the radar antenna.
8 Some one with scratch building skills could probably make the missing stuff but I'm not one of those with scratch building skills, and I don't have the stuff to work with nohow.
 

Attachments

  • Picture 314.jpg
    Picture 314.jpg
    76.3 KB · Views: 259
  • Picture 318.jpg
    Picture 318.jpg
    78.6 KB · Views: 250
  • Picture 316.jpg
    Picture 316.jpg
    90.6 KB · Views: 245
  • Picture 315.jpg
    Picture 315.jpg
    77.4 KB · Views: 240
  • Picture 319.jpg
    Picture 319.jpg
    78.7 KB · Views: 244
  • Picture 317.jpg
    Picture 317.jpg
    93.8 KB · Views: 278
  • Picture 313.jpg
    Picture 313.jpg
    86 KB · Views: 253
Well here is a small update what you see is what you get for the cockpit and back area.the back part is not glued in at this point as I'm still needing to get a hack saw for the seats. And everything needs to be trimed which I did but there is still big gaps on the bottom and top in places.

Also wont see much of this when it's closed up as you can't pose the canopy open,kinda defeats the point of having all this resin stuff.
 

Attachments

  • Picture 362.jpg
    Picture 362.jpg
    87.2 KB · Views: 238
  • Picture 361.jpg
    Picture 361.jpg
    97.6 KB · Views: 255
Another update wings together no gaps with them. Still bummed that there is no Bomb racks. And engine intake. Unfortunately gap in one of the dive flaps.
 

Attachments

  • Picture 364.jpg
    Picture 364.jpg
    95.9 KB · Views: 214
  • Picture 371.jpg
    Picture 371.jpg
    80 KB · Views: 223
  • Picture 363.jpg
    Picture 363.jpg
    93.7 KB · Views: 218
Well Razor saw acquired and now the killing of resin and plastic will begin.
 
Got the ten pounds of resin off the seats and exhausts Trimed everything else to fit, this is where I am at. nothing is glued in yet I am just seeing how bad the gaps will be and they are not too bad. Wont have to mess to much with puttying.

And as you can see you can't see too much of the detail after closing things up, which is good as I broke both mg barrels.

Why does the pictures upload out of order, and it seems to mix things up too.

DO I need to do one Picture at a time?.
 

Attachments

  • Picture 395.jpg
    Picture 395.jpg
    91.5 KB · Views: 204
  • Picture 376.jpg
    Picture 376.jpg
    94.1 KB · Views: 204
  • Picture 394.jpg
    Picture 394.jpg
    79.7 KB · Views: 213
  • Picture 390.jpg
    Picture 390.jpg
    89.2 KB · Views: 210
  • Picture 378.jpg
    Picture 378.jpg
    100 KB · Views: 253
  • Picture 389.jpg
    Picture 389.jpg
    108.9 KB · Views: 194
  • Picture 377.jpg
    Picture 377.jpg
    87.9 KB · Views: 195
  • Picture 391.jpg
    Picture 391.jpg
    95.3 KB · Views: 197
  • Picture 393.jpg
    Picture 393.jpg
    91.5 KB · Views: 210
  • Picture 382.jpg
    Picture 382.jpg
    101.7 KB · Views: 331
  • Picture 375.jpg
    Picture 375.jpg
    94.2 KB · Views: 220
  • Picture 392.jpg
    Picture 392.jpg
    81.8 KB · Views: 201
I have the same effect if I want to upload more than one image. But it isn't the rule. To be honest I don't know why the forum system does it in the way. Uplading one picture at a time works good and usually I follow the way.

Nice job so far Tim. Keep working. :)
 

Users who are viewing this thread

Back