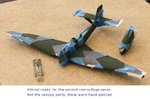
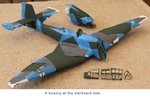
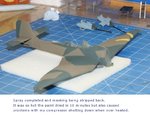
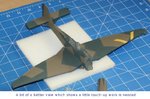
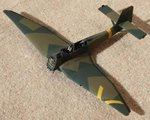
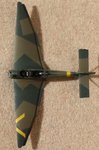
**** DONE Hasegawa 1/48 Junkers Ju-87G-2, Kdr./SG2 Heavy Hitters GB

Ad: This forum contains affiliate links to products on Amazon and eBay. More information in Terms and rules

Bl**dy Hornby Hobbies, using the good old Humbrol name on cr*p products!
I didn't know you could get thermometers that had readings higher than 20 Degrees C / 68 F !!!
 
Managed to advance quite well this last couple of days despite the oppressive heat, loads of spraying done even though the compressor overheated and stopped a couple of times. It's all done now and tomorrow after a little touch-up work hope to do some panel line marking before final assembly and a coat of clear gloss and decal work.

:hotsun: :hotsun:
 

Attachments

  • Stuka Build 2l.JPG
    Stuka Build 2l.JPG
    56.1 KB · Views: 85
  • Stuka Build 2m.JPG
    Stuka Build 2m.JPG
    53.7 KB · Views: 80
  • Stuka Build 2n.JPG
    Stuka Build 2n.JPG
    65.6 KB · Views: 75
  • Stuka Build 2o.JPG
    Stuka Build 2o.JPG
    59.4 KB · Views: 95
  • Stuka Build 2p.JPG
    Stuka Build 2p.JPG
    62.6 KB · Views: 77
  • Stuka Build 2r.JPG
    Stuka Build 2r.JPG
    42 KB · Views: 80
  • Stuka Build 2q.JPG
    Stuka Build 2q.JPG
    59.6 KB · Views: 81
Thanks for the encouraging comments folks, very much appreciated.

Now I need some advise an what to do next. Despite a good 5 hours of shopping at our DFO (misses was having fun) I got quite a bit done today and am now ready to either do some weathering or spraying a clear gloss ready for decals. So the question is, do I weather before a clear gloss spray or do I spray, decal and then weather.

For weathering I was looking at dry brushing especially for a mud effect and maybe rain and water run off. Possibly some pigment for wear and fading and the good old silver felt tip and graphite pencil for the maintenance and general wear. I should point out I'm new to weathering, never done it before and am only quoting processes form what I have read. So any hints or ideas will be most welcome.

Pics of today's progress, completing masking removal, paint touch-up and panel lining with a pencil though in the pics (taken as the sun was setting) the lines are not well defined.

:hotsun: :hotsun:
 

Attachments

  • Stuka Build 2s.JPG
    Stuka Build 2s.JPG
    58.8 KB · Views: 107
  • Stuka Build 2t.JPG
    Stuka Build 2t.JPG
    58.5 KB · Views: 83
  • Stuka Build 2u.JPG
    Stuka Build 2u.JPG
    57.7 KB · Views: 84
Looking very sharp Vic, nice one!
Weathering. There are a couple of tutorials/guides here somewhere, including Wayne's excellent pastels tutorials. Obviously, we each have our own preferences and methods, and, to a certain extent, where to begin can be determined by the type(s) of paint and clear coats used, both for the model's colour scheme, and for any additional work, including weathering. As you will most likely appreciate, to cover the subject even partially would require a fairly hefty book, so this thread isn't really a suitable place to try to reply and give advice but, as a starter, or (very) rough guide, here's the sequence I tend to use mostly, plus a couple of hints and pointers.
Once the model is painted, I normally do any initial weathering before any clear coats are applied. This will be in the form of paint scuffing, wear and any chipping, the amount/degree obviously depending on the subject etc. Also, the base for any staining, such as exhaust, gun smoke, oil and fuel etc is laid down at this stage. The mediums used are more often the basic paints, but also pencil, graphite powder and occassionally pastels. Any initial panel line work is also done at this stage, lightly for now (although it's rarely heavy anyway).Note that paint wear is rarely deep enough to show bright bare metal - more oftn it should be the btop surface of paint worn, showing a paler shade of the actual colour, or the primer. Where the metal is exposed, unless it has happened 'violently', battle damage or other heavy surface damage/puncture, then it is rarely shiny silver! Therefore, it's better to tone-down any 'bare' metal, by using a silver grey pen/pencil or, as i do mostly a steel or silver paint, with varying degrees of matt white added.
Once the initial weathering has been completed, then any fading or dirt not incorporated during the initial airbrushing of the colour scheme, is lightly added, either by damp brush, dry brush, or airbrush, or a combination of these. Then the gloss clear coat(s) are added.
Once decaling is completed, invariably some of the dedals will also need toning down, and any continuation of panel lines, htaches, weathering dirt etc, carried into0 those decalled areas requiring it.
Once this is done, any heavier weathering is completed over the gloss coat, which is mainly things like exhaust staining and similar.
The finishing clear coat is then applied , matt, semi matt or whatever, followed by any final additions to 'outer surface' weathering, thatis, those stains etc which would be 'fresh', and not part of the overall patina of the airframe. This would certainly be exhaust staining, gun smoke smears, and definitely any ground surface deposits - mud splashes, dust etc. These touches must, I feel, be finished off over the final coatings, in order to prevent them looking diffused and 'encapsulated' under the clear coats, and therefore too artificial. As the basis of these stains have been done first, the final touches are just 'bringing hem to life', and can be done very lightly if required.
Not really a detailed expalnation of 'how to', but at least the sequence, or my sequence anyway, might provide a starting point. One thing though, having decide which method you're going to try first - experiment before touching the model!

A great summary Terry. :)
 
I think Terry has covered it all excellently .So there is no need to add anything in general.

But I would like to ask you Vic... isn't the lighter camo colour too olive in tonality? It might be a camera fault but it should have been of another tonality I thought.
 
Last edited:

Users who are viewing this thread

Back