GB-60 1/48 Bf 109E-7 - Zombie Build

Ad: This forum contains affiliate links to products on Amazon and eBay. More information in Terms and rules

dneid

Staff Sergeant
1,378
293
Oct 31, 2012
Austin, TX
Username : dneid
First name : Dale
Category : Intermediate
Scale : 1/48
Manufacturer / Model : Tamiya
Extras : Eduard Masks and Minimal Photo Etch

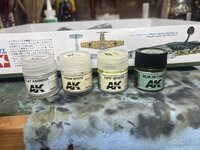
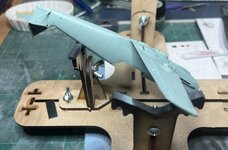
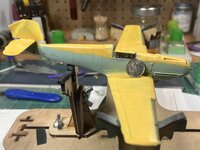
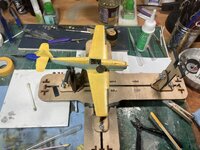
I started this build as a non group build item. My goal was to try out the AK Laquer paints (Picture 1). The kit is about 75-80% done. So, this is coming back to life for the zombie build. If this goes as quick as I expect, I have a 109G-6 I may pull in as well.
 

Attachments

  • GB60 intro 3.JPG
    GB60 intro 3.JPG
    1.5 MB · Views: 9
  • GB60 Intro2.JPG
    GB60 Intro2.JPG
    1.3 MB · Views: 11
  • GB60_Intro1.JPG
    GB60_Intro1.JPG
    2 MB · Views: 9
I spent the weekend taking stock of the existing work and where to pick up the build at. I discovered I am missing a parts tree, but I have another kit on the stack so she becomes a parts mule. So, I will be picking up the glue today and moving on.
 
Ok, I got the drop tank mount in place, still need to mask the canopy and mount it as well. This one will be close canopy bird. I did get the sky blue on the sides and underside of the bird. I do like the AK lacquers. Yeah, the box fan in the window is a must.
 

Attachments

  • Sky Blue on Belly.jpg
    Sky Blue on Belly.jpg
    479.7 KB · Views: 8
  • Sky Blue on side.jpg
    Sky Blue on side.jpg
    592.2 KB · Views: 6
I did shoot the sand on the top surfaces. One thing I have discovered is that the Mr Color Leveling Thinner does a very nice job of leveling the paint. I had a couple of small areas where I had some paint "puddling". I decided to let the entire coat dry over night to see what would happen to those "puddles". The next morning, no "puddles", just a nice, even coat of paint on all surfaces. That was a pleasant surprise. yes, the thinner smells like hell, but the box fan in the window sure cut that down in the room.
Next steps are to mask the canopy and then touch up some on the sides and wing root. Once that is complete I will then start the green mottling and then the white fuse band.
Oh, the dime in the picture is help show real life sizing for a friend who does not build.
 

Attachments

  • Sand Side.jpg
    Sand Side.jpg
    624.9 KB · Views: 10
  • Sand top.JPG
    Sand top.JPG
    1.5 MB · Views: 9
As you say Dale, a nice finish and thanks for the wee dime, it helps all of us to realize the size. :thumbright::D
 

Users who are viewing this thread

Back