Me262A-1 "Red 13" of Heinz Bar Gruppe Build

Ad: This forum contains affiliate links to products on Amazon and eBay. More information in Terms and rules

Bill G.

Banned
371
4
Jan 26, 2009
Plainwell, MI
I have been wanting to start this one for quite a while. I bought this a year or so before I deployed to Iraq in 2003! So now you all have gotten me off of my butt!

This is the Tamiya 1/48 kit. It looks like a super kit for out of the box building. There is plenty of detail to keep my paint brush busy!

I am going with the Red 13 scheme because the SEN Team I was on in Iraq had the radio call sign of Kilo One Three. Now you know!

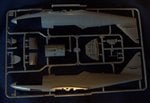
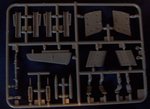
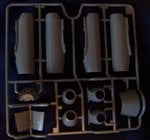
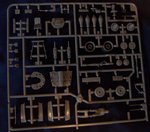
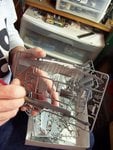
The first thing I have done is taken the parts out of the plastic and photgraphed them! We will see how it goes after that!

I have done the Revell 1/32 Me-262 and have posted a picture of it here. I hope this is even better!

Bill G
 

Attachments

  • 262-1.jpg
    262-1.jpg
    69 KB · Views: 147
  • 262-2.jpg
    262-2.jpg
    67.8 KB · Views: 149
  • 262-3.jpg
    262-3.jpg
    74.9 KB · Views: 136
  • 262-4.jpg
    262-4.jpg
    85.2 KB · Views: 165
  • 262-5.jpg
    262-5.jpg
    102.3 KB · Views: 142
  • 262-6.jpg
    262-6.jpg
    141.2 KB · Views: 136
Very nice kit! Thanks for joining in on the Group Build, Bill. Looking forward to the progress shots, and no doubt Dan will 'sticky' your threads into the Group Build section.
BTW, which Category do you put yourself in? Beginner/Novice, Intermediate, or Advanced/'expert'?
Just so we can score accordingly.
Terry.

Well, I have been building models for 43 years. But I am still learning. One thing I have to learn is airbrushing.

So call me a bottom level Intermediate for this build.

I see I need to get some RLM 83. I have everything else for paints. I will have to double check for the 109.

I have a train show Saturday. I have a van load of stuff I am taking for the club. Some of it is for the portable layout. Some is for sale. So I hope to be bringing less back.

Maybe So if not Saturday night, then Sunday I plan on getting glue and paint on my fingers!

Bill G.
 
Today, I started to paint my 262.

I got to looking at my flat aluminum paints. I had two jars, but both were low. So I poured one into the other. I mixed it up with my Badger Paint Stirrer. It still looked a bit thick, so I added a bit of thinner and mixed so more. It looked good so I went to work. I got all the parts painted that Tamiya has marked silver except two. These are the nose weight and the part that fits into it. I first want to ACC these parts together before painting.

Next is the RLM66 for the cockpit area. Again I had to thin the paint. It had dried out a bit. Again my paint stirrer works wonders after adding some thinner. I have gotten the cockpit stuff that is to be RLM66 done.

Now comes the fun of detail painting stuff!!

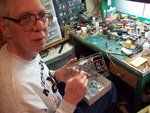
The pictures were taken today by my girl friend as I was painting the flat aluminum. The green work bench I bought at an auction in 1985 I think. I know I only paid $25 for it. And it has a fluorescent bulb (still the original), switch and outlet and small drawer. It was part of an assembly line for fishing lures! The only thing I have added is a flexible two bulb desk lamp I was given to me while I was serving in the Air Force in West Germany. The same bulbs in that too! So not a bad $25 hobby table. That is if you can find it under the mess!

Bill G.
 

Attachments

  • 262-10.jpg
    262-10.jpg
    123.8 KB · Views: 154
  • 262-11.jpg
    262-11.jpg
    164 KB · Views: 184
Quick update.

I did a bit more painting. I painted the guns and ammo feed chutes gunmetal and painted the tires black.

I also did my first glueing. I glued the plastic part that the nose gear will go into to the metal nose weight.

No pictures to share yet. I will wait for more progress for that.

And thanks to all for your comments on my work bench.

Bill G.
 
I did get a little more painting done. No further glueing.

I painted the RLM02 on the landing gear. I touched up the aluminum where needed. I painted a tiny bit of brown on the instrument panel.

One step backwards too. I misread the painting code and painted a bit of brown on the bottom piece that the guns go on. I can easily repaint this gun metal later.

Bill G.
 

Users who are viewing this thread

Back