1/48 Airfix Hawker Hurricane Mk.I

Ad: This forum contains affiliate links to products on Amazon and eBay. More information in Terms and rules

Grant Barr

Senior Airman
Next build on the list - Airfix's Hawker Hurricane Mk.I.

This one will be pretty much out of the box, with the only additions being some paper seat belts from Kamizukuri and some stencil decals from HGW. Looking at the box I think this one came off the molds in Mar 2021 and was made in India (did not know Airfix kits were made in India!).
Box - Hawker Hurricane Mk.1.jpeg

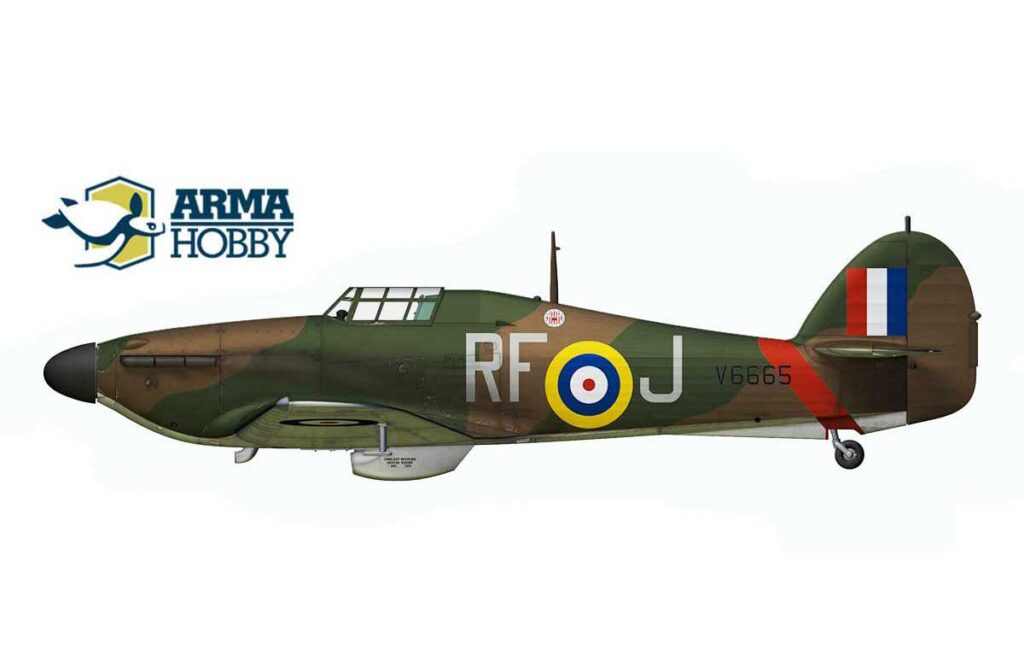
There are options to build an aircraft flown by Flt. Lt Ian Gleed (AL-K, 87 Sqn, August 1940) and Sgt. Tadeusz Andruszkow (RF-J, 303 Sqn, September 1940). I have decided to go with RF-J, as shown on the box art, as it seems to represent a "vanilla" BoB camouflage scheme, see below.
Instructions - Page 15.jpg

I've made a start and will post some more pics as I get myself organised.
 
:thumbright:

Hurricane V6665 RF-J at Northolt 1940.JPG

Hurricane V6665 RF-J at Northolt 1940_.jpg

the pic source:
 
Great post Wurger Wurger ! Really interesting background material. I've tagged this for a re-read later on. Bit confused between Tad Andruszkow and John Kent - suspect same aircraft but two different pilots at different times during the aircraft's service life.
 
Actually you are right. John Kent Kentowski was a flight commander and the Hurricne could be flown by him. But it wasn't a rule. Because of some reason he couldn't fly so the aircraft could be used by another pilot. And it s in the case. On the 9th September F/Lt John Kent shot down a Bf-110 and Ju-88 when flying RF-J. But on the On 23rd September F/L Kent was flying Hurricane RF-B / V6681. And on 27th September Sgt. Tadeusz Andruszków was shot down while flying RF-J, the Hurricane crashed and pilot died.
 
Grant Barr Grant Barr , the airframe may have been flown by both pilots during the same timeframe. While each pilot had their "own" airframe, major servicing or rotation of crews would mean that a number of pilots might fly any given airframe on the squadron. For example, let's say Plt Off Snuffy is assigned Hurricane Q1234 but Snuffy goes on a week's leave or has a nasty head-cold. His Hurricane would likely be flown by other pilots on the squadron in his absence.
 
Actually you are right. John Kent Kentowski was a flight commander and the Hurricne could be flown by him. But it wasn't a rule. Because of some reason he couldn't fly so the aircraft could be used by another pilot. And it s in the case. On the 9th September F/Lt John Kent shot down a Bf-110 and Ju-88 when flying RF-J. But on the On 23rd September F/L Kent was flying Hurricane RF-B / V6681. And on 27th September Sgt. Tadeusz Andruszków was shot down while flying RF-J, the Hurricane crashed and pilot died.
Thanks Wotjek. Sad to learn Sgt Andruszkow lost his life in this one. That explains why Airfix were so explicit with the date on the colour scheme compared to Widge Gleed's, where they just supplied the month (August).
 
Haven't seen one built yet Grant so will be following. Could you post a pic of your seat harnesses? The name sounds like the Luftwaffe ones I use, a right pain in the keester the was
Will do Geo. I think I recall you mentioning them in another thread as well. I did use this brand on the KA-14 I built a while back and didn't have too many issues with them. I did learn that they shape better if done whilst damp, either with acrylic paint or water before painting. Trying to shape them after the paint has dried results in cracking/ breaking across the belts. Haven't tried enamel paints on them yet (only because the clean up for enamel is more troublesome than acrylics).
 
OK - had some time today to organise myself. Building on the pics above the kit contents and some of the add on stuff shown below.
03_Hurricane Mk.I Decals & Seat Belts.JPG 03_Hurricane Mk.I Seat Belts Detail.JPG 05_Hurricane Mk.I Sprue A.JPG
06_Hurricane Mk.I Sprue B.JPG 07_Hurricane Mk.I Sprue C.JPG 08_Hurricane Mk.I Sprue D.JPG
09_Hurricane Mk.I Sprue E.JPG
I've added a detail pic for the paper seat belts I'm using. Hope this is helpful for you Geo - fubar57 fubar57

Plastic is the soft blue-grey that everyone mentions and seems to be reasonably well molded. There are very faint mold seams on most parts, nothing that running a sharp blade along will not remove.

Following the instructions, naturally the build starts with the cockpit. The kit contains a lot of the structural components for the fuselage and wing spars, which is great as it should help make sure that all the parts line up and the various angles for components are correct. In the following shot I have cleaned up the majority of parts for the first couple of steps in the build.
10_Hurricane Mk.I Cockpit Parts Clean Up & Assembly.JPG
Once cleaned up the assembly was pretty straight forward, although I do note that the tolerances are reasonably tight. I think that if you don't clean up the seams then some of parts will not sit flush and cause alignment issues down the track. Once assembled the painting was straight forward - I used Tamiya Aluminium rather than my usual Vallejo. I find that Vallejo needs an undercoat layer to get a better bond and I could not be bothered with the extra step, so Tamiya acrylic it was.
11_Hurricane Mk.I Cockpit Painted FLHS Assembly.JPG 12_Hurricane Mk.I Cockpit Painted FRHS Assembly.JPG 13_Hurricane Mk.I Cockpit Painted RRHS Assembly.JPG
If you look closely at the last photo (#13) you will see I have added a compass face to the blank surface the kit contains. I managed to find a suitable instrument decal from the spares box and it will look much better than any attempt I make at painting some form of face onto it.

Once the cockpit assembly was done, it was time to move onto the lower wing and preparing it for joining with the cockpit assembly. Here is where I ran into some problems.
14_Hurricane Mk.I Wheel Well Part B6.JPG 15_Hurricane Mk.I Wheel Well Rear Wall.JPG
When I offered part #B6 up to the lower wing it was pretty quickly apparent that it was warped. It did not remotely align to the cut-out in the lower wing. As a result I had to resort to some brute force to straighten it up and then some clamps to keep it in place whilst some MEK adhesive did its work. I am pleased with the result - as shown.
16_Hurricane Mk.I Wheel Well Rear Enclosure pre-Cleanup.JPG 17_Hurricane Mk.I Cockpit Assembly Test Fit.JPG
The last photo is a test fit of the cockpit assembly, it's alignment is really nice and (thankfully) the alignment to part B6 is accurate.

Long post - but that pretty much brings this thread up to date. Next step will be to paint the lower wing panel interior Aluminium and fix the cockpit assembly in place. With luck I will get this done sometime in the next week and post once I get some shots ready.

Thanks for looking in and for the advice and feedback. This is shaping up to be an enjoyable build! :thumbleft:
 
Thems the bloody harnesses, same as what I had. I can't find them online anywhere. I watched a video showing how they were put together but it was 1:32 and I couldn't for the life of me thread the harness through the buckles in 1:48. I have since learned that tapering the ends of the harnesses helps. In the end, I just painted everything separate and then glued the buckles on top of the harnesses using PVA. Not perfect but with the canopy closed it works for me

1712490102969.jpeg


1712490119320.jpeg
 
Next update.

I feel like I have done a tonne of work for very little progress in the past week. There are not too many parts required for the next few stages of the build, but most of them are pretty small and have many intricate surfaces which must have the mold seams cleaned up. I reckon I spent 4 or 5 hours alone on cleaning up before I even got to use some glue or paint.

So now that the majority of the cockpit is assembled it was time to move onto the wing assembly. I have just realised I missed the seat belts which I will have to add before too much longer - Geo fubar57 fubar57 I will try to document what I do with these, I plan on testing your chamfering the edges idea and softening the belts with water and tiny bit of PVA type glue.

Unlike most kits I have built this kit sees you add the cockpit assembly to the lower wing, add the wing guns (only if you want to show them) and then join the wing upper and lower panels. Only then do you add the fuselage to the wings.

Of course I opted for displaying the wing guns. This is achieved by cutting the appropriate access panels out of the upper wing half and assembling the visible parts of the gun breeches, magazines and feed chutes.

18_Hurricane Mk.I Ammunition Panels Instructions.JPG 19_Hurricane Mk.I Ammunition Panels Removal.JPG
As you can see, the instructions call for the whole shaded area to be removed, but on closer inspection it is evident that the access panels are separated by a wing strengthening truss section that runs diagonally. So being the "an*l retentive" type I determined that I would only remove the access panels, as you can see I've marked on the right wing (having already removed the left ones). After doing this my tiny pea brain questioned "how does the kit handle this narrow piece of wing surface if you remove the whole section?"

20_Hurricane Mk.I Ammunition Panels Instructions 2.JPG
If you look closely at part #'s D9 & D10 you will note that the top rail has a raised section that is essentially the wing surface that separates the access panels. So having decided to leave them on the wing, the only course of action was to remove this raised section from the parts. Now that was tedious and time consuming, but I got there in the end.

21_Hurricane Mk.I Shell Ejection Ports.JPG 22_Hurricane Mk.I Gun Installation.JPG
One of the other tasks I undertook was to open up the shell ejection ports in the lower section of the wing. Only after doing this was I able to commence assembly of the gun breeches, feed magazines and associated wing structures. The second of the two photos above gives a reasonably close up of the left wing. You can see the two diagonal truss sections where I removed the upper panel raised section. In preparing this photo I realised I have neglected to paint the feed chutes in a brass colour where they are open to the top and the shell casings should be visible. Let's hope I don't forget to do this before I pop the wing upper panel in place.

Now the wings are basically assembled as far as the standard kit parts are concerned. I know I did say this would be basically OOB, but I can't help adding bits and pieces where I think there is a chance of making the finished model look just that little bit better.
23_Hurricane Mk.I Wings Pre-assembly.JPG 24_Hurricane Mk.I Gun Barrel Installation Prep.JPG
In the LH photo (#23) if you look closely at the leading edge of the wing upper you will note that the four gun muzzle exits are just denoted by four dimples in the wing leading edge. I thought this looked pretty crappy, so I have ordered some brass tubing of an appropriate gauge so I can make the gun barrels and install them into the wing once I drill out the four dimples. To make sure the barrels have somewhere to fix at the back end I have drilled some 0.6mm holes that will accept some brass rod that will be inserted into the brass tube barrels (hoping that makes sense to everyone). That should ensure the barrels are anchored at the breech end and can be glued at the wing leading edge once cut to length and inserted. You're probably thinking "why don't you install the barrels before you join the wing halves?" I did look at doing it that way, but because the barrel outlets fix to the upper panel and the breech ends fix to the lower wing it just gets too hard. Once the wing halves are joined, I should be able to push the barrels into the wing through the leading edge and (with luck) poke the brass rod sections into the holes as prepared. It might work or it might just turn to sh*t. Time will tell. :dontknow:

So I think that just about brings this thread up to date. I've cut some of the pieces for the next few stages from the sprue trees and cleaned them up, but until I start painting and assembling them I wont bother with photos.

Thanks again for comments and advice.
 
Looking very good Grant and good to see you've captured the gun bay detail properly. When you get there, note that the gun muzzles were tucked a few inches into the openings and did not protrude.
Yeah - thanks Andy. I have been pondering just how far back the muzzles will be. At 1/48 a couple of inches is not much, but it will be important that they don't protrude at the very least. I think bit of test fit, resize, test fit, resize, etc. is in my future. The good news is that the metal tubes turned up today (along with other stuff of course - have to make the order above the minimum for free shipping after all...). Cheers.
 

Users who are viewing this thread

Back