Bristol Beaufighter Mk VI.

Ad: This forum contains affiliate links to products on Amazon and eBay. More information in Terms and rules

roman64krawczyk

Airman 1st Class
121
265
Dec 13, 2020
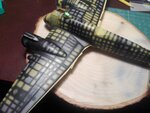
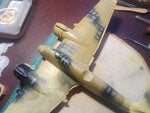
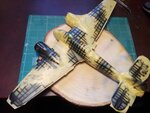
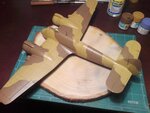
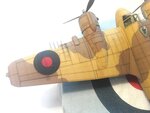
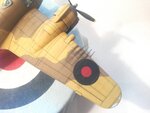
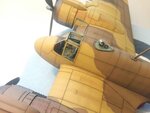
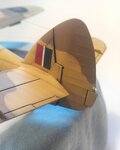
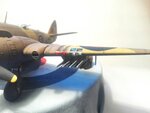
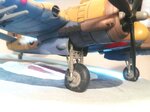
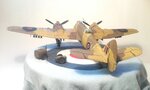
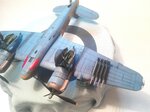
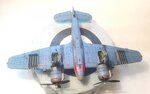
Bristol Beaufighter Mk VI. Tamiya 1:48 +
Eduard photo-etched parts
B 04.jpg
 

Attachments

  • B 05.jpg
    B 05.jpg
    1,015.5 KB · Views: 104
  • B 06.jpg
    B 06.jpg
    1.3 MB · Views: 128
  • B 07.jpg
    B 07.jpg
    930.2 KB · Views: 105
  • B 08.jpg
    B 08.jpg
    578.7 KB · Views: 102
  • B 09.jpg
    B 09.jpg
    1 MB · Views: 117
  • B 010.jpg
    B 010.jpg
    824.1 KB · Views: 126
  • B 011.jpg
    B 011.jpg
    694.5 KB · Views: 142
  • B 02.jpg
    B 02.jpg
    1.1 MB · Views: 144
  • B 03.jpg
    B 03.jpg
    935.4 KB · Views: 138
Last edited:
Ralph Haus Ralph Haus You could always try this Ralph. I just started doing this. Enlarge you paint instructions to the size of your model. I'm thinking with 1:72, you might not have to. Buy some Oracal Oramask sheets. I bought #810. Spray your first colour and let dry. Now cut the sheet just big enough to lay over the first colour of the camo you want to mask on the instruction sheet. #810 is translucent so no problem lining things up. With a sharp blade, trace around the area. Peel it off the instruction sheet and place it on the model. The film isn't as tacky as Tamiya but it doesn't to detack a bit more. I've only done the wings and tail feather this way as I haven't quite figured how to do the bendy parts of the fuselage yet.

tape.jpg

This is one source for Oramask...12" ORAMASK 810 Stencil Film By The Foot

This is how it turned out on the 1:48 Typhoon I just finished

1610847881170.png
 
Ralph Haus Ralph Haus You could always try this Ralph. I just started doing this. Enlarge you paint instructions to the size of your model. I'm thinking with 1:72, you might not have to. Buy some Oracal Oramask sheets. I bought #810. Spray your first colour and let dry. Now cut the sheet just big enough to lay over the first colour of the camo you want to mask on the instruction sheet. #810 is translucent so no problem lining things up. With a sharp blade, trace around the area. Peel it off the instruction sheet and place it on the model. The film isn't as tacky as Tamiya but it doesn't to detack a bit more. I've only done the wings and tail feather this way as I haven't quite figured how to do the bendy parts of the fuselage yet.

This is one source for Oramask...12" ORAMASK 810 Stencil Film By The Foot

This is how it turned out on the 1:48 Typhoon I just finished

I did do the scanning and re-sizing when doing my IL-2. But I just used the high end printer paper. Worked kind of OK, providing enough of a mask to achieve a reasonable pattern. The spray 'leakage', while there, was acceptable. Nothing like the results that Roman has achieved though. I did a search for the suggested Oramask 810. I get hits on Amazon for Oramask 813(blue opaque?) but no 810. I can find the 810 (12"x36") in Canada, $5.00 (3.95 US), but the shipping is $7.95 US. Ouch! I may start futzing with cutting shapes in tape as an experiment. Licking my fingers as I go. Thin tape is an option but some of the curves that one is able to achieve with cutouts is sometimes not possible even with 2mm width tape?

Thanks for the get back.

As an aside. I have not been to the 'Your Completed Kits' in some time (that's where I picked up on this), but WOW, there are some very talented new members! Makes me start to re-think what category I will enter in in the GB 49? I hope that these (appear to be) younger joiners will continue to be active and from what I can see a great resource for ideas and suggestions.
 
Impressive. You cut the 'squiggles' onto the tape and then applied? Shurly you did not cut tape after being applied? How do you keep it from sticking to your fingers?? That's my biggest challange when trying to apply, carefully, tape. I use Tamiya. Maybe using the wrong brand?
Hello Ralf. fubar57 method is very good. I use this one. Good luck and best regards.
 

Users who are viewing this thread

Back