Missing Starboard Trim Tab

Ad: This forum contains affiliate links to products on Amazon and eBay. More information in Terms and rules

prem895

Staff Sergeant
1,172
55
Oct 7, 2012
Toronto/Beijing
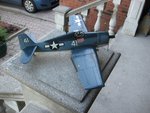
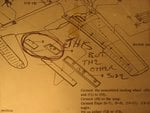
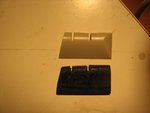
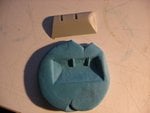
I am building a Hase 1/32 f6f-5 and from running up and down the stairs from my assembly area to my paint room I have managed to lose the starboard side trim tab. Does anyone have one or can someone make one for me. My skill level is just not good enough to build one from scratch. Otherwise it came out ok to me. Will post picks of it at my other tread on the 1st Hellcat I built. The 1st one I did in overall deep sea blue. This one I did in the Tri colour scheme. I would totally appreciate any help. I tried to contact Hase,but you know how that turned out...Zero reply. Gary:mad:
 
I think it is a trim tab. The little piece missing on the right wing
 

Attachments

  • hellcat and mig 005.JPG
    hellcat and mig 005.JPG
    337.1 KB · Views: 59
  • 003.JPG
    003.JPG
    217.1 KB · Views: 63
This is the inner flap but not the trim tab. Trim tabs are these small plates at rudders, elevators and ailerons usually. I hope there can be found somebody who can help. However if I were you I would measure the port side flap then reverse its shape and make it from scratch. With the scale I shouldn't be difficult to prefabricate.
 
Hi Air Marshall, I would like to thank you for your help,but I think I have found the solution to this flap business. I was assembling a bbq at work the other day and I noticed some cardboard packaging that reminded me of the lost part because of the rounded edge on it and I thought this may be the answer. This is what I came up with so far. It looks a bit rough,but I am still working with it. I did a test fit and when it is all painted it will be hard to even notice The flap in the picture is one from one of my other kit.
 

Attachments

  • 001.JPG
    001.JPG
    148 KB · Views: 49
  • 002.JPG
    002.JPG
    164.6 KB · Views: 51
I see. Glad you got the problem sorted out. However using of the cardboard isn't too good idea. Especially you have the flap pieces from another kit. I would use some of plasticine and stamp these two parts in that. Then I would spill over the mould with some of epoxy. Whne hardened some of sanding on flat surface with sandpaper and both pieces would be ready to put together with either CA or the same epoxy you moulded them.. Estimated time of having the flap ready fully depending on the epoxy... about 30min.
 
Yep.. it should. But check if stamped part has a smooth surfaces in there. The plasticine gives it if the stencil is wet and cold.
 
Yes it will. But it would be better if the mix wasn't too thick. It should be thin rather.
 
Last edited:
thats a brill idea Wojtek,i think i'm going to have a go scratch building something with this idea after practicing 1st
 
Glad you like it Bob. This is a very quick way for making small pieces. Of course it is possible to make bigger parts too.
 
Well,it's of to the store for my epoxy. Thanks Air Marshall, This is kinda fun. Got to get me one of thoses new 3D printers:lol:
 

Attachments

  • 003.JPG
    003.JPG
    187.3 KB · Views: 45
Looking good. You have grasped it well. However try to make the stamp colder or damp. The mould seems to be of a little bit rough sourfaces because the stamp stuck to the blue-tack at a few areas. Also it is fine to press the stamp into the block plasticine ( blue tack ) with something flat. Usually I use a piece of flat thick wooden board. Oh .. and the next tip .... it is better to shape the plasticine block with the flat thing firstly. I mean , put the piece of the plasticine of a flat surface. Then press it from the top with something flat ( it may be a plastic ruler e.g... ). It'll make the top surface flat. Then you can stamp the piece you need pressing it into the plasticine with the flat board. In the way you will get nice non-misshapen edges of the mould.
 
Yes that's it. However you could attach a small "wall" made of the blue tack around the mould and apply some more of the epoxy. The main reason are these bubbles. If the epoxy is "fresh" you may put the mould into a foil bag and suck off the air from the bag with a vacuum cleaner. It should remove these bubbles as well.
 
Last edited:
It's OK. If these are inside of the piece it can be. Sometimes a few of them stay at the outer surface making it looking like a cheese and have to be spackle with a putty and sanded in order to get a nice smooth surface of the detail. Any pic here?
 
Last edited:

Users who are viewing this thread

Back