
- Thread starter
- #21

Grant Barr
Senior Airman
So much for taking a couple of weeks off from this build. Here I am just over 12 months later having recovered from serious illness and a 2,000km move north in preparation for my retirement (provided current world events stop ruining my retirement investment fund...  ).
).
The good news is that I am almost recovered from my poor health and am happily living where the temperature in winter rarely drops below 12C overnight across winter. Time to get back to the Lysander - which I can confirm survived the trip unscathed.
The next steps were to complete the cockpit and button up the fuselage to enclose the cockpit assembly. The photos below show the completed cockpit assembly, although I note that I must have taken these shots before I added a whole bunch of cables and wires out the back of IP. I did this as I discovered when test fitting that you can see down behind the IP, although how much you can actually see with the windscreen in place is debatable.
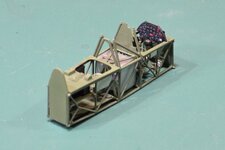
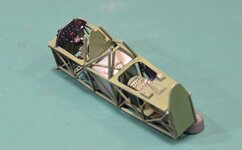
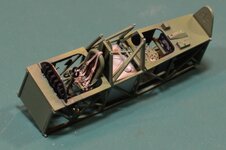
I'm happy with the way the cockpit turned out, it looks busy and well "used".
The next step was to fit this into the fuselage and seal the two halves together. This is where it went a little bit south. In the following folders you can see where the cockpit edge panel on the port side is a whisker below the edge of the cockpit.
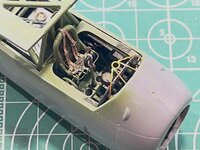
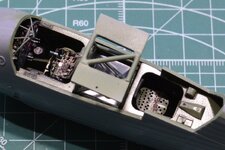
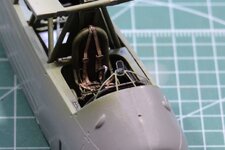
Unfortunately, the kit does not have positive location points with which to "lock in" the cockpit assembly. I was too slow to realise the LHS of the assembly had dropped below the edge and had dried into a position nearly 1mm below the edge of the cockpit frame. Much swearing, poking and pushing resulted; but I did manage to get the frame back up to less than 0.5mm below the edge. Not perfect but it will have to do.
The photos also illustrate the gunsight mount and fitting of the gunsight itself. This was super fiddly, but with a bit of patience I managed to get both the PE framework and the clear plastic for the sight glass in place. In hindsight I think it might have been better to mount the framework on one side of the fuselage before joining the two halves together – maybe. That method might have proved just as challenging as the way I did it?
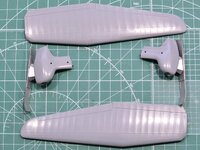
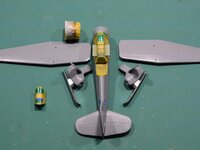
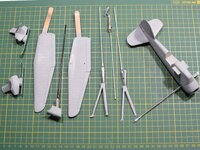
Next came some clean up work on the undercarriage spats. As usual I was not happy with the thickness of the plastic edges to the wheel areas, so I hacked away at thinning these down. Then I proceeded to put together the beautifully molded resin skis and to fit the very fiddly snow deflectors around the undercarriage oleo legs. Not 100% happy with how this looks but it is so fragile I don't want to touch it any further. You may also note that I elected to add some brass rod as stronger anchor points for the oleo legs – I had little confidence in just bonding the resin to the styrene via CA glue with no "key" to lock it all in place.
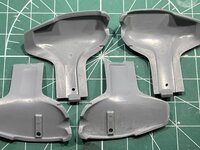
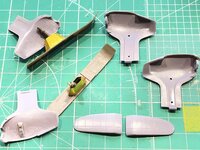
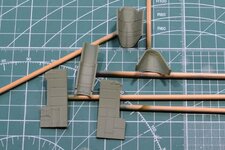
The next major task was to mask up the inside of the cockpit glazing in preparation for a coat of interior green. This took an absolute age to do, but I am hoping it will all be worthwhile at the end.
I have progressed further but will save that for an update in the coming week or so.
It's nice to get back to the workbench and feel like I am doing something constructive - if for no other reason than it makes me happy. As always, thanks to anyone dropping by and I'm looking forward to posting the next update soon. Cheers!
).The good news is that I am almost recovered from my poor health and am happily living where the temperature in winter rarely drops below 12C overnight across winter. Time to get back to the Lysander - which I can confirm survived the trip unscathed.
The next steps were to complete the cockpit and button up the fuselage to enclose the cockpit assembly. The photos below show the completed cockpit assembly, although I note that I must have taken these shots before I added a whole bunch of cables and wires out the back of IP. I did this as I discovered when test fitting that you can see down behind the IP, although how much you can actually see with the windscreen in place is debatable.
I'm happy with the way the cockpit turned out, it looks busy and well "used".
The next step was to fit this into the fuselage and seal the two halves together. This is where it went a little bit south. In the following folders you can see where the cockpit edge panel on the port side is a whisker below the edge of the cockpit.
Unfortunately, the kit does not have positive location points with which to "lock in" the cockpit assembly. I was too slow to realise the LHS of the assembly had dropped below the edge and had dried into a position nearly 1mm below the edge of the cockpit frame. Much swearing, poking and pushing resulted; but I did manage to get the frame back up to less than 0.5mm below the edge. Not perfect but it will have to do.
The photos also illustrate the gunsight mount and fitting of the gunsight itself. This was super fiddly, but with a bit of patience I managed to get both the PE framework and the clear plastic for the sight glass in place. In hindsight I think it might have been better to mount the framework on one side of the fuselage before joining the two halves together – maybe. That method might have proved just as challenging as the way I did it?
Next came some clean up work on the undercarriage spats. As usual I was not happy with the thickness of the plastic edges to the wheel areas, so I hacked away at thinning these down. Then I proceeded to put together the beautifully molded resin skis and to fit the very fiddly snow deflectors around the undercarriage oleo legs. Not 100% happy with how this looks but it is so fragile I don't want to touch it any further. You may also note that I elected to add some brass rod as stronger anchor points for the oleo legs – I had little confidence in just bonding the resin to the styrene via CA glue with no "key" to lock it all in place.
The next major task was to mask up the inside of the cockpit glazing in preparation for a coat of interior green. This took an absolute age to do, but I am hoping it will all be worthwhile at the end.
I have progressed further but will save that for an update in the coming week or so.
It's nice to get back to the workbench and feel like I am doing something constructive - if for no other reason than it makes me happy. As always, thanks to anyone dropping by and I'm looking forward to posting the next update soon. Cheers!


 .
.


