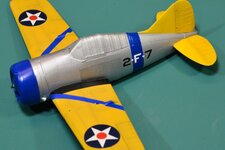
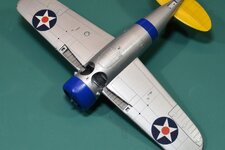
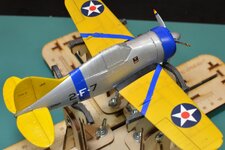
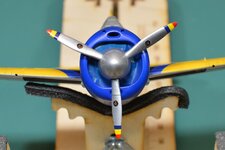
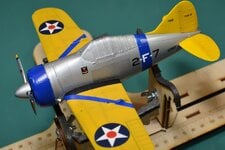
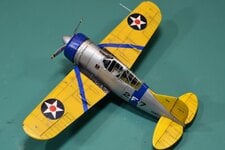
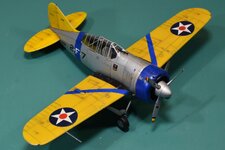
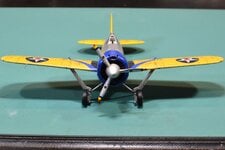
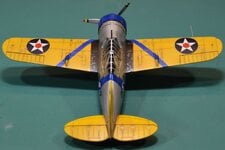
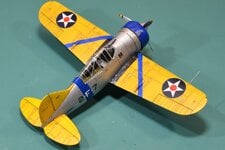
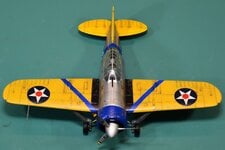
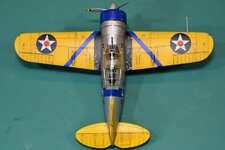
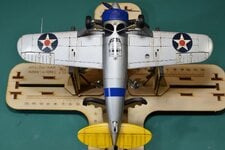
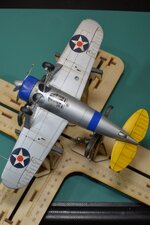
1/48 Tamiya Brewster F2A-2 Buffalo

Ad: This forum contains affiliate links to products on Amazon and eBay. More information in Terms and rules

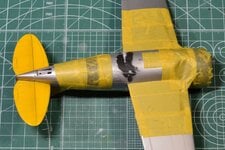
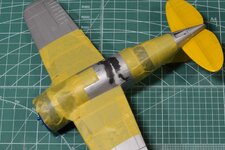
Well - had small disaster after my last post on this thread. I had hastily put some blue down on the wings, fuselage stripe and engine cowl and then sealed it all in with a clear coat. I wanted the clear to dry as quickly and as hard as possible so being a hot day, I left the model in the afternoon sun out on the garden furniture. This happened to be a very hot day, around 36C and that tends to make dust devils form. Unfortunately the Buffalo thought it was a "real plane" and tried to fly - straight off the outdoor table and onto the concrete path. Result - a separate fuselage and wing section...

70_F2FA Reattach Wings Underside.JPG 71_F2FA Reattach Wings RHS Underside.JPG

These two shots are after I had finished swearing, left it a couple of days (only to avoid the possibility of throwing the remains at the wall) and then went about reattaching the wings and fuselage. To avoid having to refinish the whole aircraft again I decided I would try to use the panel lines as demarcation to limit the scope of work. It kind of worked but there is a slight difference in finish from original to rework - I'm just going to say it represents a field repair!!!!

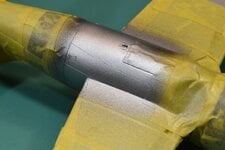
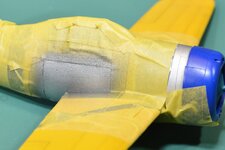
72_F2FA Respray Wings LHS Underside.JPG 73_F2FA Respray Wings RHS Fuselage Section.JPG

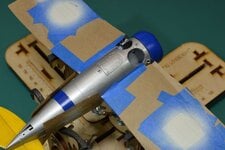
The next couple of shots are after undercoat and the first layer of silver. It looks a bit rough in these shots and the panel lines have all but disappeared, but I did fix these with later coats of silver and it looks somewhat better than this. You can also see the blue on the engine cowl - I do like how this turned out, its a very pretty blue...

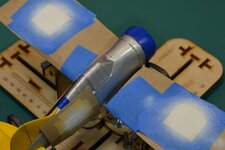
74_F2FA White Insignia & Code Letters RHS.JPG 75_F2FA White Insignia Underside.JPG 76_F2FA White Code Letter RHS.JPG

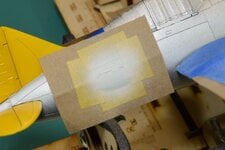
Finally, once I got the repairs to a point I was comfortable with the quality, I set about masking up for the wing decals and the fuselage code letters. As I noted in one of the first posts the decals are pretty much shot, full of cracks and badly stained in places. I measured everything up and cut some masks from Frisket Film. The stars and circles on the wings were reasonably easy to plot out and cut, but the letters represented a bit more of a challenge.

I had a copy of the correct font style as a Windows font file so I spent quite a bit of time with scaling and kerning on the computer to get the letters right. Shape and size wise they are reasonably good, what is not quite right is the spacing. I could have cut the letters/numbers and put them into Adobe or PhotoScape to get it closer, but to be honest I lost patience with it and just printed (in reverse of course) onto the Frisket backing paper so I could cut them out with a nice sharp new blade. The third of the shots above shows the -F- in the middle of the code string. The leading/trailing characters will be black, so they are waiting on the white to dry so they can be uncovered as the white gets covered.

Next job is to place the star masks into the circles and put down some Insignia Blue. Then the black letters I think, followed by the red dots in the middle of the stars. Hoping to get some further progress over Easter as I have done my last Triathlon race for the season and my training regime has backed right off for a couple of weeks (hooray!!!).

Anyway - thanks for looking in. Comments or reactions always welcome.
 
"Come fly with me, come fly....................." Bit of a sad tail Grant but glad it was not a total disaster. When I was in Saudi I used to land sail and we would get quite a kick out of entering one of the huge sand devils and for the wind and being kicked out at about 100k. Most exhilarating.

Oh....................your other bits are looking good as well. :thumbright: :D
Sounds like a hoot Vic. I'd like to give that a try one day!
 
"Come fly with me, come fly....................." Bit of a sad tail Grant but glad it was not a total disaster. When I was in Saudi I used to land sail and we would get quite a kick out of entering one of the huge sand devils and for the wind and being kicked out at about 100k. Most exhilarating.

Oh....................your other bits are looking good as well. :thumbright: :D

Used to do that on the old airfield at Bassingbourn. It's great fun. Nothing like scooting along at 60mph with your bum about 1.5 inches off the gtround...a true feeling of speed!
 
There was a difference in length between the F2A-1 (sent to Finland) and the later models. Has anyone checked to see which version that kit really represents?
Nope...

Probably a bit late now to correct if wrong... :laughing6:

I'm sure someone will have done the homework on that question on any of the many forums kicking around - maybe buffnut453 buffnut453 might know?

Thanks for the question though!
 
The Finnish Brewsters were repurposed F2A-1s which did have a longer nose than the F2A-2 represented in the Tamiya kit, as well as removal of arrestor gear and other nautical fixtures (e.g. buoyancy aids, life raft etc). In addition, the cowling is an entirely different shape between the two variants. The -1 has slightly raised fairings for the machine guns and air scoops whereas the -2 appears to have a slightly larger cowling all round, which enabled the scoops and machine guns to be fully enclosed within a consistently-curved cowling.
 
Thanks buffnut453 buffnut453 for the answer to M MIflyer 's question - at least it confirms this is indeed an F2A-2 and is consistent with some reference photos I used.

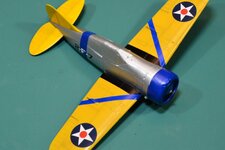
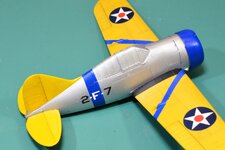
Back to the kit - I have now completed the national insignia and the code letters. Lots of masking and lots of paint changes in the airbrush, photos below:

77_F2FA Insignia Top RHS.JPG 78_F2FA Code Letters RHS.JPG 79_F2FA Code Letters LHS.JPG 80_F2FA Insignia Underside.JPG

I am really pleased with how the stars turned out. A couple of them are not quite perfectly centred, but you have to look pretty hard to see it. I had to do the white a couple of times as I started out with a stark white and realised it should have been Insignia White, which I corrected. I had a couple of places that needed very tiny touch-ups but overall they turned out way better than I expected. Similarly, with the code letters they painted up quite well, but I will need to do some more touch-up on the black lettering as I didn't remove these as carefully as I should.

Before putting on another clear coat I took the opportunity to add the smaller decals that I could salvage from the sheet. These are mostly on the tail and rear fuselage with the squadron badge and prop placards the only others. It's hard to see on the photos, but the tiny bit of carrier film I had leave around the edges has gone slightly milky, despite trying to wash out the old adhesive with MicroSol/Set. Not ideal, but it's pretty small and given the condition of the decals I'm surprised that was the worst thing to happen.

81_F2FA Decals RHS.JPG 82_F2FA Decals Prop.JPG 83_F2FA Decals LHS.JPG

I hope to spend some time today on the undercarriage and other "sticky-outy" bits while I wait for another clear coat to dry and harden. If you look at shots of the LHS of the fuselage, you can easily see where I repainted the panel after having to reattach the wings. Like I said - it's a field repair!!! Maybe the clear coat will help blend it in a bit more - dunno...

Thanks to everyone who looks in. Getting close to finishing now!
 
OK - so after a good bit of fluffing around over Easter, I've managed to get the Buffalo pretty much done!

84_F2FA Finished Top Rear LHS.JPG 85_F2FA Finished Top Front RHS.JPG 86_F2FA Finished Front.JPG
87_F2FA Finished Top Rear.JPG 88_F2FA Finished Top Rear RHS.JPG 89_F2FA Finished Top Front.JPG
90_F2FA Finished Top.JPG 91_F2FA Finished Bottom.JPG 92_F2FA Finished Bottom RHS.JPG

I was in two minds on how to best represent this aircraft. I had initially intended for this to be a clean, almost new aircraft but the date on the box for this aircraft in this squadron indicated it had probably seen a couple of years service by 1942. As such, I decided to make it look quite well used, but not necessarily abused. I went for lots of ingrained dirt and oil stains - the usual signs that an aircraft has done quite a lot of hours in all sorts of weather. I am happy with the weathering - I like the way that oil paints can be used for spot staining or even for dot filtering to vary the panel colours underneath, it's quite a lot of fun to experiment with (if you don't like it then clean it off with some clear spirit and go again!).

I think the bit I need to practice more is the chipping. I decided early on in this build that I wanted to experiment with using a bit of filter foam and see what sort of chipping effect I could get. It kind of worked, but does not really stand close up scrutiny - an area where I need to play more to see what gives the best result with this technique. Might have to get out an old test mule kit and try different foams and paint consistencies to see what works. A bit more research on how panels tend to show a chipping effect would probably help too! :rolleyes:

There are two 100lb(?) bombs that I have half prepared to fit before completely calling this one. I am struggling to get them finished - I just can't get interested in the ordinance that most kits come with. I did again decide early on that I would fit the bombs to this aircraft so with luck I will finish them in the next day or two and post some final underside photos with them fitted.

Thanks again to everyone for dropping by to see my ramblings... :toothy5:
 

Users who are viewing this thread

Back