Admiral Beez
Major
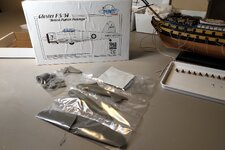
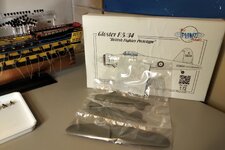
After some contemplation of the high ¥8,207 (CAD $84) delivered cost (pus 13% import VAT) from HLJ.com - The Worlds Largest Online Hobby, Toy and Figure Shop I decided to go ahead and order Planet Models 1:72 resin-cast Gloster F5/34.

My goal is to make it a FAA fighter to serve alongside the Blackburn Skua and Fairey Swordfish on HMS Ark Royal. I'm assuming the Gloster F5, having first flown in Dec 1936, enters fleet service around the same time as the Skua (first flight two months later in Feb 1937).
Of course in addition to a hook we need folding wings; so this entails two essentials for cutting resin, first and foremost a ventilator mask (here's mine RANKSING 6200) as resin dust in the lungs can cause Isocyanate asthma - an uncurable lung condition caused by inhaling the dust. I also use this ventilator when I am spray priming my models, you can see my latest project underway here HMS Spartiate by Admiral Beez. Second, you need a very good saw, here's mine ZONA
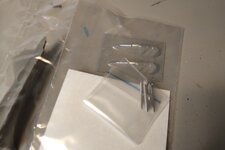
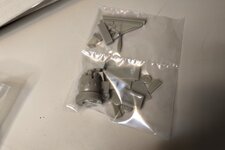
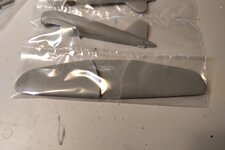
The kit is pretty basic, with not a lot of parts. see attached pics. While I'd like to think the FAA would have demanded that the protruding undercarriage be revised for a flush surface when retracted, amending this on the model is beyond my capability - we'll just assume some boffin at the FAA thought the undercarriage as is would be useful in deck landings during undercarriage failures - same as on the Douglas TBD Devastator. I'll need to decide on where to cut the wing, ensuring that the overall width does not exceed the narrower 22ft wide lift on HMS Ark Royal.

You can see they give you the basic decals from the prototype. I'd like to show the Gloster in 1940-41 colour scheme. So, the question is what decals and colour scheme do I use? I was looking at this decal set for the Hawker Sea Hurricane, 1/72 Hawker Sea Hurricane decals - Décals avions au 1/72
However I'm not a big fan of the FAA's interpretation of the RAF camo scheme.

So, I prefer #4 above, sort of like what the Skua had, courtesy of Blackburn Skua and Roc colour schemes and markings. But I definitely want the "Royal Navy" call out on the aft fuselage like on the Sea Hurricanes above. And definitely not the half black wing underneath. Thoughts?

My goal is to make it a FAA fighter to serve alongside the Blackburn Skua and Fairey Swordfish on HMS Ark Royal. I'm assuming the Gloster F5, having first flown in Dec 1936, enters fleet service around the same time as the Skua (first flight two months later in Feb 1937).
Of course in addition to a hook we need folding wings; so this entails two essentials for cutting resin, first and foremost a ventilator mask (here's mine RANKSING 6200) as resin dust in the lungs can cause Isocyanate asthma - an uncurable lung condition caused by inhaling the dust. I also use this ventilator when I am spray priming my models, you can see my latest project underway here HMS Spartiate by Admiral Beez. Second, you need a very good saw, here's mine ZONA
The kit is pretty basic, with not a lot of parts. see attached pics. While I'd like to think the FAA would have demanded that the protruding undercarriage be revised for a flush surface when retracted, amending this on the model is beyond my capability - we'll just assume some boffin at the FAA thought the undercarriage as is would be useful in deck landings during undercarriage failures - same as on the Douglas TBD Devastator. I'll need to decide on where to cut the wing, ensuring that the overall width does not exceed the narrower 22ft wide lift on HMS Ark Royal.
You can see they give you the basic decals from the prototype. I'd like to show the Gloster in 1940-41 colour scheme. So, the question is what decals and colour scheme do I use? I was looking at this decal set for the Hawker Sea Hurricane, 1/72 Hawker Sea Hurricane decals - Décals avions au 1/72
However I'm not a big fan of the FAA's interpretation of the RAF camo scheme.
So, I prefer #4 above, sort of like what the Skua had, courtesy of Blackburn Skua and Roc colour schemes and markings. But I definitely want the "Royal Navy" call out on the aft fuselage like on the Sea Hurricanes above. And definitely not the half black wing underneath. Thoughts?
Attachments
Last edited:
As an Amazon Associate we earn from qualifying purchases.