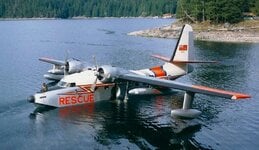
Those are the correct station drawings for the Canadian CSR-110s & Japanese HU-16Bs, they were the last HU-16s built and were for all practical purposes identical in construction with the exception of the Tri-Phibian mode for the Canadian aircraft. About half of the CSR-110s were built to be Tri-Phibians with the addition of a retractable hull ski mounted on the keel and removable outrider stabilizers on the tips of the floats. The earliest CSR-110s had an external hull ski, this was later modified to fit flush with the rest of the keel. It is distinguishable by a notch sometimes seen in profile photos. All of the CSR-110s had the late tip floats with the Tri-Phibian outrigger mounting, this was standard on all HU-16s leaving the factory from the late 1950s. The first image shows the early external keel, all the others show the built in keel.Regarding the tails ...
I found these ..
for A variant ..
View attachment 721872
View attachment 721874
for the B version ...
View attachment 721873
View attachment 721875
View attachment 721876
View attachment 721878
View attachment 721877
the pic source: albmangal
Navigation
Install the app
How to install the app on iOS
Follow along with the video below to see how to install our site as a web app on your home screen.
Note: This feature may not be available in some browsers.
More options
You are using an out of date browser. It may not display this or other websites correctly.
You should upgrade or use an alternative browser.
You should upgrade or use an alternative browser.
Grumman HU-16B Albatross help needed (RCAF CSR-110 Albatross)
- Thread starter Colin L
- Start date
Ad: This forum contains affiliate links to products on Amazon and eBay. More information in Terms and rules
More options
Who Replied?- Thread starter
- #22
Yes. I think we are on the same page, the 70" plug that Grumman added outboard of the nacelle would have the same airfoil shape as the center section, at least on the inboard side. And in all probability the outboard side as well. When the outboard wing section was redesigned to eliminate the slots, that first inboard rib is possibly where the added 'cuff' started, and increased in droop as it progressed to the tip. That would serve the requirement of controlling where the flow separation started.
Thanks, it's clearer now what is required for the conversion!
Thanks, it's clearer now what is required for the conversion!
Exactly. It is as you said. So now having this you may find the shape of all he wing airfoils from the extension to the wing tip. It can be done in a graphic way I use if I need to find an intermediate cross-section between two different shapes.
- Thread starter
- #24
Thanks, those are excellent photos!Those are the correct station drawings for the Canadian CSR-110s & Japanese HU-16Bs, they were the last HU-16s built and were for all practical purposes identical in construction with the exception of the Tri-Phibian mode for the Canadian aircraft. About half of the CSR-110s were built to be Tri-Phibians with the addition of a retractable hull ski mounted on the keel and removable outrider stabilizers on the tips of the floats. The earliest CSR-110s had an external hull ski, this was later modified to fit flush with the rest of the keel. It is distinguishable by a notch sometimes seen in profile photos. All of the CSR-110s had the late tip floats with the Tri-Phibian outrigger mounting, this was standard on all HU-16s leaving the factory from the late 1950s. The first image shows the early external keel, all the others show the built in keel.View attachment 722819View attachment 722820View attachment 722821View attachment 722822
I did not know that all CSR-110's had the ski fitting on the wing floats, something else to add!
Would you know which serial numbers were built without the Tri-Phibian feature (this is complicated enough!)
Thanks,
Colin
I can figure it out after while, there were only 10 airplanes. Got a few chores to do first.Thanks, those are excellent photos!
I did not know that all CSR-110's had the ski fitting on the wing floats, something else to add!
Would you know which serial numbers were built without the Tri-Phibian feature (this is complicated enough!)
Thanks,
Colin
Near as I can figure out 8 of the 10 had the ski. all but 9305 and 9309 had them, BUT adding the ski is no big deal. When it's retracted it hardly shows. You would have to scribe 2 parallel lines to the keel, file a small notch on the keel for the hinge and make a small piece for the retraction strut behind the step. Compared to the rest of the conversion, nothing to it.I can figure it out after while, there were only 10 airplanes. Got a few chores to do first.
- Thread starter
- #28
Those photo's are marvelous, thank you so very much! This 'little' project is all coming into focus now!Near as I can figure out 8 of the 10 had the ski. all but 9305 and 9309 had them, BUT adding the ski is no big deal. When it's retracted it hardly shows. You would have to scribe 2 parallel lines to the keel, file a small notch on the keel for the hinge and make a small piece for the retraction strut behind the step. Compared to the rest of the conversion, nothing to it.View attachment 722898View attachment 722900View attachment 722901
I'm thinking this will be next up, after I finish my 2 Kingfishers. I can hardly wait to start hacking and chopping!
Snautzer01
Marshal
- 46,292
- Mar 26, 2007
Hoping to see the build here.Those photo's are marvelous, thank you so very much! This 'little' project is all coming into focus now!
I'm thinking this will be next up, after I finish my 2 Kingfishers. I can hardly wait to start hacking and chopping!
- Thread starter
- #30
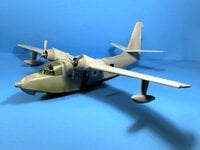
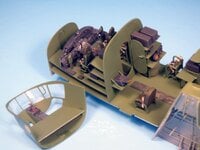
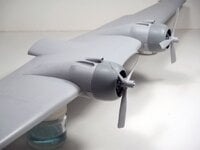
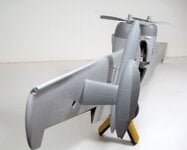
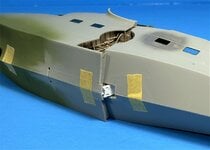
Reviving an old thread, I finally got around to starting the conversion, and what a task it turns out to be. i took each segment as a separate model and worked to completion on it, before starting the next segment. 3 months in and I'm ready to start final assembly. A tape together for weight and balance reveals that it requires 70 grams of weight in the nose, good thing it has metal gear!
Attachments
SaparotRob
Unter Gemeine Geschwader Murmeltier XIII
I started work on a Hasegawa Brewster Buffalo about 16(?) years ago so you're doing better than I am.Reviving an old thread, I finally got around to starting the conversion, and what a task it turns out to be. i took each segment as a separate model and worked to completion on it, before starting the next segment. 3 months in and I'm ready to start final assembly. A tape together for weight and balance reveals that it requires 70 grams of weight in the nose, good thing it has metal gear!
Users who are viewing this thread
Total: 1 (members: 0, guests: 1)
Similar threads
- Replies
- 1
- Views
- 2K

