The real combat history of the P-39 Airacobra in the Pacific (7 Viewers)

Ad: This forum contains affiliate links to products on Amazon and eBay. More information in Terms and rules

Seems you are not crediting losses to AA.

Not my focus here, though there were a few mainly to IJN bombers during the naval battle (Coral Sea). There were not too many losses to AA in this period in the ground based fighting but there was some. AAA was pretty minimal in early-mid 1942 but it did improve especially for the Allies subsequently.

5 x G4M Betty were lost to AAA during an attack on USN task force on 7 May
2 Kates and 4 Vals were lost to AAA during the main Coral Sea raids on 8 May,
2 A6Ms were lost to AAA during a raid on Port Morseby on 17 May
1 G4M may have been lost to AAA during a Port Morseby raid on 18 May (or it may have been the Airacobras)

I didn't see any US losses specifically attributed to AAA in this period but some of the US dive bombers my have been lost to AAA or damaged by AAA fire and then subsequently lost due to fuel starvation etc.
 
There are FAA limits on how long you can stay above 10,000 ft with out supplementary oxygen; I think it is 30 min for aircrew, longer for passengers.

And it depends on the person. Some people take off their mask at 20,000 ft and pass right out. Some do not seem to be affected. I started getting woozy after a while but did not pass out. The thing that struck me was that I could not feel the difference in the air. I had assumed that at 20,000 ft you are at 2.9 PSI rather than 14.7 SPI and you could tell then difference by waving your hand. The crew in the chamber saw me trying to feel air molecules and probably assumed I was out of it.

If you smoke you probably get in trouble fast. On some of the P-51 missions to Germany they did not have enough oxygen to cover the whole mission but Blakeslee told them to tough it out.

The first thing affected, though, is your eyesight. Standard USAF practice is use 100% oxygen from the ground up at night.
I believe the Blakeslee story to be correct, but context was that it was the June 20 Shuttle mission and Blakeslee was Concerned about Oxygen supply so the ingress to R/V with the 355th near Ruhland was flown at 15000 feet to conserve oxygen. IIRC his story he ordered the 4th to go on oxygen near Leipzig and climbed to 25,000 feet - and the rest of the mission.

My father did not so order restricting oxygen when he led the last Shuttle Mission but they did cruise to R/V at 20,000 feet and met the 13th Wing at 10,000 feet north of Torun - which was the supply drop altitude over Warsaw. His log said 7.9hrs for the mission and he had some fuel left when he landed at Piryatin. The final leg back was Foggia-Steeple Morden for 7.5hrs.
 
Remember that the two P-400 recently recovered from a NG jungle strip by the RAAF were "lost" in that they did not make it home but were still intact and landed safely. I don't know how you would count that, since they were just too difficult to repair, but not destroyed.

Interesting item I found is that prior to the Battle of the Coral Sea the IJN main fleet had asked for seaplane recon support but was told by their forces in NG that they could not provide it. And it seems that in that first big furball of a combat mission Buzz Wagner led the P-39's on an attack on Japanese seaplane bases, right before Coral Sea. So perhaps the P-39's actually helped in the Coral Sea battle.
An intact aircraft that force-landed and was never used again has to be counted as destroyed if happened due to combat or lost as "other operational losses" if they just ran out of fuel and were never flown again but were not involved in combat.

If you recover them today and restore them, they will not be in military service, and their use was lost during the war they participated in.
 
Last edited:
Even if they are repaired after a forced landing they can still be considered 'shot down' if not destroyed. I would say that still counts as a kill, as would a forced landing from running out of fuel or suffering a mechanical problem after combat (in most cases).
 
Which probably account for the incredible 33,000 plus BF-109 built. When they were "remanufactured" they were counted as new again.

Interesting point. The Allies did a fair bit of that too, for example at Aboukir in Egypt for the DAF, and in Australia for the South Pacific Air Forces.
 
The Bf109 production figures are being refined by people doing deep dives into the records, when people say German production they often include license production. The reports include deliveries from the repair system separate to new builds. The most persistent story about inflating output is aircraft damaged during air raids on manufacturing plants written off then incorporated into new production. Aircraft in need of overhaul were returned to Germany but think how many Bf109 could be shipped back until the front line of the air war came to Germany and so eligible for remanufacturing with new work numbers, that is the aircraft needed some repair or maintenance work but counted as a new build.

As usual production can be measured at different points, September 1939 to March 1945 monthly reports indicate just under 30,000 Bf109 fighters and 1,300 reconnaissance and school aircraft. Peak of around 1,500 in September/October 1944. The USSBS would add around 1,000 more for the rest of 1939 production. Then comes pre 1939 and April 1945.

The repair/salvage system can have some interesting outcomes, start with aircraft marked repair but then written off or marked write off but repaired, outcomes that occurred as early as 1940 for the RAF in an overloaded system that included civilian workers. The Narrow Margin by Wood and Dempster has before and after photographs of Hurricane P3320, it sustained category B damage. Add aircraft broken down into major sub assemblies for maintenance but not necessarily being reassembled with the same parts.

The fuselage was usually considered the aircraft, if it could be repaired so could the aircraft, even if everything else was replaced. How that applied to aircraft like the P-38 is a good question. The system usually repaired those marked for repairs and wrote off those marked write offs, the RAF had Brought Back on Charge for write offs that were repaired. If you classify remanufactured as the maintenance system building aircraft from spares and write offs it was a sparse occurrence on the allied side at least and there was a formal system to note the work. Where spares were in short supply the opposite was more the case, in for repairs but cannibalised to the point of write off.

RAAF weekly reports on its maintenance system can be found in its Chiefs of Staff reports, Series A11252, readable online.

For an example of an anomaly, there was one RAF Auster I "non contract" aircraft, LB395, assembled from spare parts.
 
You routinely see DAF aircraft in 1943-44 with major components like "new" wings, sometimes still bearing the paint of a previous aircraft they were taken from. As a pilot I'd have to be a little wary of pulling a lot of G on such a plane...

Do you know if the Germans had a major field repair depot somewhere in Eastern Europe like the British did in Aboukir in Egypt (and I think also some spots in India as well)
 
The repair/salvage system can have some interesting outcomes,
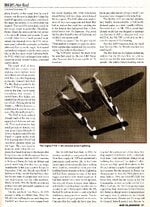
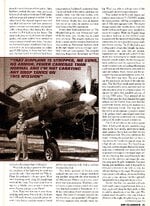
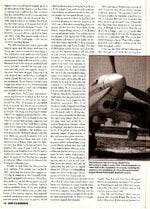
My friend Ward Duncan described what occurred with one P-38E/F-4 recon Lightning in India. Caught on the ground during a Japanese air attack at a forward base, they had to patch it up and send it to the depot to be repaired. There it lingered for some time and when Ward wet to inquire about it they Depot people told him they were tired of working on it and for him to please take it away - they would designate it as destroyed and it would be off the books. So Ward patched it up and flew it to the 9th PRS home base. Two P-38J's had been wrecked when a C-46 careened off the runway during takeoff and Ward had a nice supply of late model parts to use to fix up the battered F-4.
DuncansHotRod-1sm.jpg
 

Attachments

  • DuncansHotRod-8.jpg
    DuncansHotRod-8.jpg
    329.8 KB · Views: 41
  • DuncansHotRod-7sm.jpg
    DuncansHotRod-7sm.jpg
    575.1 KB · Views: 39
  • DuncansHotRod-6sm.jpg
    DuncansHotRod-6sm.jpg
    622.2 KB · Views: 48
  • DuncansHotRod-5sm.jpg
    DuncansHotRod-5sm.jpg
    614.2 KB · Views: 40
  • DuncansHotRod-4sm.jpg
    DuncansHotRod-4sm.jpg
    598.7 KB · Views: 37
  • DuncansHotRod-3sm.jpg
    DuncansHotRod-3sm.jpg
    587.8 KB · Views: 41
  • DuncansHotRod-2sm.jpg
    DuncansHotRod-2sm.jpg
    695.3 KB · Views: 32
New Zealand pilots stationed in the Solomons described how US mechanics would often 'junk' badly damaged or worn airframes- literally push them to treeline at the edge of the field with a bulldozer, while the Kiwis couldn't afford to assume replacements would be on the way and often raided these same wrecks for parts, because they were fixing just about every plane that landed on or near base, no matter how wrecked it was.
 
Ok let me apologize for how long it took to get to this, all I can say is I have been a bit overwhelmed with some tasks that should have been fairly routine.

I mean to go back through South Pacific Air War Vol 3 in more detail and cover some of the engagements that the US P-39 fighters got into, but I never seemed to get around to that (partly because I foolishly lent out the book to someone who took a long time to finish it).

Anyway, I'm just going to skip that and jump ahead to South Pacific Air War Vol 4, which takes up right after the events of Vol 3 and covers the period June-September 1942.

1785704574755.png


As in Volume 3, this book has a helpful summary of all the losses, both combat and 'operational', for both sides during the period covered in the volume. You can then go back and find these entries in the book and remind yourself of any necessary details.

Today I'm just going to go through this summary and hopefully tonight or tomorrow I'll do one more followup on this volume and give a little more detail on some of the engagements.

Allied losses around New Guinea during June -September 1942 consisted of 89 aircraft of all types, broken down as follows:

21 x P-39 or P-400 Airacobra fighters
19 x B-17 Flying Fortresses bomber
4 x B-25 Mitchell bomber
9 x B-26 Marauder bomber
5 x A-24 Banshee (Army version of Douglas SBD) bomber
3 x Lockheed Loadstar
5 x Lockheed Hudson patrol aircraft
11 x P-40E Kittyhawk (these are all RAAF planes)
4 x Bristol Beaufort (also RAAF)
2 x CAC Wirraway (also RAAF)
and 6 x "Other", including DC-2, DC-5, Empire flying boat, F-4 Lightning, a Beaufighter, and a LB-30 Liberator.

Japanese losses during the same period consisted of 37 aircraft of all types, broken down as follows:

21 x A6M2 "Zero" fighters
5 x G4M "Betty" bomber
5 x D3A "Val"
3 x "Rufe" seaplane
1 x G3M "Nell" bomber
1 x "Irving" night fighter
1 x "Babs" recon aircraft

Further more, the fighter losses break down as follows:

Of the 21 P-39s lost, 11 were shot down by Zeros, 6 lost to accidents, 3 shot down by AAA, and 1 was destroyed on the ground in an air raid.
Of the 11 P-40s lost, 5 were shot down by Zeros, 5 lost to accidents, and 1 to small arms fire
Of the 21 A6Ms lost, 4 were shot down by defensive gunners of bombers, 6 were shot down by Airacobras, 3 by RAAF Kittyhawks, 6 to accidents, and 2 to small arms fire

As previously, there were several inconclusive combats and overclaiming was high on both sides.
This time around there were no major navigational blunders by US fighter units so Airacobra losses were a bit lower.

A few more noteworthy points:
  • On 4 July 3 x Airacobras from the 39th FS were ambushed and shot down by Tainan Ku Zeros during a raid on Port Morseby.
  • On 18 July 4 x Tainan Ku Zeros were lost in bad weather during a flight from Lae to Rabaul.
  • On 22 July 2 x Airacrobras from the 41st FS were shot down by Zeros over Buna during a raid.
  • On 11 August, Tainan Ku Zeros ambushed RAAF Kittyhawks of 75 and 76 Sqn near Milne Bay and shot down four of them.
  • On 26 August Airacobras from 80th FS caught Zeros from No 2 Ku and Tainan Ku taking off at Buna and shot down three of them.
  • On 27 Aug RAAF Kittyhawks of 75 and 76 sqn shot down two Zeros and two Vals over Milne Bay when the Tainan Ku was escorting a dive bombing raid. Two more Zeros were lost to ground fire. One Kittyhawk was also shot down by a Zero during the same combat, and another was lost to ground fire.
  • On 1 Sept 3 x D3A "Val" bombers were forced to land on a beach near Milne Bay after running out of fuel on a mission looking for allied ships. The crew were later killed in shootouts with Australian troops.
  • All of the "Rufes" were shot down by B-17s.
  • The Airacobras in action during this period were mostly P-400s, as well as some P-39D and P-39F
  • The Kittyhawks in action in this period (starting in August) were all P-40E Kittyhawks of the RAAF
  • The Zeros in action in this period were all A6M2s of No 2 Ku and Tainan Ku
Allied aircrew suffered 191 fatalities during this period, mostly bomber crews, while Japanese units suffered 46 fatalities.
 
Ok a couple more data points from this time and place.

By this time, the Japanese were doing fewer medium bomber raids on the Allied bases during the daylight, instead they were mostly (with some exceptions) flying raids at night and / or dusk. Nevertheless, they did hit several Allied aircraft on their airfields. They also flew some raids with D3A "Val" dive bombers but they didn't go so well.

The Americans were continuing to have problems with the limited range of the Airacobras, which resulted in medium bombers being shot down due to having to fly unescorted.
Four of the six Zeros shot down by the Airacobras were caught taking off at Buna.

On several occasions however, US B-26s were able to outrun pursuing Zeros by going into high speed shallow dives.

In addition to 16 fighters, the Zeros shot down 13 bombers, as follows, for a total of 29 enemy aircraft destroyed in air combat vs 21 lost:

Hudson (July 22)
2 x B-25 (July 26)
4 x A-24 (July 29)
B-17E (Aug 2)
B-17E (Aug 7)
2 x B-17E (Aug 9)
B-26 (Aug 13)
B-17 (Aug 14)

In addition to 6 Zeros, the Airacobras shot down one additional aircraft (a Nell bomber) for 7 enemy aircraft destroyed in air combat vs 11 lost, plus they destroyed 2 Bettys in a strafing attack:
Nell (Jun 26)
2 x Bettys via strafing (Aug 29)

In addition to 3 Zeroes, the RAAF Kittyhawks shot down three additional aircraft, for a total of 6 enemy aircraft destroyed in the air vs 5 lost
Babs high speed recon plane (Aug 4)
2 x Vals (Aug 27)

On July 3, 13 x Airacobras from the 39th FS were patrolling at 21,000', (well above their critical altitude) and were bounced from above by 20 Tainan Ku Zeros from three Chutais. Two were shot down in the first pass. The Airacobras dived away and fought the Zeros amidst low clouds for some time after, during which one more Airacobra was shot down. One Zero was damaged and had to divert to an alternate airfield. No Zeros were lost.

On July 6 a raid by 21 x Betty bombers against Port Moresby was chased by 9 x Airacobras from the 40th FS who intercepted the Bettys at 21,000 ft. 15 Bettys were damaged but none crashed. One Betty crewman was killed and four injured. The escort of 15 Zeros then attacked, the P-39s fleeing in shallow dives. One P-39 was then shot down by the escort (possibly Saburo Sakai).

On July 22 the Japanese were landing supplies and troops at Buna. US 39th, 40th, 41st and 80th FS (all Airacobras) and 6 B-26s from 2nd and 408th BS were strafing the landing areas and ships. They managed to damage the destroyer Uzuki and caused 16 casualties, and sunk the transport Ayatosan Maru. A Lockheed Hudson flying recon over the area was attacked by six Zeros, and fled the area but was eventually shot down after a fierce dogfight. This was the famous case Saburo Sakai wrote about. Later seven 76 Sqn RAAF Kittyhawks loaded with 500 lb were on a mission to bomb the AA in this area, escorted by eight Airacobras. These encountered the same six Zeros with Saburo Sakai but fled over the mountains and escaped. The RAAF Kittyhawks jettisoned their bombs and engaged the Zeros in a running fight over 50 miles on the way back to Port Morseby. During a running fight the RAAF Kittyhawks one Kittyhawk received a single bullet hole, another had to land on a beach due to running out of fuel (it was later flown out) but there were no losses on either side.

On Aug 11 sixteen RAAF Kittyhawks were climbing through heavy cloud cover when they suddenly ran into six Tainan Ku Zeros almost head on. The Japanese got the better of the confused fight which followed and 4 Kittyhawks were shot down, while 1 Zero was badly damaged and ditched in the sea on the way home.

On 24 August fifteen Zeros from Tainan and 2 Kokutai engaged 26 Kittyhawks from No. 75 and 76 Squadrons at altitude over Milne Bay. Amid cloudy and rainy counditions an extended dogfight took place for some time, spiraling down to sea level, the Zeros expended 5,000 rounds of ordinance. Despite this, there were no losses. Only one Kittyhawk and one Zero were damaged.

On 27 August seven Zeros from Tainan and 2 Kokutai escorted eight Vals from 2 Ku to a raid on Milne Bay. While the Zeros were strafing and the Vals were bombing at low altitude, six Kittyhawks of 75 Sqn led by experienced CO Les Jackson arrived, engaging the Zeros first they shot down two, then two Vals were shot down by the other flight. Two more Zeros were lost to ground fire, two Kittyhawks were also shot down one to ground fire and one to unknown reasons (probably combat with the Zeros or return fire from a Val)


These are some good examples of both the 'conclusive' and 'inconclusive' fighting which was taking place.

It's also worth pointing out that at this point the Japanese pilots were experts while both the American and Australian pilots were relatively inexperienced, which is shown by the large number of accidents they were still suffering in the wretched conditions.

The Japanese were struggling with the US heavy bombers, especially the B-17s, even though these were very early type (E and F). The Japanese fighters shot down 5 B-17s for the loss of 4 Zeros.

The Zeros flying at this point were all A6M2 with only 60 rounds of 20mm ammunition for their cannons, which played a role in outcomes as they often ran out of ammunition. The Japanese records indicate ammunition expended in most combats, interestingly enough. The US and Australian fighters were also having trouble with their guns jamming, though the jams could often (not always) be cleared. They were just starting to use higher boost settings, which definitely saved lives but also resulted in some cases in their running out of fuel in combat.

The USAAF and RAAF pilots were not necessarily engaging in pure 'Boom and Zoom' tactics, rather they were diving away to disengage when they could and then immediately re-engaging, often in long running battles. These were often inconclusive and probably most of the losses were during the initial moments of surprise engagements.
 
Last edited:
Ok so on to the next period, and the next book.

1785978786824.png


This covers fighting in and around New Guinea from Sept - Dec 1942

At this point, the US 49th FG was brought in fresh from their successful though punishing defense of Darwin, still equipped with mainly P-40Es and maybe a handful of P-40Ks. An additional P-39 fighter group (including a few newer P-39Ks), and a handful of new P-38Fs started to trickle in, plus several more bomber units with US A-20As, (very similar) RAAF Bostons, a squadron of RAAF Beauforts, some RAAF Beaufighters, a bomb group of US B-24Ds, and more B-25s (including some newer B-25Ds). C-47s - and I think still at this point some De Havilland Dragon Rapides - are being used to move troops and supplies to different positions in the ground fighting on the Island. And the Aussies had some Wirraways being used for Army cooperation, (and on one famous occasion, as a fighter!)

From the arrival of the 49th FG their P-40 Warhawks and the small numbers of P-38s took over most of the longer ranged escort and fighter sweep missions, while the Airacobras focused on air defense of the air bases and strafing nearby Japanese ground positions for the most part.

On the Japanese side, the Imperial Japanese Navy rotated Tainan Ku and No 2 Ku out, and at various points brought in new units including No 3, No 751, No 251, No 252, and no 582 Ku. These included some of the new A6M3 which had a two speed supercharger, clipped wings, and increased cannon ammunition - but less fuel capacity and shorter range. The Imperial Japanese Army started arriving at the very end of this period, bringing with them Ki-43-I "Oscar" fighters and Army bomber types like the Ki-48 "Lily" and the Ki-21 "Sally". These Oscars were the early type with the two blade propeller and only one 12.7mm gun (sometimes two 7.7mm)

Ground fighting was continuing and this involved a naval component as the Japanese brought in transports and supply ships to supply their isolated ground units in north-eastern New Guinea around Gona and Buna, with ground fighting taking place in the highlands in the center of the country.

Losses were as follows, for the Allies:

115 aircraft including
21 x P-40E "Warhawk" (8 lost to Zeros, 1 to an Oscar, 10 to accidents and mishaps, and 2 to AA)
18 x B-25 "Mitchell" (3 lost to Zeros, 2 to AA, 13 to accidents and mishaps)
15 x B-17 "Fortress" (2 lost to Zeros, 13 to accidents and mishaps)
9 x B-24 "Liberator" (1 lost to Zeros, 8 to accidents and mishaps)
6 x "Airacobra" (all accidents, though 3 of these just disappeared after missions to the Central Highlands and may have been intercepted or shot down by AA)
6 x "Beaufort" (all accidents and mishaps)
6 x C-47 (2 lost to Zeros, 4 to accidents and mishaps)
6 x A-20A (all to accidents, including some apparently due to bomb fuses)
5 x B-26 "Marauder" (all to accidents and mishaps)
5 x Hudson (one to ground fire, 4 to accidents)
4 x Beaufighter (2 to AA, 2 to accidents)
4 x Wirraway (accidents)
3 x RAAF "Bostons" (accidents)
2 x P-38 "Lightning" (both to accidents)
and 5 "Other", (including an O-49A, a Ford Trimotor, an F4 Lightning, a Lockheed Loadstar, and an Anson)

Losses for the Japanese were a total of 51 aircraft, including:

19 x A6M "Zero" (9 to bomber gunners, 5 to P-40s, 2 to Airacobras, 3 to accidents)
7 x D3A "Val" (3 to P-39s, 3 probably to AA, 1 to an accident)
5 x G4M "Betty" (1 to a B-24, 4 to accidents or unknown)
4 x G3M "Nell" (3 to P-40s, 1 to accident)
4 x Ki-43-I "Oscar" (1 to a P-40, 2 to P-38s, 1 to a Wirraway)
2 x A6M2-N "Rufe" seaplane fighters (one blown up on a ship deck by a Hudson, the other from an accident)
10 x "Unknown aircraft" destroyed by bombing.

The Zeros shot down a total of 8 P-40s, 6 bombers, and 2 transports, for a total of 16 real victories against 19 losses in air combat.
The Oscars shot down 1 P-40 and lost 4 in air combat.
The P-40s shot down a total of 5 Zeros, 1 Oscar, and 3 bombers, for a total of 9 victories vs 9 losses in air combat.
The P-39s shot down a total of 2 Zeros and 3 bombers, for a total of 5 victories vs 0 losses in air combat (a superb showing!)
The P-38s shot down a total of 2 Oscars for a total of 2 victories vs 0 losses, also a superb albeit so far small showing.
The Wirraway of course is the stand out winner, with one air to air victory and no losses!

As usual, the biggest threat by far for the Allies especially was weather and appalling conditions. Many more were lost simply to running into a mountain in the fog, getting lost in the clouds and never heard from again, mysterious engine or other mechanical failure, or accidents during takeoff or landing than were lost in air combat. The fact that the Allies had more accidents than the Japanese points to their less thorough training IMO. The Allies were rapidly expanding the number of airfields and finally starting to improve living conditions somewhat, with things like mosquito nets and proper tents and so on starting to arrive.

As in the previous period, most of the air combat losses on both sides were concentrated on a handful of specific incidents, with a lot of inconsequential air combats also taking place (i.e. with no losses on either side). I'll get into some of that tomorrow hopefully.

 
Last edited:
Ok I've been very lax on following up on this yet again, but I've finally got a little time so I'm going to try to do a couple more entries.

This part is to follow up on the last post about the fighting in New Guinea between Sept - Dec 1942, as described in South Pacific Air War Vol 5.

As in the previous periods, most of the air to air fighting involving fighters on both sides took place on a handful of occasions, in this case 6 incidents on 7 days in November and December. Sept and Oct seem to have been a bit of a lull.

Date - IJN Fighter losses / Allied Fighter losses
1 Nov
- 1 x A6M3 Model 32 Zero to a P-40E / 1 x P-40E and 1 x B-25D lost near Lae, 2 x Airacobras disappeared*
22 Nov - 2 x A6M (subtype not indicated) to a P-40E and a P-39 / 4 x P-40E over 'northern Papua", 1 x Airacrobra lost near Buna*,
26 Nov - 1 x A6M to P-40s over Buna / 1 x P-40 lost to AAA & 1 x RAAF Boston lost over Buna**, 2 x C-47s shot down by Zeros at Dobodura
30 Nov - 2 x A6M to P-40s over Buna / 2 x P-40E lost to Zeros over Buna
7 Dec - 1 x A6M and 2 x Val to P-39s over Buna, 3 x G3M2 Nell lost to P-40s near Buna / no Allied losses
26-27 Dec - 1 x Ki-43-I shot down by P-40 near Dobodura, 1 x Ki-43-I shot down by Wirraway, 1 x Ki-43-I and 1 x D3A Val shot down by P-38s over Buna / 1 x P-40E and 1 x Hudson lost to Ki-43-I

* these three Airacobras in November were lost for unknown reasons, might have been navigation or mechanical problem or they may have been shot down.
** this Boston may have been lost due to a munitions problem

The Context
A lot of the fighting in this period centered around ground combat taking place on the Kokoda trail between Australian militia and Japanese Army regulars. This was a steep trail which attempted to pass over the middle of the island and through the jungle highlands terrible heights of the massive Owen Stanley mountains, with the Japanese starting at Buna and hoping to eventually reach Port Morseby. This rather desperate gambit by the JAAF took place after having difficulties attempting the end run around the eastern side of the massive, mountainous island, thwarted by the Allied victories at Coral Sea and Milne Bay.

Both sides were somewhat reorganized in this period. The RAAF Kittyhawk squadrons 75 and 76 RAAF were rotated out, and the now somewhat experienced 49th FG (also flying P-40s, including some improved P-40Ks with the 7th Squadron) was brought in, just at the end of their successful defense of Darwin, and the 39th FS just converted from P-39s to P-38s arrived with their P-38Fs, and additional Airacobra squadrons were brought in, with several new airstrips being hastily built. The Allies also brought in more bombers including more B-17s, some B-24s, B-25s, A-20As, Beaufighters, and some RAAF Bostons and Wirraways for Army co-operation. They also had Hudsons and B-26s in the area.

The Japanese Navy, smarting under slow but steady attrition of about 7-8 fighters per month since early 1942, brought in additional units and reorganized their existing units into new formations (notably Tianan Air Group became 4 Kokutai) and brought in some new A6M3 / Model 32 type Zeros, which had two speed supercharger and more cannon ammunition. More significantly, the Army arrived with 60 x+ Ki-43-I under the 11th Sentai finally arriving starting on December 18, as well as squadrons of Ki-48 and Ki-21 bombers. Some of the Japanese aircraft were based at Lae, some at Rabaul, and some at their new base at Buna.

1788033053045.png


Both sides were making heavy use of their air power to support the ground operations, both tactically near the front lines, and operationally by attacking each other's bases and shipping. The Allies were also moving troops around, and supplying them, with the help of C-47 transport planes (and some other types, including a few Dragon Rapides) by carving our precarious landing fields on some hilltops.

Nov 1
On Nov having detected an alarming build up of shipping and air activity around Buna, the Allies sent a raid of a dozen B-17s from two bombardment squadrons bombed shipping near Buna, damaging the seaplane tender Kamikawa Maru. One B-17 disappeared due to weather. The Japanese had just sent 27 x Zeros from Rabaul to Lae protect a supply convoy to Buna, which triggered more allied raids. On 1 Nov 16 x P-40Es from the 8th FS / 49th FG escorted 11 x B-25s, 14 x A-20s and 6 Beaufighters. There was heavy rain and cloud cover causing 4 of the B-25s to turn back, but the others and A-20s bombed and strafed Lae. Zeros already on the field about to takeoff scrambled and engaged some of the 8th FS P-40s amidst the clouds. One flight of four P-40s was engaged, and for the engagement that followed, I'm going to paste in a pic from the book so you can read it in Claringbould's own words, as I think the details are significant:

1788035524398.png


1788035621521.png


As far as I know, this is the first account of allied fighter pilots outside of China / Burma using a dive to disengage from Japanese fighters and then returning to continue fighting, even when seriously outnumbered. This is an evolution of the energy fighting tactics in this area. If you read accounts from the earlier fighting in New Guinea, Allied pilots were diving away from any unfavorable situation and fleeing long distances before returning to base. They were not repeatedly engaging. This is one of the reasons why the tactic was so controversial early on.

I suspect that what was going on is by Nov 1942 they had the improved fuel which was allowing them to more easily outrun the Japanese fighters at low altitude.

That's going to have to be it for now, I'll finish this up hopefully tomorrow.
 

Users who are viewing this thread

Back