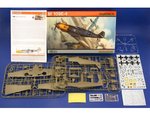
Two vintage 1/32nd scale Bf109E kits reviewed.

Ad: This forum contains affiliate links to products on Amazon and eBay. More information in Terms and rules

Sounds good, and the old Monogram C47 isn't obsolete! It's still a good kit, and a darned site cheaper than the over-priced, inaccurate Trumpeter example! I've been wanting to get one for some time (now under the Revell label), to build as either a WW2 para-dropping kite, or maybe a post war RAF Dakota, in bare metal, silver and white, with the blue cheat line, or a 1950's civilian airliner, or a........
 
One day I'll have to grill you on the inaccuracies of the Trumpeter kit, but for now I have a completely unrelated question that I need an answer for. Actually it's a few different questions. I was going to post a whole seperate thread for this but I have a feeling you're the guy to ask. Here goes...

I'm working on the Revell/Monogram /148th P-61 Black Widow. Yesterday I noticed that the cowling ring on one side is open while the other side is closed. This is because the kit is made to have one engine displayed. Here are my questions: 1) What is the function of the cowling ring? I think I'm calling it by it's right name (?) Is it accurate to show one engine open and the other closed or would this never happen? 2) Assuming that both should be the same, I've decided it would be easier on this kit to close the open cowling ring rather than open the closed one. What's the best way to go about this? Should I cut off and discard the old ring and build a new one out of sheet plastic or should I cut the existing one into a bunch of little pieces and then glue them back together in closed position? I noticed there's an Eduard photoetch set specifically for the exterior of this kit. Do you know if it includes cowling ring parts?

Thanks in advance for your input on this.
 
Basically, the Trumpeter kit of the C47, which I must stress I've only seen photos and reviews of, is quite inaccurate in the shape of the fin, rudder, and extreme tail area. There is even an aftermarket replacement for this. Personally, at four times the price of the Revell/Monogram kit, I don't think it's worth the money, however detailed the interior is (not much can be seen anyway in the cockpit, and the main hold wasn't exactly chock-full of detail on the real thing), or however 'nice' the exterior surface detail - this will be mainly hidden by paint anyway. I think I'd much prefer two or three of the R/M kit, which looks good enough to me, than one Trumpeter.
Anyway, on to the P61. If you men the extreme front of the cowling, where it surronds the engine itself, then this is mainly a streamline fairting, although it would also enclose theexhaust collector 'ring'. I haven't actually seen this kit close -up, so I'm not that sure what's what, but I would think it's easier having one engine bay open, as this would often be normal if only one engine needed attention, or the other engine had been 'finished' and closed up. If you want to have both cowlings closed, then the kit's cowling panels should be designed to be made to fit in the closed position also, although they may need a little filler to give a more realistic appearance when closed.
As for aftermarket detail parts, I wouldn't know without searching the net for them, but both 'Maglar' and' Night Fighter Nut' have recently built this kit, so they might be able to advise you.
 
I've found a few names for these bits. I'm talking about the cooling or radiator fins or flaps that are on the rear of the cowling. They can be opened to allow a greater air flow over the air cooled engines or closed to improve the streamlining. I saw a very good modeler who built this kit and left the one side open and the other closed, but his was on the ground while mine will be in flight. I would think it's possible that one side could be closed and the other open but it doesn't look quite right. However it might be way too much trouble to change. I saw that Meteor Productions, also known as Cutting Edge, makes replacement engine cowlings and boom mounts which I might have to go and buy.
 
Ah! If you mean the cowling gills, the series of small, virtually square 'flaps' which surround the rear of the main cowling, then these would either be open or closed on both engines normally, depending on engine running requirements. These cooling gills, depending on the aircraft type and operating system, are operated either manually, by a lever in the cockpit, or autimatically by the aircraft systems, and are set to open them in (generally) three stages, as required by engine running temperature, exhaust gas temperature, fuel mixture setting, outside temperature, and altitude. The three stages are normally: closed, fully open, and a step in between, depending on the conditions mentioned above. A study of as many reference pics as possible should give an idea of what they look like in flight, although in normal operating conditions, they would probably be closed.
 
Yes, that's it - cowling gills. I would think in the P-61 that they're operated manually. I would also think it possible, but unlikely, that the 2 engines' cowling gills could be set differently. I sure hope I'm right about that as it will make this model a bit easier to do nothing with those things. I searched high and low for the replacement set without luck and I'm reluctant to go through all the work to close those open gills.
 
It would be easier to open the closed ones! This can be done by sawing through the engraved, or raised lines for each gill, then sand the insides thinner. The gills can then be gently bent upwards. A better way is to make a pattern from the kit part, and cut-off the gills, and replace them with individual ones made from thin plastic card, or even paper card, such as you'd find on greetings cards. It's not as hard as it sounds and, if you haven't done any before, a good introduction to modifications and scratch-building!
 
Even though that the review were most excellent, I want to try Eduards 1/32 E-4 and do that *Yellow 13'. Hope to see more reviews old boy! :thumbright:

AeroScale :: Eduard 1/32 BF-109E-4 'Von Werra'
 

Attachments

  • 3003%20BF%20109E-4%201-32.jpg
    3003%20BF%20109E-4%201-32.jpg
    81.7 KB · Views: 66
I have to admit, I will be getting an Eduard E4 at some time. The reviews normally point out that the canopy is wrong, although I belive this has now been corrected, but in the pics I've seen, it looked OK. Of course, there is an aftermarket canopy from Squadron (one piece though) and a really excellent, detailed PE and clear multi-part canopy from that Briznan bloke (or however it's spelled!).
But for now, the inaccurate Hasegawa (ex-Frog) and the chunky but good Matchbox kits will do. I just hope Revell release the ex-Matchbox kit at some point in the future, as I would like a series of '109E's in 1/32nd scale, and it's a cheaper way to do it!!
I'll be doing both the Hasegawa and Matchbox kits for the BoB GB, and possibly a 1/32nd scale Hurricane, if PCM have released the later Mk1 by then (otherwise it's a case of altering the wing detail on their early version).
 
The problem with the Monogram kit (sorry, it will always be Monogram to me - I built all their stuff back in the '70s when I was a lad) is that to open the closed gills you have to provide a whole new bulkhead wall. That is, the side with the open gills has a seperate cowling piece while the side with the closed gills is molded into the boom, in addition to having open panels as that's the side designed to have the engine showing. That's a rather awkward description so I hope it makes sense.

I like your idea of using paper card as a scratchbuilding material. I also have to say that I've already closed the gear doors and I'm planning on grinding off the screen area between the cowling gills and the gear doors and replacing it with actual brass screen I have from my days as an armor modeler. But it seems to me there's no way to avoid doing some scratchbuilding in this hobby of ours as any time you lose a little piece you have to build a new one. And who among us never loses a little "fiddly bit" once in a while?

One more unrelated question, oh guru: Last night I attached the tailwheel onto my Tamyia 1/48th Wildcat and then noticed that it's not straight. I imediately came up with the excuse that tail wheels must have been able to turn around 360 degrees, right? I mean, they wouldn't be fixed in the straight position because it would impede turning while taxiing. Am I correct or do I have to break the thing off and reattach it?
 
Last edited:
Most aircraft have a castoring tailwheel, which can be locked for take-off/landing, often by moving the 'stick' forward when on the ground, or by a separate lock. As for that aircraft, it's one I don't comment on !(see numerous comical posts across the forum!). But, yes, I guess it would be acceptable.
 
"Castoring" - another word I learned to say!

Now for yet another question: Last night I attached the radio wire on that same aircraft (the Tamyia Wildcat). It came out all right, in part thanks to EZ Line, which is similar to lycra in that it can stretch easily. I wonder what the best way is to attach these things. Super glue with accelerator works well for me, but how do you avoid the blob of glue look? Do you drill a tiny hole to accept the line? I'm just wondering how to go from doing an acceptable job of it to actually doing a good job. Any thoughts?
 
Very strange! I posted a reply here, and now it's not here!
Anyway, I normally use either stretched sprue or 'invisible' mending thread, as I want the line to remain taught, without any stretch. Depending on the set-up of the original aircraft, where possible a small hole or groove will be drilled into the fin, and this end of the antenna 'wire' attached first, using a very small drop of Superglue, normally applied by dipping the 'wire' into a small spot of the glue poured onto paper, or by applying a tiny drop to the hole with a pin or cocktail stick.
Once the 'wire' is attached, it is held for a few seconds until set, then left for around ten minutes to fully set, before pulling taught and fixing to the antenna mast or other attachment point. On a mast, a very small drop of Superglue is applied, again by pin, and the line pressed against it, pulling tight, and wrapping back around the mast, holding it taught until set, just a few seconds. After another ten minutes, any excess line is snipped-off with nail clippers, and any remining small piece 'shaved' off with a new scalpel blade.
 
Last edited:

Users who are viewing this thread

Back