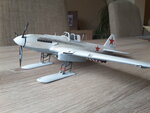
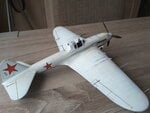
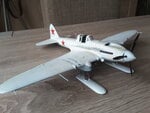
Academy 1/48 IL-2 Stormovik "Ski equipped early version

Ad: This forum contains affiliate links to products on Amazon and eBay. More information in Terms and rules

Ron Pearcy

Airman 1st Class
286
118
Feb 24, 2018
Market Harborough,UK
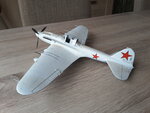
I've built this and the Tamiya version when I got back into modelling a couple of years ago. Both kits are excellent with nothing difficult in the build. The skis on this version are tricky because it's not clear from the instructions where the struts actually fit. Internet research solved this issue. The whitewash finish gave me confidence to try a bit of weathering. I used brown pastels to create muddy staining on the wings and black for the exhaust.
Please constructively criticise.
20200503_182459.jpg20200503_182448.jpg
 

Attachments

  • 20200503_182523.jpg
    20200503_182523.jpg
    658.9 KB · Views: 157
  • 20200503_182535.jpg
    20200503_182535.jpg
    587.8 KB · Views: 146
Looks very good to me. The only quibble I would have is the thickness of the radio aerial. These aerials were quite thin in real life and very hard to see from moderate distances so should be quite thin for true scale effect. I use "nylon invisible mending thread" that you can get from sewing or fabric stores, available in either clear or with a smoke finish. The below pictures are mine.

IMG_0588 reduced.jpg
IMG_0589 reduced.jpg

18022609.jpg
 
Nicely done.
The invisible thread works very well, and is only around £1 or less for a bobbin, which is normally around 100 meters, so lasts for years.
 
Good looking aircraft Ron. I think I stalled out on mine somewhere around the landing gear. I'll have to review. For what its worth, I use Uschi van der Rosten Super-fine thread for my aerials.
 
Also worth mentioning, since you asked, is that some of the seams are visible (one example below) and these are things that prevent good builds from becoming great builds.

Capture.JPG


It all depends on how meticulous you are and to what degree you want to strive for perfection. I tend to spend a lot of time on visible seams before applying the finish colours. A good surface primer like the lacquer based one below, can be applied thickly with a small brush over these small imperfections and then sanded back using wet sandpaper or pads to eliminate these. I often need to go over these areas more than once.

q=tbn%3AANd9GcR1E--WIUHOxNwlZIcfldcsUfeBDJW2vCc3bX_ANDJe9AnWJTZJSIBF_PN-I_R3hVQXdPgw7ts&usqp=CAc.jpg
 

Users who are viewing this thread

Back