Airbrush Questions. (1 Viewer)

Ad: This forum contains affiliate links to products on Amazon and eBay. More information in Terms and rules

B-17engineer

Colonel
14,949
65
Dec 9, 2007
Revis Island.
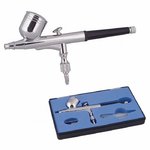
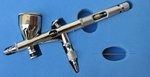
How much does a good airbrush cost?

If I am doing a 1/72 Opel Blitz do you recommend paintbrush or airbrush?

Thanks:lol:
 
Ad.1. I think it doesn't matter how much an airbrush costs and how it is good if your hands shiver.:lol: In the case you can buy a very expensive golden one but the effect of yuor work can be miserable.The most important info about an airbrush is , what the nozzle diameter is, what is capacity of the paint container and what is very important - what is the air pressure the airbrush can work with.Also if you are "a greenhorn" at painting with an airbrush why buy an expensive tool that you won't be able to use fully.I always suggest purchasing a such tools from the middle of the price ratio.There are many of them of a very good quality.If you have a look at the net you will find a few of them I'm sure.What is more you should remember that an airbrush without a compressor is another useless thing at home.

Ad.2. I would like to ask you a question. What would you do if you had a brush for painting only?
I thiink your answer will be " I wouldl paint the model with the brush.." Am I right?

So the question seems to me a little bit odd.We all know that an airbrush is a very nice tool.It gives nice painted surfaces, it allows to use a few techinques that a brush doesn't.But if a modeller even uses an airbrush , a brush is stil needed for a model finishing , making the weathering and painting many small details.

Personally I use something like these below but with the nozzle of 0.2mm in diameter.For more info and other shots look here

Air Brush Kit, Pneumatic Brush Kit, Air Brush, Pneumatic Brush, Air Brush Equipment, Pneumatic Brush Equipment
 

Attachments

  • Air-Brush-Kit.jpg
    Air-Brush-Kit.jpg
    29.5 KB · Views: 173
  • EW 770.jpg
    EW 770.jpg
    35.4 KB · Views: 147
Last edited:
Very good advice Wojtek ,wholeheartily agree!

Just a question of my own ,is there a desired pressure for airbrushing? does it vary at all? or one set pressure?
I suspect that maybe the reason for mines anger problems
 
There are offered airbrushes for quite low airpressure and for higher.Generally acrylic paints need low pressure and enemels that are usually thicker need a little bit higher.Most offered compressors provide airpressure of 0-4 bar.These selfmade at homes can supply up to 6 bar and more.My aibrushes work with 1-3.5 bar so I have about 0.5 bar in reserve.
So a possibility of setting the airpressure is quite obvious.The wider range of airpressure used by an airbrush the more settings for different paints.
 
For the size of 1/72 Vehicles brush painting is the easiest way. Thinning the paint will give you some great results. Not to mention weathering and general detail will also lift the model.
 
Alright thanks a lot guys, this is just a separate question. For the windows of the truck there are clear plastic parts, every time I try getting the glue on it drips down the side and ruins the window, any suggestions on how to get the glue on the window?
 
The Polish modelling say is "Klej najlepiej trzyma jak go nima".The direct translation is " A glue holds the best when it isn't at all.".It means that the less glue is the betterit sticks.So there is a few of solutions for the proiblem.
Number 1 is : use as less glue as possible.
Number 2 is : use thicker glue that won't be dripping down "the glass" side
Number 3 is : mount the window glass at the window hole with a masking tape for instance and then apply a thin , quick hardened glue to the gaps between the hole and the glass . It can be the cyanoacrylate Superglue.For applying use a needle.The kind of glue has a nice feature and goes always along gaps.
Number 4 is : Don't apply a glue at the top edge of the window glass. Do that at the side edges only or if it is really needed at the bottom one as well.
Number 5 is : use Humbrol Clearfix.

Western Front colours.......All paints for both German Army, Air Forces and Navy were predetermined by rules.So these were the same for each TO, excluding the N.Africa one where these paints were the desert colours.. Of course there can be diferences especially at the end of war when the shortage of paints appeared.Also if a truck was captured or was an effect of a requisition. I have to check.
 
Last edited:
The basic colour untill February 1943 was Grau ( Panzer Grau ) RAL 7027 - Humbrol 125, Testors 1723, Tamiya XF-24
From February 1943 to the end of war - Wehrmacht Olive - Humbrol 84, Tamiya XF-60
From November 1944 a part of vehicles was painted with Olive Grun RAL 8003 - Humbrol 117,Testors 1713, Tamiya XF-61.

Additional camo colours :

From February 1943
Olive Grun RAL8002 - Humbrol 151, Testors 1715
Brun RAL 8017 - Humbrol 186, Testors 1701
Also Olive Grun RAL 8003 from August 1944

From August 1944
Brun RAL 8012 - Humbrol 160, Tamiya XF-64
 
Last edited:
There isn't any best method..simply clean these up with a thinner and then wash them with warm water and soap. Then put them away to dry themself.
 
Last edited:
My wife (a professional artist) and I both use this on our brushes:

05704-3050-3ww-l.jpg


It keeps the bristles soft, and more importantly it helps get paint out from the base of the bristles - down in the metal rim. It works great with acrylics. My wife works with all sorts of paints ( oils, acrylics, and watercolors) and it works on all of them.
 
Yes. I hope not :D!!!I want this to be my first non-screw up model :lol:

The only thing that may pose a problem is getting the axe and shovel onto the engine cause its really really small
 
I can imagine...are these as separate parts or moulded on th enegine?
 

Users who are viewing this thread

Back