Airbrush Questions.

Ad: This forum contains affiliate links to products on Amazon and eBay. More information in Terms and rules

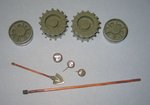
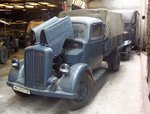
They are separate. Which means I need to either get a very small scissor of carefully get it out with my hobby knife. Then the painting of it also. I have to go to Michael's (Arts and Crafts) and replenish my supply of paint for this. :lol:
 
I see. It is better if these are separated.It will be easy to paint them.Concerning their cutting out from the mould frame.I do that in the way. With a bigger hobby knife or a scalpel I get them out with parts of the frame.Then using a sharp razor blade I cut off these pieces of the frame gently.
 
All paints can be thinned to flow nicely and give good coverage. If a second coat is necessary then it will have to be done and can be done usually within 20 minutes of the first coat. Keep the paint thin. Proper thinning will allow good flow with very low pressures ranging from 15-20 psi. Thicker viscosities require higher pressure and the paint goes on too thick. Even the full scale birds are given several coats. Also, thicker viscosities tend to gel faster in the airbrush clogging down the flow orifice (needle nozzle area) causing the paint to start spitting ending in a stippled (slightly textured) look to the final finish. With practice templates can be made for markings such as a simple hinomaru circle and paints reduced to even thinner viscosities will achieve a rather first-rate weathered meatball. I see highly weathered Japanese paint jobs on models with "factory fresh" looking meatballs (decals) applied over them. That just doesn't match up well with the weathered surfaces. The airbrush spraying "weathered" (very thin and translucent) washes can remedy that.
 
Very good. Will keep in mind! What color should the digging end of the shovel be silver?

Here is my scratch-built shovel for my cartonboard model of Cromwell Mk.IV tank. I painted the whole shovel digging part with a silver car paint in spray firstly.Then I applied the Humbrol green colour.When the paind was already dried I used a sandpaper of 1500 grade and sanded without water at edges and at the flat part of the shovel digging part.It has to be done gently in that way the silver colour can appear.Then I add a drop of very thinned mixture of black-brown paints as the wash..That's all.
 

Attachments

  • IMG_0013a.jpg
    IMG_0013a.jpg
    38.9 KB · Views: 72
I think yes...it does. But remember. the exaggereted wathering makes a model looking dirty.

Also find a thread about Les' Panther build.It can come in handy as well.
 
Last edited:
As memory serves every unit had their own transportation equippment.
 
I have to check.But it seems that it wasn't common to use unit emblems.But I remember the Africa Corps vehicles with the swastik and a palm as the emblem of this Corps.
 
Yes i've just looked up some pictures and here are some different paint schemes. Personally I like the last one.
 

Attachments

  • Opel Blitz 5.jpg
    Opel Blitz 5.jpg
    96.2 KB · Views: 61
  • Opel BLitz 4.JPG
    Opel BLitz 4.JPG
    90.1 KB · Views: 65
  • Opel_Blitz 3.jpg
    Opel_Blitz 3.jpg
    87.5 KB · Views: 59
  • Opel Blitz 2.jpg
    Opel Blitz 2.jpg
    176.1 KB · Views: 60
  • Opel BLitz 1.jpg
    Opel BLitz 1.jpg
    62 KB · Views: 61
  • Opel Blitz 6.jpg
    Opel Blitz 6.jpg
    89.4 KB · Views: 62
  • Opel Blitz 7.jpg
    Opel Blitz 7.jpg
    31.6 KB · Views: 71
  • Opel Blitz 8.jpg
    Opel Blitz 8.jpg
    96.6 KB · Views: 72
The last one pics shows these vehicles painted with the Panzer Grau colour.I think it could be somewhere in France 1940.
 
Last edited:
Arg. That's true. I want to be like towards the end of the war which color represents the Dark Yellow color towards the end of the war. Just out of curiosity what color would Panzer Grau color be listed as in stores?


Edit: On the second picture what creates the muddy look on the tires? Looks like a Red-Brown mix?
 
Last edited:
:oops: 
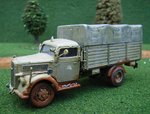
I don't catch your question about the Panzer Grau colour. Could you explain, please?

concerning the helmet on the Blitz door , I found out that it was a truck of 503rd schwere Heeres Panzer Abteilung.

Below the Blitz in Italy 1944...source unknown
 

Attachments

  • Blitz Italy 1944.jpg
    Blitz Italy 1944.jpg
    52.3 KB · Views: 77
Last edited:
Oh thanks Wurger.

My questions are

The Panzer Grau paint scheme is the early war paint scheme. I was wondering if I went to a store to buy that color paint what color would it be listed as Panzer Grau or another color?

The next question is on the second photo. I see a color seeing to imitate mud on the tires and wheel well I was wondering if that's just flat brown or a red-brown mix?

Thanks!!

The helmet on the door of the Blitz is that a decal or something else?

My apologies for firing so many questions at you....:(
 
Last edited:
I'm building the one on the right.
 

Attachments

  • internethobbies_2067_458233809.gif
    internethobbies_2067_458233809.gif
    21.4 KB · Views: 60

Users who are viewing this thread

Back