Distance

Ad: This forum contains affiliate links to products on Amazon and eBay. More information in Terms and rules

ellis995

Staff Sergeant
1,077
8
Mar 15, 2009
Easington Lane UK
Hi guy's
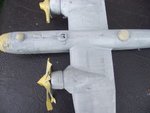
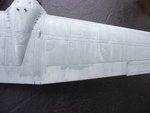
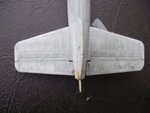
Tried out the airbrush today on a 1/72 "GRIEF" Pleased it's the last small scale model i had to build:D
Paint is all over the place :oops: runs, to thin, to thick, :evil:
What is the right distance from the model do you have be.Also the airbrush is a double action how the f****
do you get it to the right pressure as i am like Terry i have arthritis in my hands.
Its a pain and gets me angry as he*l.
 

Attachments

  • 001.jpg
    001.jpg
    64.2 KB · Views: 123
  • 002.jpg
    002.jpg
    57.8 KB · Views: 109
  • 003.jpg
    003.jpg
    57.8 KB · Views: 106
Last edited:
Not an easy question to answer Keith, as there are a number of variables.
First of all, the pressure. This depends on the viscosity and type of paint being used, and - the distance being sprayed from ! This is governed by the type of coating required, for example, a thin misting, a number of thin coats to build up an effect, gloss finish to be smooth etc etc.
A good 'happy medium' is to set the pressure around 15 to 20 p.s.i. as a start point, and thin the paint so that it runs down the mixing container with the same consistency as milk.
It looks, from the pics, as if there is a build - up of paint, causing runs. ALWAYS keep the airbrush moving, making straight, equal, and slightly overlapping passes. Do not twist the wrist, but keep the 'brush 'square' to the surface being sprayed.
Depending on the colour being used, don't expect a perfect, 'solid' finish first time - it may, and almost certainly will, need at least two coats.
Never go back over a 'thin' area when it is still freshly wet - this leads to runs, lumps, and 'orange peel', the 'textured' look of pitting and small pimples.
Always do a trial spray of the paint mix before hitting the model, to check for viscosity / consistency (to avoid runs) and ease of flow and so on. If the paint seems to be 'struggling', or starts to spit, then it is probably under thinned.
As for actually using the 'brush, the pressure is set at the compressor, either fixed, as with a simple compressor, or via a regulator. The trigger, when pressed down, only allows air flow at the pressure set. Pulling back on the trigger controls paint flow - the further back it's pulled, the more and heavier the paint flow.
The heavier the paint flow, the faster the movement of the brush.
This can only really be perfected by practice.
For practice in using the 'brush itself, try just spraying various effects onto paper or card, using ink, or cheap kiddies water colour paints, the type found in half -litre (approx.) bottles in toy shops. Just thin this with water and spray away.
For practice with getting the finish as required, use a normal paint mix, probably about 50/50 for enamels as a starting point, and spray a block or line(s) of a solid colour onto an old model. Use this to get the 'feel' of working around the shapes of a model, keeping distance and angle constant as required.
Spraying distance not only governs the width of the spray patten, but also the depth, or weight of paint. The further back, the wider, but thinner, the coverage pattern.
The actual distance will depend also on how far back the trigger is pulled, and what effect is required. This could literally be two or three millimetres, for tight, fine lines, at only partial trigger, or up to around nine inches for a wide, light, misting.
An average spraying distance for general - purpose coverage would be around two to four inches.
Bottom line is experiment and practice, practice, practice !
Hope this helps a bit.
 
Take a test model, one that didnt go oh so smooth and just use that for any doubts you have... i have a very colorful 1/72nd P-51B!!
 
i have an aztec double with a small wheel that can be rotated to fix the flow rate to a preset level.
i started out spraying water onto cardboard to get the feel of the gun and the various nozzels.
then i added food coloring to the water and practiced some more.
finally i bought paint specifically for airbrushing, pre-thinned. i painted styrofoam food containers with that paint.
air brushing is an art which you have to play with and develop a "feel" for. other than that i learned to stir, stir, and then stir some more, and to use several light coats, a run is a bear to correct
 
Ellis

I'm no expert when it comes to air brushing but I believe Terry covered all the variables. My thing is to test each mixture and pressure before I hit the model. If you ever see any of my work bench shots you will see a plastic base in almost every shot. This is what I use to test with. I've found in the past that cardboard doesn't have the same affect as plastic.

The piece I'm talking about is in the top of the photo upside down with a red dot on it. It's the base for a Titanic model.

IMG_2794.jpg
 
i used cardboard with the water and food coloring. i switched to the styro containers with real paint because they had curvature and were 3D like a model. this helped me keep and even distance as i went across it.
took about a month before i even tried a model
 
Exactly right. Use the water colours on card or paper just to get a feel for the 'bruch. When you startto practice with the paint used for the model, do this on a similar surface (i.e. plastic) to learn the effects of distance, pressure and paint weight. Using an old model is ideal for this, as it not only shows what happens where, but gives practice in handling a 'live' model and spraying at the same time. I have an old 1/32nd scale P51 which has more colours than Joseph's Technicolour Dreamcoat !!
Using a 'hack' model is also great when experimenting with various shades of one colour, especially for bare metal finishes.
But it can't be stressed enough - practice, practice, practice, then more practice!
As Mike stated, airbrushing is an art (and a science) which doesn't just happen, it needs to be practised, and even for basic spraying.
 
Thanks fellas

I have a old 1/72 Airfix Bucaneer2sb that i can use as a test bed for airbrushing.

The paints i am using are xtracrylix which look like they are used straight out of the pots ( not thined out ).

I have read somewhere that they can be thined out with just plain tap water.:confused:
 
Last edited:
I haven't used many acrylics, and never used Xtracrylics, but I only know of one brand which is ready to spray, and that's the Vallejo Model Air. Check the bottle/container to see if thinning is required, and with what. Some can be thinned with tap water, some with distilled water, and some with an alchohol-based thinner.
 
Thanks again Terry

This is where i found out about xtracrylix paints

AEROSCALE


The basicsXtracrylix are - surprise, surprise, acrylic paints. They are supplied in 16ml plastic bottles with a screw-top. The consistency is very thin - it's fine for brush-painting, but I was also able to airbrush it straight from the bottle. Hannants recommend using 10-15% neat water as a thinner, but I used distilled water, Liquitex Flow-Aid and Isopropyl Alcohol for the tests and all worked perfectly. (Note: Unlike some acrylic paints, Xtracrylix is not compatible with cellulose thinners.)

The pigment is very fine and showed no sign of separating out, even when I thinned the paint excessively.

the rangeAt present, Xtracrylix cover RAF (BS), Luftwaffe (RLM) and US (FS) colours. The range ties in closely with the existing Xtracolor range of enamels. The rumour-mill is already at work, with talk of WW2 Russian and Italian colours being added, along with a range of armour colours.

For the latest range of colours, click HERE.

SprayingI sprayed the paint onto high-gloss coated card. All the colours sprayed beautifully - no clogging, pooling or spattering - and the colour density was excellent. As a test, I sprayed RAF Sky and Trainer Yellow over Dark Green and Dark Earth - a single coat covered the darker colours with no trouble at all.

Hannants quote the drying time as 15 minutes, but I really pushed it, respraying as quickly as I could flush the airbrush and change colour. I encountered no problems, and had a 4-colour pattern in under 10 minutes.

The finish is initially a silky matt, with a sheen becoming evident as the paint builds up. More coats (or a really heavy application) result in a gloss finish. After the paints had dried for several hours, I tested their robustness by rubbing down various masking tapes - Easy Mask KleenEdge, Tamiya and Scotch Magic Tape. I removed them very roughly and the paint showed no signs of lifting.

accuracyAlways a controversial topic, and modellers will debate 'till the end of time about "scale effect" etc. I bought some RAF and Luftwaffe colours and compared them with the paint chips in the RAF Museum publication "British Aviation Colours of WW2" and Michael Ullmann's "Luftwaffe Colours 1935-45", but bear in mind that there are bound to be some variations in the printed references and paint batches.

The results were very good (see photos). For the RAF colours:

XA 1007 Sky was an exact match
XA 1001 Dark Green was a very close match - a little dark.
XA 1002 Dark Earth was a little too dark and red

For the Luftwaffe colours,
XA1202 RLM 65 was a good match (in chroma, but rather pale) for the 1938 colour - M. Ullmann's research indicates that specification of RLM 65 changed later.
XA1222 RLM 72 was a very close match for the original chip, but darker than its replacement in the revision supplement (shown here).
XA1223 RLM 73 was an exact match.

conclusionXtracrylix is an excellent addition to the range of modelling paints. With its easy application and good colour accuracy, it deserves to be a success. Assuming the other colours in the range match up to the quality of the ones I puchased, I have no hesitation in giving it 9/10 - Highly recommended.
 
Good info Keith. I would go with the Hannant's recommendation for thinning. I've used Xtracolor enamels quite a lot over the years, and they are excellent, although some RAF colours are a little dark for smaller scales, OK for 1/32nd scale up. No problem though, just make them a touch lighter.
 
i'm an acrylic man, never have tried enamels. i spray indoors and do not have a spray booth. have used modelmaster from testors right out of the bottle and tamya with a bit of thinning.
best stuff i've found for thinning is blue windshield fluid
 

Users who are viewing this thread

Back