Vic Balshaw
Major General
Amazing work and detail Gerry and I echo George re the straps. 
Follow along with the video below to see how to install our site as a web app on your home screen.
Note: This feature may not be available in some browsers.
Ad: This forum contains affiliate links to products on Amazon and eBay. More information in Terms and rules
As always, thank you very much FubarVery nice looking crew Gerry. Love those straps on the first guy

Thank you my friendImpressive stuff
Thank you GnomeyGood work so far!
Thank you my dear Vic.Amazing work and detail Gerry and I echo George re the straps.
Thank you sirNice work.
 .
.
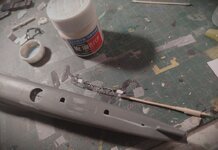
Thank you Fubar, lets see if they stand another sanding....Really nice work on the rivets

Thanks my dear friend VicOnce again Gerry, great detail and great patience.
Thank you my friend.Now that I have a decent riveting tool, I may be doing more of this myself. Adds some nice texture and yours looks very good Gerry.
Thank you sirLovely work so far!
 ......