Question about Floquil Crystal Cote

Ad: This forum contains affiliate links to products on Amazon and eBay. More information in Terms and rules

Flash_Taco

Airman
73
0
May 12, 2010
San Diego, CA
Hello,

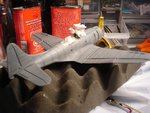
I have been reading this forum for about a month or so, but never participated until today. I am returning to modeling after approximately 30 years, although I was never an advanced modeler, but rather just an "assembler" of plastic aircraft kits. Two months ago I decided to buy the tools and supplies to start modeling in a more serious manner. I've read tons of info from the web and a couple of books to refresh and acquire new concepts about the hobby. This forum has proven an invaluable source of advice since I am halfway from complete my first model relatively trouble free (A 1/48 scale SBD Dauntless from Revell) Ok, that's enough introduction, here is my question:

I have airbrushed the model with Model masters enamel following a two color scheme (Lt. Gray on the bottom and Neutral gray for the top) I am satisfied with the looks, but now it's time for the "infamous" clear coat stage. While reading about the different coatings I learned that some of them tend to discolor to a yellow tone with time, and this can be prevented by using clear coats. One of the authors suggests Floquil's Cristal Cote as a good option. In preparation for this, I covered a styrene sheet with the same paint and let dry for 3 days and applied Crystal cote with an airbrush at around 20 psi and it looks nice and even. However, I want to know if any one here has experience with this particular coating and how to avoid the most feared "frosting" Are their any "secrets" as how to manage the dilution between thinner and cote? I just want to play safe before I coat my model (I keep a medium mallet on my workbench in case something goes wrong ...:confused:) Also, do I need to buff the paint before the clear coat to reduce the grainy texture of the mate paint?

Thank you all, and keep the good work.
 
Last edited:
Hi Mate,

I haven't been used the particular cote.So I can't tell too much about it.
Generally , we use matt paints or enamels for painting our models. To be honest it should be enough but it isn't because of decals. As you have already noticed and mentioned matt paints cause the grainy texture.It is the reason we have to apply a gloss cote at these areas where decals markings have to be sticked.Or else the effect called "silvering" can appear. The silvering means that the transparent areas of decals get "milky" tonality when looking from different angles. This is a matter of a light and rough surfaces painted with matt paints.Simply there are free areas among the paint grains.The gloss cote fills these areas and make surfaces smooth.This helps decals with sticking better without the effect of silvering.
Now a model is glossy right? But it was matt wasn't it? That's why we have to apply the matt cote.In addition the matt layer of the varnish protects decals and makes all surfaces looking solid.

The matter of getting yellowish tonality with time ... this depends on a paint base I mean the main principle.For instance, the oil principle is the main one for Humbrol enamels and varnishes .It is of a bad feature of getting yellowish because the pure priciple is simply of yellow and transparent tonality like honey.Humbrol tried to correct the disadvantage and improved this finally.Paints and also their varnishes are water-based mostly so the problem appears quite rarely. But time is time and nothing is forever.So these can get the yellowwish tonality as well.And it doesn't matter if you apply them more diluted or not.In fact these water paint and varnishes keep their tonality longer.

Concerning the diluting ratio for these matt or gloss cotes. The more thinner the worse effect. Usually these are diluted with 50/50 ratio like paints.But for these matt cotes I suggest using of less thinner and more cote for the matt final effect.
 
Last edited:
Hi, Wurger,

I read something similar about the light refraction phenomena with trapped air bubbles under the decal film, but your explanation is far clearer. I like the Matt finish of my model, but decals need to be placed and as you say the gloss cote is needed. It is not a must for me to use Floquil, and I am open to try something else that works for most people. I know Pledge Future is widely preferred in the modeling world, but I have read a couple of people hating it after it ruined a perfect paint job.

If you don't mind me asking what is what works well for you as a clear coate on enamels, and possibly share the dilution and application protocol.

On a different subject, allow me to say Wurger that your modeling skills are very impressive.

Thanks.
 
HI again,

Thank you for these nice words about my modeling skills.That's very kind of you.:D :oops:

As far as your question is concerned, I use both the Humbrol gloss and matt cote.ALso I'm still having a couple cans of Revell gloss and matt varnish.The reason I still use the Humbrol ones is all my models are of 1/72 scale.So I don't need much of these dopes to get models finished.The diluting of them is either 50/50 or 50/40 percent of course.The fifty-fifty ratio is for the gloss one and the 50/40% The 50% is the cote and 40% is the thinner.Sometimes I use 35% of the thinner only if I want to achieve the effect of a very matt surface. I'm sure you know that in reality aircraft surfaces aren't so matt.These are of semi-matt ( satin ) rather. These very matt ones are characteristic for planes without the tech maintenance especially for these standing "under cloud" for a long time.
Concerning the application protocol.... it is exactly the same like for painting. I use an airbrush and a compressor for applying.The air pressure is set just a little higher because these oil enamels are a little bit thicker than these acrylic water-paints.I apply the matt cote from slightly longer distance than the gloss one or paints ( enamels). I hope it can be found useful by you.
 
If anyone knows this stuff its Wurger. Just to add my own two cents and confuse you even more :twisted: I use future once the paint job is completed. I've read some articles where the authors never use matt paints thus they don't need to spray a Future cote for the decals but that's a different story. The point I wanted to make was that I use Model Masters dull cote but what I've found (with that product) is it sometimes damages the decals if directly applied as directed. So to avoid that I seal the decals with future then apply the matt.
 
Wurger,

Thanks a lot for sharing wisdom. Unfortunately Humbrol is difficult to get here, but I believe the protocol can be used with other cote, thank you very much.

Dirk,

Please, go ahead and confuse me, for I am an incorrigible masochist. Future has to work for most people, otherwise it would not be as popular, and like I said, i am not close to "convert" to its doctrine.

I decided to go ahead and use the floquil, and it seemed to work well but, 2 small areas look a little cloudy. I took a pic to show here but the stains are invisible to the optics, or I did not use the proper light, expo, etc. The pic does show that the model surface is shiny to some degree, but to my fingers it still feels rough.

Here is my next question: Would it be possible to wait for the lacquer to cure and apply the future and achieve a softer surface? This model is old school and has multiple raised panels, so I don't thing the surface will ever be completely smooth, but at least one more coat with lacquer or future could ease the decal application?

Regards gentlemen.
 
Sorry, here is the picture.
 

Attachments

  • Reduced.jpg
    Reduced.jpg
    72.8 KB · Views: 201
With any 'varnish', matt or gloss, 'blooming' can occur if not thoroughly stirred, and then stirred again immediately before use. 'Blooming' is the effect of a matt varnish showing patches of gloss, and/or cloudiness, which is the matting agent either not being fully stirred into the carrier base (oil or polymer type), and/or a concentration of the matting agent causing the cloudy effect, often showing as a 'white' patch.
With gloss varnish, the 'blooming' will show as areas or patches of semi-gloss.
If you want a totally smooth, gloss surface for decals, using Future, then more than one coat will be required. Apply secon and subsequent coats after the previous coat has fully dried - preferably at least one hour for the first coat, and at least 30 minutes for subsequent coats. Leave at least twelve hours, preferably 24+ hours, before applying decals.
 
Yep...I agree with the post above. But I'm not sure you understood that about the smooth surface and gloss varnish.Look at the diagram below please.Do you catch ? I'm sure you do.
Raised panel lines are a different matter.These have to raise as their name says.You don't have to apply so much of a gloss cote in order to make the surface smooth totally.For a solution of the problem modellers use liquids called Micro-Set and Micro-Sol or similar ones for better fitting a decal marking to a model surface.
 

Attachments

  • painting.jpg
    painting.jpg
    41.5 KB · Views: 190
Airframes,

Thanks for your advice; you make it sound fairly simple so I guess I will try this. By the way, I also admire your work, especially since you hand paint your models (I specially like a B-17 that you posted)

Wurger,

I believe your first explanation was very sharp and I got the concept, but I think I failed to make my point: I understand the gloss coat yields a smooth surface for the decals to conform; this is especially true on models featuring smooth and recessed panels right? With raised panels we would have to apply a very thick coat of gloss and completely cover them to develop an almost perfectly smooth surface, which sounds undesirable. Now, a thicker coat of gloss to what I already have on my model, but without completely covering the raised panels will offer a more "conforming"surface to the decals? Inspired by your schematics I draw another to illustrate the concept that I have. Please have a look and see if you think it makes sense.

I agree on the decal set and solvent usage, and I already bought these, although they are from Mr. Hobby as per recommendation of my local store. Any experience with these?

Guys, you are walking encyclopedias, thank you so much for your help.
 

Attachments

  • Decals.gif
    Decals.gif
    51.6 KB · Views: 189
Increasing the depth, or 'thickness' of a clear coat, gloss or matt, is self-defeating. Yes, you may end up with a smooth, even surface - eventually. But, this will be at the at the cost of loss of surface detail, and severley diffused paintwork, which will not only look different in shade and 'sharpness', but will also become darker the more coats of clear are applied.It can aslo have the effect of distorting the percieved shape of a model.
The raised detail is not a problem - it was, until relatively recently, the only way mould manufacturers could reproduce panel lines, joints, control surfaces etc, and the now common engraved surface detail is still, to me anyway, a luxury!
Using decal solutions will allow the decals to conform to much worse undulations than a triflingly small. raised panel line detail, and is much better than trying to achieve something which is, to be blunt, a total waste of effort, time and materials.
The only reason for the gloss, as you are probably aware, is to prevent silvering of decals, either from trapped air, or decal-film diffusion, although a gloss clear coat aslo has the effect of 'sharpening' a paint finish, to an extent.
Having stated all the above, if you want a really smooth, even surface, without the 'hassle' of using clear coats, and which will allow raised and engraved detail to still be visible, then use gloss paints, finishing with a matt clear coat if required.
In enamels, Xtracolour formulated a superb gloss range just to cope with this problem, and these are availablke in a full range of military and civilian colours.
 
Wurger,

Please have a look and see if you think it makes sense.

The first top diagrams in your shot are exactly the same like these in my one. Also we can say these two in the bottom line as well.But there is one mistake I have to mention. If you apply any dope ( it doesn't matter if it is the matt or gloss cote ) these raised panel lines are covered with that as well. These lines aren't a kind of a dam ( walls) that keep a varnish between them. Certainly every next coating of varnish makes raised panel lines thicker or shallow when these are engraved and finally disappeared when there is too many of them I think Terry explained it above in a very good way.

Because there is nothing better than see what it is talking about.I uploaded a couple of pics of my old 1/72 scale Tempest model.The kite has raised panel lines. For painting and finishing I used Humbrol enamels and an airbrush.The procedure of applying paints and finishing the model was as followed. Having the model assembled I washed it with warm water and soap and made dry. Then I sprayed all over the model with an aluminium spray in a can used for car painting ( a quite thick layer).The next step was to apply the camo colours according to the RAF camo scheme for the machines used on the D-day.All of these camo colours were matt ones.When finished I let them dry fully for a few days.Then I airbrushed the gloss cote and let it be dry .The model became gloss at all surfaces. A day later I put decal markings. In order to limit the possibility of appearing of the decal silvering effect , I cut off all the unnecessary transparent decal background. One day of getting decals dry was enough.Then I checked if these were sticked fully.As you might notice there still are small spots under decals where these did't stick correctly to a surface. It means that the gloss cote was diluted too much and its layer was too thin making the surface smooth not enough. However these aren't seen in general view of the model. Well....finishing the model I applied the matt dope once getting the satin texture of the Tempest model.

To sum up that. These raised panel lines on the model can be still seen even under decal markings.Right?
 

Attachments

  • Dscn2889.JPG
    Dscn2889.JPG
    82.1 KB · Views: 158
  • Dscn2887.JPG
    Dscn2887.JPG
    79.9 KB · Views: 164
  • Dscn2886.JPG
    Dscn2886.JPG
    93 KB · Views: 150
  • Dscn2884.JPG
    Dscn2884.JPG
    84.4 KB · Views: 167
Last edited:
And a few more.....
 

Attachments

  • Dscn2890.JPG
    Dscn2890.JPG
    80.9 KB · Views: 166
  • Dscn2891.JPG
    Dscn2891.JPG
    82.9 KB · Views: 159
  • Dscn2895.JPG
    Dscn2895.JPG
    76.4 KB · Views: 151
  • Dscn2896.JPG
    Dscn2896.JPG
    82.4 KB · Views: 144
Gentlemen,

Just a quick note to say hello and apologize for not responding to your kind observations, but the "real life" obligations are working against this.

Wurger, Thanks again for the corrections and sharing illustrations of your own work; I would like to comment a little more on our highly technical and scientific chat about the raised panels8):D, but I will have to skim some time to do so

Just as a brief update I have to say the third cote of crystal created clumped horribly inside the smaller raised panels and at that point I decided to strip the cote and repaint. I am giving the paint at least 5 days of curing time and will recoat with Future using the protocol suggested by Airframes (Terry?)

Well, I got to run.

Regards.
 
Last edited:
Hey Dirkpitt,

I bought the dull cote from Model master as you recomended and plan to use it after the future coat on the decals. Thank you for sharing knowledge.

Regards.
 
Yes, no problem. It's best to dip the canopy in the liquid, holding it by a piece of tape secured on a convenient edge. remove,drain, and then place on a kitchen towel to dry. Make sure it stands on its bottom frames, to allow any excess Future to drain evenly. The frames can then be re-coated in the required finish if not gloss. BTW, it's a good idea to put some form of cover over the drying part, without it touching of course, as Future is a great dust magnet! Should be totally set within 30 minutes.
 
Just something to think about before you start your decals. I have had decal setting solution have a bad reaction with the future gloss coat, turning it milky. I was using Micro Set at the time.(Micro Sol works fine) I know you said you were using something else, but it might be a good idea to test it out on an inconspicuous area of the model first.
 

Users who are viewing this thread

Back