Rookie question on decal silvering.. relating to airbrush paint surface and 'Future' acrylic floor clear.

Ad: This forum contains affiliate links to products on Amazon and eBay. More information in Terms and rules

Wiking

Airman
34
38
Jun 28, 2009
USA Norway
Hello all,
Hope everyone is dealing well with covid-19 issues..

Question:
- Has anyone experimented using 'Future' acrylic clear, introducing it in liquid form only directly under each individual decal at the time of application, and not shot over the whole model before applying decals? I wonder if 'Future' works as an adhesive and a pre-emptive anti-silvering solution when it is introduced under the decal at the time of applying it to paint.

BACKGROUND:
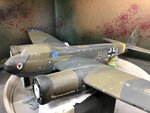
I am building a Revell 1/32 Ju-88, airbrushed with Vallero Air paints. It's my first time using an airbrush (Badger double-action). The splinter camouflage masking and airbrushing went well enough. I have finished the colors and am ready for decalling.
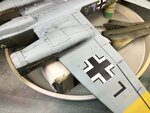
- The surface of the paint is not as smooth as I achieve with my old-fashioned bristle-brushing. The surface has a sand-papery 'grain' to it. Maybe I airbrushed the paint too dry and this lead to a build-up of dry paint 'grain' on the surface? I'll research that problem separately. It isn't as apparent when resurfaced with Matte finish, so I will move forward and live with it as a 'lesson learned'.
- I expect this surface 'grain' will lead to decal silvering.
- I shot a sample area of the model with 'Future' acrylic floor clear and the 'grain' doesn't diminish much at all.
- I came here to research the problem and found this discussion thread useful: Silvering.
- I will employ Micro-Set and -Sol and test a few expendable decals to see how to I can handle the situation by trial and error.

But the use of Future many offer a pre-emptive solution. Therefore my question.

Thank you,
- Art

tBp+YbgGSSuEY4Z3IBgtKA.jpg


hbWQfNQIQBaq2Ffm0M6xFQ.jpg
 
Yep.. it was described as many times here and over there. So once again, The Future is noting more but a clear acrylic varnish. In the past modellers were looking for a liquid that could be a chaeper alternative for quite expensive dedicated varnishes of Tamiya, Humbrol etc... It was started to be used just because of an attempt to making of a matt surface more smooth or gloss. Additionally it appeared that the Future coat has been worked greatly as the background for decals and limited the effect of silvering significantly. However the quality of the surface and the final effect depends on how the Future is/was applied. It appears that applying with an airbrush may require a couple of coats to make the surface smooth and ready for applying of decals. The matt surface is like "a sponge" and may take up a lot of the clear varnish before it can become of the nice smooth finish. Therefore the Future should be applied with a thick but soft brush without thinning. But even then , it may appear that the one coat of the Future isn't enough to make the surface smooth.
 
I agree. When I used to use the 'old' Future ( Johnson's Klear in the UK), I found that at least two good coats were needed to achieve a good, smooth gloss finish, applied with a soft brush.
As Future is now totally different (at least in the UK) I stopped using it some years back, and now use the Humbrol clear gloss acrylic, applied again by brush. Depending on the type of paint used, matt or satin, for example (enamels in my case), I find that this also needs at least two coats in most cases, and often up to four coats.
As mentioned by Wojtek, a matt paint finish will 'absorb' some of the varnish, even when relatively smooth. If there is a 'dusty, grainy' finish, then further coats will be needed, built up until a smooth, gloss finish is achieved.
The grainy finish to the paint, whether enamel or acrylic, is normally caused by either too high a pressure, incorrect thinning ( 'heavy' on the paint), the distance sprayed from, or a combination of all of these.
 
Exactly what Tarry said..

Here I collected a couple of shots from my old build of 1/24 scale Bf 109E. Generally I applied three coats of the clear varnish. One was airbrused and two next applied with a brush.

1. A very matt finish of the oil Humbrol enamels on the model and a close up shot of the surface.

mattfinish1.jpg

mattfinish2.jpg


2. The appearance of the model after airbrushing of one clear coat of a varnish ... as you may notice the gloss appeared as a couple of small spots there... generally nothing was changed.

1coat with airbrush_a.jpg

1coat with airbrush_b.jpg


3. And her appearance after the coat applied with a brush .. a little bit better bust still not too smooth ..

1coatwithbrush.jpg

1coatwithbrusha.jpg


4. And after brusing of the second coat .. also not too perfect but fortunately it was enough gloss ( smooth ) at areas where decals had to be applied.

2coat with brush.jpg

2coat with brusha.jpg
 
Exactly what Tarry said..

Here I collected a couple of shots from my old build of 1/24 scale Bf 109E. Generally I applied three coats of the clear varnish. One was airbrused and two next applied with a brush.

1. A very matt finish of the oil Humbrol enamels on the model and a close up shot of the surface.
2. The appearance of the model after airbrushing of one clear coat of a varnish ... as you may notice the gloss appeared as a couple of small spots there... generally nothing was changed.
3. And her appearance after the coat applied with a brush .. a little bit better bust still not too smooth ..
4. And after brusing of the second coat .. also not too perfect but fortunately it was enough gloss ( smooth ) at areas where decals had to be applied.

Thank you guys, and Wurger - for the 'demonstration' - it's very confidence-building to know THAT many coats didn't diminish the surface detail enough to bother you.. (or?)..
I experimented with small redundant decals and it seems to be working well enough to apply acrylic clear (Mop-n-Glow) right under the decal, undiluted to get it more bonded to the 'grainy' surface. I'll let dry overnight and post pics tomorrow. With this method, there is some 'spillage' of the Clear onto the surrounding matte paint, but I'm blending it in as weathering with water and brush.. the more distress and age the better. I still have the choice to shoot a topcoat of matte when it's all done,

Cheers,
- Art
 
I use Testors gloss coat before the application of decals. Some of the local model club members use Future as a gloss and for setting decals. You restore the matt finish by spraying Dull Coat over the model.
 
I recently started using Testors Clear Wet Look Gloss Coat that's designed for the model car folks. It seems to provide much higher gloss than either Testors Gloss Coat or Tamiya's Gloss Clear. I've also used Future, but get impatient about how long it takes to cure: at least 24 hours. I've often said when people look at my work and comment, "You're so patient." I say, I'm not patient, I'm persistent!
 
Xtracolor and Xtracrylic paints are gloss, specifically for that reason, and are accurate matches for the major air forces and airlines.
I've used the Xtracolor (enamels) off and on for around 35 years, and still have a reasonable stock, but had a problem with one colour only (PRU Blue) a year or so back, and shied away from them.
They cover very well, with brush or airbrush, but do tend to take a while to fully harden.
Off course, like anything, there are advantages and disadvantages. Good for a smooth, hard, gloss finish, but this can restrict the use of some weathering techniques.
 
Actually I agree with Andy. It would be better to paint a model with gloss colours. Then applying of decals and then the matt coat for the final touch. However it should be kept in mind that nobody used the techinque 50 years ago. In that time it was enough to apply colours and then decals for an ordinary modeller. Secondly, it is a business, instead of two bottles ( colour + clear varnish ) you have to buy three cans ( colour + clear gloss varnish + matt clear one ). Also both kinds of varnishes run out quicker in the case. And as a result you have to purchase the next two new bottles .
The business is the business.
 
.. it is a business, instead of two bottles you have to buy three cans...
The business is the business.

True, but whichever supplier has product with the lesser cost wins customers..

I have the following update on my experiments;

I was not able to prevent *some* silvering of the decals on this very gritty surface.. note the 'Shield' emblem near the nose of the Ju-88, the edges have some silvering.

I opted NOT to shoot many layers of Mop-N-Glo over the whole model. I did shoot one layer of Mop-N-Glo on the areas to receive the largest decals - wing ends, mid-fuselage, and vertical tail. On the many smaller decals, I cut away as much clear as possible, delivered via a small brush discrete amounts of Mop-N-Glo under the decal as it went down, seated the decal in place, then wicked extra liquid out from under the decal while applying Micro-Sol to the top surface. This gave reasonable results.

Next time I will avoid gritty paint surface by practicing my airbrush mixtures and pressures, and eliminating any form of 'primer' coat, that seems the biggest mistake in hindsight. But all in all, very happy with my first try at airbrushing.

Here is a current photo.. almost ready, just remove canopy masks, add antennae and defensive guns, finish the spinners and props, plus external bombload.

Cheers,
- Art
 

Attachments

  • rnBG21jySxa%1sgTIoAE6w.jpg
    rnBG21jySxa%1sgTIoAE6w.jpg
    1.1 MB · Views: 102
At this point I have shot the dull coat on the model..

Here is the belly... I think you can discern the surface under the 'balkenkreuz' decal..
 

Attachments

  • 0AYBt5WWRj6gRLBoG2ZpTg.jpg
    0AYBt5WWRj6gRLBoG2ZpTg.jpg
    1.2 MB · Views: 138
Still looks good. If you had applied more MopNGlow with a brush before dull coating you might have been able to eliminate the silvering around the edges of the decal.
 
Also wondering if perhaps a little polishing of the paint coat to reduce the grit (using a micro mesh) might have worked? Of course, with acrylics, the color coat tends to be more fragile than say enamel or lacquer paints, so likely that wasn't really an option.
The cause of the problem? Paint was already 'drying' when it hit the surface. Not enough paint in the spray stream or too much air, end result fast drying acrylics not hitting 'wet' to allow for some settling. Primer coat likely not the reason unless it was a rough finish too. Were you using a double action a/b? Was the needle 'drying a drop' on the tip, disturbing the flow? I keep a damp lint free rag handy to quickly clean the tip as I go otherwise sputtering can start as the tip develops some buildup.

Paul Budzik recommends a small spray gun works better than an airbrush simply because they lay down paint faster, leaving less chance for this problem to occur. Baring that, using a brush with a larger nozzle can help.

TYOQ: I've used a 'puddle' of Klear where the transfer must go to eliminate silvering then placing it right in while wet. Just not too much, it can build up, and of course wick off any excess you can. Sort of a 'super setting solution'. Can use solvent over top if needed, but I'd experiment on the 'paint pig' first. Better when the experiments fail 'off the masterpiece'!

Tough one when this happens, though. Still, looks pretty decent!

Regards, Robert

Thank you Robert - all of your advice is spot-on and unambiguous...
- Yes, I'm using a double-action Badger. I like it. To date I've concentrated using a constant pressure, varying the paint flow only, as I learn. The tip occasionally accumulates some paint, but not enough to cause an embarrassingly uneven spray pattern. A quick wipe and it's gone. And to my eye, the occasional unevenness lends a useful, slightly 'hand sprayed', look to the finished, weathered surface.
- What I did first was spray a quick coat of Testor's Gull Grey enamel on the whole model. The intent was to even out the difference in underlying plastic colors between the myriad front canopies and the grey molded plastic. That coat came out a little dry and thus gritty. That is why I think it was my first, biggest mistake.
- Subesquent acrylic coats also went on fairly dry and this would tend to amplify the underlying gritty enamel texture.

I also conceived of and used the 'puddle' of Mop-N-Glo under each individual decal, wicking off excess liquid and applying Micro-Sol to the top as the decal driver in place.

Thanks again for useful pointers on spray wetness.
Cheers,
- Art
 
Perhaps I should start a new thread? But it does kind of fit in here.

Double action airbrushes, specifically the Badger line.

Thanks to 21st century progress, my wife's robot floor vacuum decided to start cleaning in my build area and start a fight with my airbrush supply hose (hanging to close to the floor) and pulled the cleaning jar holder and air brush off the work table onto the floor. The jar made it, the spraying end of the air brush didn't. So, I'm off on a quest for a new one. I seem to see Badger as a brand in may posts. Are there any specific models that, if you had too, you would replace it with? To relate to this post, I'm interested in just what model you bought? I too have been getting 'dry' coverage, using Taymia paints straight from the bottle, adding very little of their thinner, milky if you will, but the coverage does appear grainy!

And on 'milky'. Is that 2% or whole?
 
I recall there being several threads here on airbrushes. It's all going to depend on what you are willing to pay.

Spraying Tamiya paints straight from the bottle is going to give you issues in my opinion. I usually thin 40 to 50% with their yellow cap thinner.
 

Users who are viewing this thread

Back