Scratchbuilt

Ad: This forum contains affiliate links to products on Amazon and eBay. More information in Terms and rules

gerar

Airman
59
4
Feb 28, 2005
Panama
www.propellermodels.com
Hi Everyone.

I scratchbuild my models and am at presently finishing plans for an Italian SM-71 Airliner. Can anyone provide me some pictures or tell me where I can find some...
Thank you.

I make my models with Mahogany Wood, card, paper, wire, Plaster of Paris (engines and wheels etc..) and all kind of stuff.

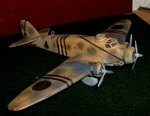
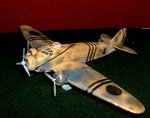
Here are some pics of my last one: SM-81 Pipistrello. (Bat)
 

Attachments

  • finito1.jpg
    finito1.jpg
    24 KB · Views: 982
  • finito2.jpg
    finito2.jpg
    27.6 KB · Views: 935
  • finito3.jpg
    finito3.jpg
    31.6 KB · Views: 821
Wuger........I do all kinds from 1:144 up to 1:24 but most are in 1:72 scale. Open cockpit models look very good in 1:32 down........

It is better to make wooden models in bigger scale.There is always possibility to make them much more accurate.In smaller scale some of details often have to be made without enough accuracy.Especially, in 1:72 scale. :(
Therefore,I say again - Well done Gerar :thumbleft:
Could you send us more pics of your models? And it would be nice if you could describe how you make them and show us how you make them.( any shots would be appreciated )
 
Wurger...... You are right, as you go below 1:32 scale detail get lost
in the small model. I do most in 1:72 due to space, but do about 3
1:32 and 1:24 scales a year, which I usually give away. I am presently doing a 1:32 Italian RO-41.
---------------
Here are some pics of the procedure. This is nothing new!!, static models were done this way between 1920-1950, then plastics came along and "solids" became a lost hobby..........a big shame since they are totally different birds!!
___________________________
I start with a good plan, and cut the wood blocks I will need for fuselage, wings, tail etc...

allparts-1.jpg


2) file the fuselage and other parts to the general outline.
fuselage2.jpg


3)In this case I attached the radiator piece
airintake.jpg


4)Formers are made of cardboard for the given fuselage shapes.
fuselageformers.jpg


5)Start shaping fuselage accordingly...I use files for this stage, no sandpaper yet.
fuselageformers11.jpg


6)This fuselage needed the cylinder housings so I added them
fuselagecloseup.jpg


7)sanded and some filler.
fuselagefiller.jpg


8) Added radiator louvres, just little cardboard slivers.
radditail.jpg


9) More parts...
PIEZAS3.jpg


10) glue together...
armado4.jpg


11) Ribbing with paper slivers....
strigerfuse3.jpg


12) more details using cardboard, paper and wire.
strigerfuse1.jpg


13) finished.
FINITO991.jpg

FINITO6.jpg

FINITO8.jpg


Hope you enjoyed it......Why don´t you try one???:D

FINITOescadrille.jpg
 
Cool.I was thinking about the kind of the description.:D
Excellent foto-reportage.What about wheels? Do you make them of wood like in the pics of D-510? In my opinion you could improve the detail using different material.

PS. D-510 looks very very nice.
 
Oh yea, you can go to any level of details, but the idea in solids is that they are a "representation of the real aircraft" Not a detail replica.......have you seen models in museums?...they represent an aircraft without all the nuts and bolts......but there are many thoughts about this.
I made a radial engine with 350 parts.....totally detailed and a two year timespan!!!!:)...much fun.
Oh by the way, I do paper models also.........Poland is the Best provider of paper models in the world....absolutly great models!!!!!!
 
Actually you are right.I've never seen detailed solid models.But it would be nice to make them a bit improved,wouldn't it.Of course ,the choice is yours.And what kind of enamels do you use to paint the solids?
As paper models are concerned I do them too,certainly if I have free time.To be honest assembling them takes much more time then the plastic kits take.
Do you have any pics of your paper models?

BTW. Thank you for the nice words about Poland.
 
Very nice work and tutorial!
Gerar, you could also use your scratch models parts as masters and vacuform plastic parts from them; that way you could keep your masters to make several models out of them or sell part sets for guys who would like to build the same aircraft, considering the SM71 for example, is pretty hard to find as a plastic model (if it was even produced as a plastic kit).

By the way, I was thinking of moulding parts from melted lead, but what material should I use for moulds, that could stand the heat of melted lead?
 
By the way, I was thinking of moulding parts from melted lead, but what material should I use for moulds, that could stand the heat of melted lead?

I don't know if I understand your idea correctly Vince.Do you want to make metal parts of a model? If yes, and if the metal is lead "Pb", so your moulds could be made of plaster.There is a method of making these metal parts.It is called ( I don't know if the translation from Polish is correct ) "Method of a lost wax".There is link to a site,Unfortunately in Polish only,I'll try find something in English but it cannot be easy.There are some described steps with pictures of how to make paterns of parts of wax etc...

Strona domowa Marka

I've found this in English.I think it can help to understand the idea.The link is:
Method of manufacturing a metal article by the... - Google Patents
 
Happy New Year to Everyone.................

Thanks guys for your nice words about my solid models, its a pleasure doing them.

Wurger.........I use acrylics for coloring and for metal finish " Chrome Spray" which I cover with about three or four cotes let dry for a week then rub to get a nice metal look.

Vince....Yes, you are right. I have used the wood forms to make Vacuform models but I don´t do this very often. For parts I use "Plaster of Paris" for engines, wheels, floats etc,a very easy technique and they look real good. For metal parts, like Wurger says, you would have to use the "lost wax" technique. There are many pages on this in the net.

I have added a few more pictures of some of my models..........

An old 1934 Passenger Dewoitine....to me a "beatifully design aircraft for the time"

Ffini-4.jpg


Italy´s failed "Dive Bomber" the SM-85

frente-fuera-3.jpg


The Breda-75A.......only one made.

fin4.jpg


The Old Lady of the Hump...........C-46

alitalia-1.jpg


Presently working on the B-18 Bolo and Ca-133

conalas3.jpg


Caproni-133

PASSO63.jpg
 
Gerar I'm really impressed by your great collection.Well done mate. :thumbleft:
THX for the info on painting.:D What about paper models pics?
 
Hi Gents....
Well since a new year has started, I desided to start and old Italian coastal patrol hydro....the Cant Z-501. Its very small, only 8" wingspan....

FUSELAGE3.jpg


Notice I made transparent cabin and bubbles which will have their framework done in paper.
GRUPO1.jpg


PASSO3-1.jpg


PASSO3-2.jpg


PASSO3-3.jpg


Hope to finish in one or two weeks...............

Finished a Breda-25...........a similiar Italian Trainer of the 30´s to the US PT-17..........
Some steps:..............

PASSO1.jpg


FUSEPINT5.jpg


MotorePASSO-1.jpg


FUSELAGE1.jpg


FIN71.jpg


FIN167482.jpg


FIN1682.jpg
 
Gerar, it is excellent work :thumbleft: I can see you use the same idea to make some of parts for your aircrafts ( the pic with Breda-25 engine.)It is a very good way to obtain some details shortly.What kind of material do you ust to make them?
I use two conponent epoxy glue "PXIPOL" or "DRAGON" epoxy mass.
 

Users who are viewing this thread

Back