

captain Frey
Airman 1st Class
- 164
- Feb 18, 2012
Hey guys,
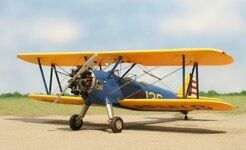
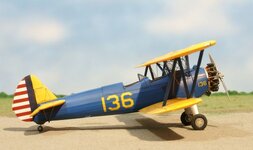
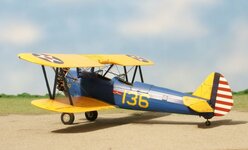
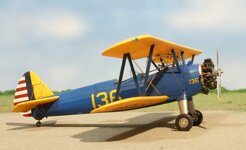
Here's my latest model, two months of work.
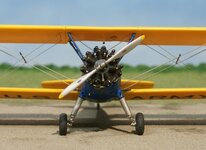
It's a 1/48 scale Revell PT-17. It's a good kit, about ten years old, well-designed and doesn't require any filler. It's a shame the plastic is yellow, which isn't very convenient.
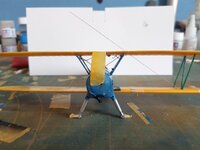
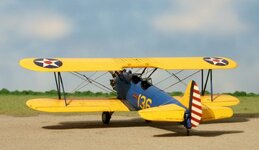
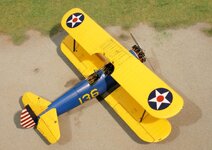
I struggled a bit to fit the engine and get the lower wing dihedral right (1.5° per side). I had to do some trimming at the wing root and consequently reduce the height of the struts a little, but nothing too complicated.
The rigging was done with photo-etched wires from SBS (SBS Rigging Generic) in 0.25 and 0.30mm widths (by 0.10mm thickness). I found it practical as long as you drill a 0.4mm hole in the plastic at each end of the wire, perfectly centered. The rigging wires can be cut with a good pair of scissors; you can take advantage of the metal's elasticity to fit them in place. To determine the lengths of each wire and check the hole alignment, I dry-fitted the underside of the upper wing. The PT 17 isn't the simplest because some of the rigging wires are doubled.
For gluing these wires, I don't use cyanoacrylate glue but Zap canopy glue, which has the advantage of allowing time for application, become transparent, and can be dissolved in water if needed. Very little glue is required because the wires are captive at each end.
Note that SBS makes rigging sets specifically for certain kits (the Airfix 1/48 Tiger Moth, for example). My SBS products come from Super Hobby, where shipping is cheaper than from the manufacturer.
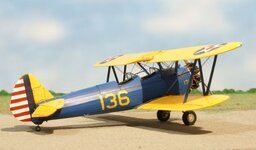
I used MRP True Blue No. 384, the yellow is Tamiya XF3 with a touch of red, and Tamiya semi-gloss varnish.
The kit decals are printed in Italy (by Cartograf?) but have a few minor flaws; I used them anyway.
Feel free to comment and give me your opinion.
Best regards !
Here's my latest model, two months of work.
It's a 1/48 scale Revell PT-17. It's a good kit, about ten years old, well-designed and doesn't require any filler. It's a shame the plastic is yellow, which isn't very convenient.
I struggled a bit to fit the engine and get the lower wing dihedral right (1.5° per side). I had to do some trimming at the wing root and consequently reduce the height of the struts a little, but nothing too complicated.
The rigging was done with photo-etched wires from SBS (SBS Rigging Generic) in 0.25 and 0.30mm widths (by 0.10mm thickness). I found it practical as long as you drill a 0.4mm hole in the plastic at each end of the wire, perfectly centered. The rigging wires can be cut with a good pair of scissors; you can take advantage of the metal's elasticity to fit them in place. To determine the lengths of each wire and check the hole alignment, I dry-fitted the underside of the upper wing. The PT 17 isn't the simplest because some of the rigging wires are doubled.
For gluing these wires, I don't use cyanoacrylate glue but Zap canopy glue, which has the advantage of allowing time for application, become transparent, and can be dissolved in water if needed. Very little glue is required because the wires are captive at each end.
Note that SBS makes rigging sets specifically for certain kits (the Airfix 1/48 Tiger Moth, for example). My SBS products come from Super Hobby, where shipping is cheaper than from the manufacturer.
I used MRP True Blue No. 384, the yellow is Tamiya XF3 with a touch of red, and Tamiya semi-gloss varnish.
The kit decals are printed in Italy (by Cartograf?) but have a few minor flaws; I used them anyway.
Feel free to comment and give me your opinion.
Best regards !
Attachments
-
 DSC07545x1000.jpg76.8 KB · Views: 54
 -
 20260101x1000.jpg82.9 KB · Views: 53
 -
 DSC07562x1000.jpg96.4 KB · Views: 43
 -
 DSC07546x1000.jpg67.7 KB · Views: 48
 -
 DSC07547x1000.jpg67.2 KB · Views: 47
 -
 DSC07551x1000.jpg69.1 KB · Views: 49
 -
 DSC07556x1000.jpg70.1 KB · Views: 49
 -
 DSC07557x1000.jpg137.7 KB · Views: 43
 -
 DSC07548x1000.jpg73.2 KB · Views: 49


