So I tried two products, Dimension magic by Mod Podge, sold in craft stores, and Testors clear parts adhesive.

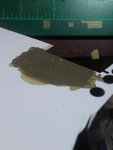
I got better results with the Mod Podge product, the Testors wanted to level out a lot more. The trick I found is to place a small drop from the bottle on a work surface (like you do when using super glue) and let it set up for about 15 minutes. It will be too thin to achieve the desired result before this. I'll show these as done on piece of plastic sheet over a swatch of olive drab. In the pictures, the group of four were done with the testors product and the grouping of six are the Mod Podge product.
Take a shaved down sharp toothpick and place a tiny drop where desired, being careful to not to let the diameter of the drop exceed the width of the light you are wanting to represent. Carefully, with a very light touch, drag the drop in the direction of the taper and lift away while doing so that it tapers out. (This of course for the light a light that is to be teardrop shaped)
You can build up the thickness by reapplying more. Basically just touching the bead formed on the end of the toothpick to your newly made light and lifting away. It is something that you really have to feel and play with a bit. If you do not like the result, allow to dry for at least an hour and it can be easily removed by gently scratching with ones fingernail or toothpick. It will pop right off, allowing you to start anew.

In the picture above, the cluster of four lights at the bottom are made with the testors clear cement. It may be able to work, but seems that it will take many more layers to achieve sufficient volume. The Mod Podge product worked better and was able to be built up quickly once allowed to cure to an acceptable viscosity. Be careful waiting too long to work with it as it will eventually leave points as you pull your toothpick away and not want to level out into the desired domed shape. Again, this is a feel sort of thing when working with this.


These have been painted with Model Master Acryl clear red and clear blue. A vertical stabilizer from a 1/48 P-51D has been included for scale. These are pretty translucent even though the camera does not show this.
I hope this is helpful and I will be glad to clarify anything if needed. Let me me know if additional pictures would be useful, I will see what I can do.
I got better results with the Mod Podge product, the Testors wanted to level out a lot more. The trick I found is to place a small drop from the bottle on a work surface (like you do when using super glue) and let it set up for about 15 minutes. It will be too thin to achieve the desired result before this. I'll show these as done on piece of plastic sheet over a swatch of olive drab. In the pictures, the group of four were done with the testors product and the grouping of six are the Mod Podge product.
Take a shaved down sharp toothpick and place a tiny drop where desired, being careful to not to let the diameter of the drop exceed the width of the light you are wanting to represent. Carefully, with a very light touch, drag the drop in the direction of the taper and lift away while doing so that it tapers out. (This of course for the light a light that is to be teardrop shaped)
You can build up the thickness by reapplying more. Basically just touching the bead formed on the end of the toothpick to your newly made light and lifting away. It is something that you really have to feel and play with a bit. If you do not like the result, allow to dry for at least an hour and it can be easily removed by gently scratching with ones fingernail or toothpick. It will pop right off, allowing you to start anew.
In the picture above, the cluster of four lights at the bottom are made with the testors clear cement. It may be able to work, but seems that it will take many more layers to achieve sufficient volume. The Mod Podge product worked better and was able to be built up quickly once allowed to cure to an acceptable viscosity. Be careful waiting too long to work with it as it will eventually leave points as you pull your toothpick away and not want to level out into the desired domed shape. Again, this is a feel sort of thing when working with this.
These have been painted with Model Master Acryl clear red and clear blue. A vertical stabilizer from a 1/48 P-51D has been included for scale. These are pretty translucent even though the camera does not show this.
I hope this is helpful and I will be glad to clarify anything if needed. Let me me know if additional pictures would be useful, I will see what I can do.
Attachments
Last edited:

