Grant Barr
Senior Airman
This next build is an old(?) Classic Airframes kit of the Boeing P-12E. Unless you have an old Aurora kit, this is basically the only game in town when it comes to 1/48 scale versions of this aircraft. I did build the Matchbox 1/72 scale kit of this aircraft back when Adam was a boy, but my eyes and fingers just can't cope at the smaller scales these days. Minicraft/Hasegawa do have one in 1/32, but I don't have enough space for the big scale stuff.
As you would expect with a short-run kit (and as the makers helpfully state on their instructions), there will be lots of cleaning up of parts, dry fitting and scratching up enhancements/replacements/fixes along the way. After looking closely at the sprue trees, I think that the clean-up and fitting work will form most of the time I spend putting this one together.
So, what do I get for my hard-earned cash?
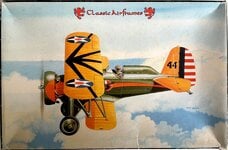
The excellent box art is from the late Don Greer and pictures an aircraft from the same squadron as that I built with the Matchbox kit so many years ago.
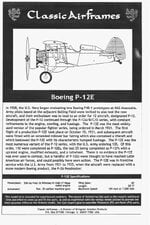
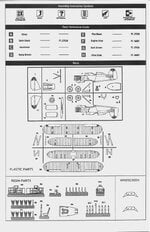
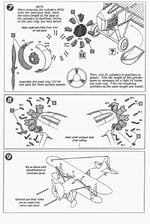
The instructions are basic, with guidance on the placement of parts a bit "arbitrary". Thankfully I have been able to source quite a good number of old photos (mostly from the Boeing website) which provide excellent real-world detail on what goes where on the aircraft.
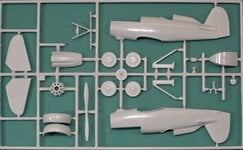
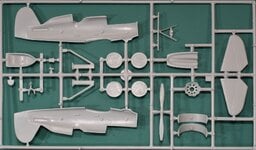
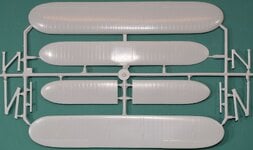
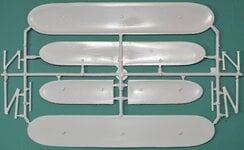
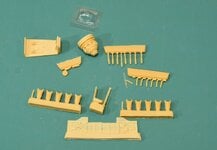
As for the parts themselves, if you zoom in a bit on the sprues, you will see that the moldings are a bit "blurry" around the edges and there are a lot of mold seams and flash to be dealt with. The other thing I really noticed was the massive mold fill point "lugs" on the inside of the wings, fuselage, and engine cowl. Will need to get the trusty Dremel out to deal with those.
Also worth noting is the inclusion of a comment in the instructions in step 5, where the top wings are installed, advising that the outboard struts and the cabane struts are molded too long and need to be shortened by up to 6mm (for the outboard struts – less for cabane). This does seem to be perhaps a bit excessive, but I have sourced some 1/48 scale line drawings to help me with fixing this issue. However, I am still worried about how this will impact the angle of the diagonal brace between the forward and rearward struts. Will need to think this one through a bit before proceeding – measure twice / cut once!
More to come - will be slowly progressing this kit over the next few months. Thanks for stopping by!
As you would expect with a short-run kit (and as the makers helpfully state on their instructions), there will be lots of cleaning up of parts, dry fitting and scratching up enhancements/replacements/fixes along the way. After looking closely at the sprue trees, I think that the clean-up and fitting work will form most of the time I spend putting this one together.
So, what do I get for my hard-earned cash?

The excellent box art is from the late Don Greer and pictures an aircraft from the same squadron as that I built with the Matchbox kit so many years ago.


The instructions are basic, with guidance on the placement of parts a bit "arbitrary". Thankfully I have been able to source quite a good number of old photos (mostly from the Boeing website) which provide excellent real-world detail on what goes where on the aircraft.


As for the parts themselves, if you zoom in a bit on the sprues, you will see that the moldings are a bit "blurry" around the edges and there are a lot of mold seams and flash to be dealt with. The other thing I really noticed was the massive mold fill point "lugs" on the inside of the wings, fuselage, and engine cowl. Will need to get the trusty Dremel out to deal with those.
Also worth noting is the inclusion of a comment in the instructions in step 5, where the top wings are installed, advising that the outboard struts and the cabane struts are molded too long and need to be shortened by up to 6mm (for the outboard struts – less for cabane). This does seem to be perhaps a bit excessive, but I have sourced some 1/48 scale line drawings to help me with fixing this issue. However, I am still worried about how this will impact the angle of the diagonal brace between the forward and rearward struts. Will need to think this one through a bit before proceeding – measure twice / cut once!
More to come - will be slowly progressing this kit over the next few months. Thanks for stopping by!
