
Navigation
Install the app
How to install the app on iOS
Follow along with the video below to see how to install our site as a web app on your home screen.
Note: This feature may not be available in some browsers.
More options
You are using an out of date browser. It may not display this or other websites correctly.
You should upgrade or use an alternative browser.
You should upgrade or use an alternative browser.
1:48 Engine Room #3 Battleship USS New Jersey for Permanent Display on Board.
- Thread starter Builder 2010
- Start date
More options
Who Replied?
Excellent work so far!

Vic Balshaw
Major General
Showing us the real thing then the art work and then the 3D parts.........................amazing stuff. 
- Thread starter
- #184

Builder 2010
Staff Sergeant
Thanks guys!
I got the aux air ejectors designed, but they're kind of fictional. I have no drawings of them nor do images help very much. Here's an image that "shows" the two aux air ejectors that produce vacuum for the turbo-generators. Can you see an air ejector hiding in that piping? I can't. Therefore; I just shrunk the main ejector until it made a resonable size. Anyone visiting the engine rooms probably won't see much of them either. They are on the right side of the image.

I have the foundation drawings for the aux units. They are brackets that attach to the bulkhead wall with stiffening on the fire room #4 side. I drew them sort of correctly, albeit simpilified. That said, I don't have any drawing of the units themselves or the foundation of the main air ejctor. If it goes straight down to the 3rd skin like some of the heavier gear does, it won't work becasue they would pass through the end bell of the main condenser. I chose to bracket it also.

Here are the two unpiped aux air ejectors. They are fatter than the real ones.

I'm running into a jam trying to get the clear acrylic bulkheads laser cut within a budget I can tolerate. I'm donating this model like the other two, and spending the best part of a year in its creation. As a result, I'm trying to mitigate out-of-pocket expenses as much as I can. That leads us to plan B; back to hand-cut styrene sheet. I've already bought the sheets for this eventuality and will make the end bulkheads and all the under-floor framing out of styrene. Styrene is much easier to glue togther (silver lining).
I'm calling this approach, "the Swiss Cheese cutaway method". The stiffeners on the fire room sides will add structural integrity to make the bulkheds work. There would be part of the boiler supports on the other side. Stiffeners are mentioned on the plans.
Here's the fore bulkhead:

And the aft bulkhead. It's important that they support the propshaft pass thrus. The tongue sticking up is supporting the entry ladder. I think I'm going to make a bit of ceiling there to model the entry hatch into the engine room. It's an important feature. There's also a small hatch in the fore bulkhead to enter the #3 fire room.

I printed out full-size plans for all the styrene parts in prep to handcut them. I'm still waiting for another quote for laser cutting acrylic, but I'm not very optimistic about the outcome. I still have to design the control panels and electrical cabinets. After that paint and assembly will begin.
I got the aux air ejectors designed, but they're kind of fictional. I have no drawings of them nor do images help very much. Here's an image that "shows" the two aux air ejectors that produce vacuum for the turbo-generators. Can you see an air ejector hiding in that piping? I can't. Therefore; I just shrunk the main ejector until it made a resonable size. Anyone visiting the engine rooms probably won't see much of them either. They are on the right side of the image.
I have the foundation drawings for the aux units. They are brackets that attach to the bulkhead wall with stiffening on the fire room #4 side. I drew them sort of correctly, albeit simpilified. That said, I don't have any drawing of the units themselves or the foundation of the main air ejctor. If it goes straight down to the 3rd skin like some of the heavier gear does, it won't work becasue they would pass through the end bell of the main condenser. I chose to bracket it also.
Here are the two unpiped aux air ejectors. They are fatter than the real ones.
I'm running into a jam trying to get the clear acrylic bulkheads laser cut within a budget I can tolerate. I'm donating this model like the other two, and spending the best part of a year in its creation. As a result, I'm trying to mitigate out-of-pocket expenses as much as I can. That leads us to plan B; back to hand-cut styrene sheet. I've already bought the sheets for this eventuality and will make the end bulkheads and all the under-floor framing out of styrene. Styrene is much easier to glue togther (silver lining).
I'm calling this approach, "the Swiss Cheese cutaway method". The stiffeners on the fire room sides will add structural integrity to make the bulkheds work. There would be part of the boiler supports on the other side. Stiffeners are mentioned on the plans.
Here's the fore bulkhead:
And the aft bulkhead. It's important that they support the propshaft pass thrus. The tongue sticking up is supporting the entry ladder. I think I'm going to make a bit of ceiling there to model the entry hatch into the engine room. It's an important feature. There's also a small hatch in the fore bulkhead to enter the #3 fire room.
I printed out full-size plans for all the styrene parts in prep to handcut them. I'm still waiting for another quote for laser cutting acrylic, but I'm not very optimistic about the outcome. I still have to design the control panels and electrical cabinets. After that paint and assembly will begin.
Last edited:


- Thread starter
- #186
Builder 2010
Staff Sergeant
I've piped the aux air ejectors. This is not prototypical, but it's reasonably functional. This is just the primary lines. I'm not attempting to include any secondary lines. I may attempt to print this as a complete assembly… would help in alignment. Ryan gave his approval on the "Swiss Cheese" approach. I will have a lot of styrene cutting to do.

Great work so far!
- Thread starter
- #189
Builder 2010
Staff Sergeant
Everything starts with the artwork! Printer is a slave to the drawings. Get them right and you're halfway there. The next hurdle is getting the supports right on the printer set up. Then the printer can do its magic.
While still doing more design, I started on the styrene parts. I printed full-size plans for all of the parts using PostRazr to help convert bigger-than-letter-sized drawings to mulitple page prints since my version of CorelDraw doesn't play well with the latest version of Mac OS. I'd have to pay another $300 to upgrade CorelDraw… which I'm not going to do. You export the big drawing as PNG to PostRazr (free online app) then it converts it to a tiled PDF output that can be printed in mutiple, overlapping pages by Adobe Reader. Convuluted, but free.

I started cutting the pieces with the front bulkhead. Maybe I should have started with some of inner pieces to perfect the cutting… nope. I used the Lord Nelson method, "I went straight at em'". Might have been a mistake. I mis-drilled one of the lightening holes in the lower frame portion. This will show!
I cut the holes for the prop shaft seals. These go in at an angle so a little siop in the fit is tolerable. To cut these I used my dividers-with-a-chisel-blade method, where I just twirl it around and score the plastic. I cut radial slots to the center and break out the piece leaving a reasonably-sized hole. Some light Dremel sanding work cleaned up rough edges. The shaft seals fit okay.

I used the same method for the steam pipe opening at the top. For the oval hole for the condenser inlet scoop I used the "drill-a-zillion-little-holes-around-the-perimeter method and used a #11 blade to cut between them, breaking out the center. Again, Dremel sanding finished it up. I chose to drill all the rest of the holes and radii. I didn't have a plastic-ground drill of the right size so i had to grind one. I have a commercial plastic bit that I used as a guide. To drill soft plastic like styrene you need a sharper point angle. Standard drills are 118º and need to be something around 90º. Also the drills need less rake angle under the cutting lip. If you don't do these things, the drills will tear and grab the plastic creating more of a mess than a hole. The grind worked.


I used a small pilot drill to locate the centers of the frame holes and drilled them all successfully except for the hole 3rd from the right in the picture. I am really annoyed by this! I so annoyed that I may plug it and re-drill. I'll think about it. For all the rest of the holes in all the frames, I'm going to temporarily glue them together and drill as a batch including the back bulkhead. I'm also going to drill the upper end of the cross-lap slots instead of working about cutting a square edge. it won't matter.

To cut the remaining free-form shapes i'm thinking about using a jig or jewelers saw. I did the first cuts by scribing with a #11 blade and breaking out the pieces, but occasionally the knife slipped and cut into good stock that will leave a mark requiring post-finishing. Using the saw would be more controllaable and leave smoother edges.
Meanwhile, I'm about to finish the last drawing challeges, including all the electrical, control panels and diamond plate flooring for the lower level. The diamond plate I drew for the 5" proiject, while scale-sized was too fine to see well in 1:48. I'm going to enlarge the bumps a bit and then print.
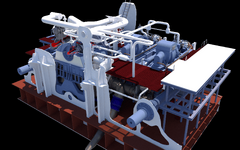
The complex nature of the project at this point is mind-blowing, even for me, and I'm the guy doing all the drawing. Notice the large column in the center of the image. That's a prominent feature in the ER. It required me to change the routing of the main steam pipe to clear it. Also note that the upper mezanine platform is ready to receive the electrical equipment after I draw it.

All of the platforms and catwalks will require handrails before they're fully done. I'm probably going to make them out of soldered phos-bronze wire to reduce opportunities for breakage. I'm still working out how all the floor panels will be supported, especially since there's not a full bulkhead in the fore or aft from which to hang them.
While still doing more design, I started on the styrene parts. I printed full-size plans for all of the parts using PostRazr to help convert bigger-than-letter-sized drawings to mulitple page prints since my version of CorelDraw doesn't play well with the latest version of Mac OS. I'd have to pay another $300 to upgrade CorelDraw… which I'm not going to do. You export the big drawing as PNG to PostRazr (free online app) then it converts it to a tiled PDF output that can be printed in mutiple, overlapping pages by Adobe Reader. Convuluted, but free.
I started cutting the pieces with the front bulkhead. Maybe I should have started with some of inner pieces to perfect the cutting… nope. I used the Lord Nelson method, "I went straight at em'". Might have been a mistake. I mis-drilled one of the lightening holes in the lower frame portion. This will show!
I cut the holes for the prop shaft seals. These go in at an angle so a little siop in the fit is tolerable. To cut these I used my dividers-with-a-chisel-blade method, where I just twirl it around and score the plastic. I cut radial slots to the center and break out the piece leaving a reasonably-sized hole. Some light Dremel sanding work cleaned up rough edges. The shaft seals fit okay.
I used the same method for the steam pipe opening at the top. For the oval hole for the condenser inlet scoop I used the "drill-a-zillion-little-holes-around-the-perimeter method and used a #11 blade to cut between them, breaking out the center. Again, Dremel sanding finished it up. I chose to drill all the rest of the holes and radii. I didn't have a plastic-ground drill of the right size so i had to grind one. I have a commercial plastic bit that I used as a guide. To drill soft plastic like styrene you need a sharper point angle. Standard drills are 118º and need to be something around 90º. Also the drills need less rake angle under the cutting lip. If you don't do these things, the drills will tear and grab the plastic creating more of a mess than a hole. The grind worked.
I used a small pilot drill to locate the centers of the frame holes and drilled them all successfully except for the hole 3rd from the right in the picture. I am really annoyed by this! I so annoyed that I may plug it and re-drill. I'll think about it. For all the rest of the holes in all the frames, I'm going to temporarily glue them together and drill as a batch including the back bulkhead. I'm also going to drill the upper end of the cross-lap slots instead of working about cutting a square edge. it won't matter.
To cut the remaining free-form shapes i'm thinking about using a jig or jewelers saw. I did the first cuts by scribing with a #11 blade and breaking out the pieces, but occasionally the knife slipped and cut into good stock that will leave a mark requiring post-finishing. Using the saw would be more controllaable and leave smoother edges.
Meanwhile, I'm about to finish the last drawing challeges, including all the electrical, control panels and diamond plate flooring for the lower level. The diamond plate I drew for the 5" proiject, while scale-sized was too fine to see well in 1:48. I'm going to enlarge the bumps a bit and then print.
The complex nature of the project at this point is mind-blowing, even for me, and I'm the guy doing all the drawing. Notice the large column in the center of the image. That's a prominent feature in the ER. It required me to change the routing of the main steam pipe to clear it. Also note that the upper mezanine platform is ready to receive the electrical equipment after I draw it.
All of the platforms and catwalks will require handrails before they're fully done. I'm probably going to make them out of soldered phos-bronze wire to reduce opportunities for breakage. I'm still working out how all the floor panels will be supported, especially since there's not a full bulkhead in the fore or aft from which to hang them.
Attachments

SaparotRob
Unter Gemeine Geschwader Murmeltier XIII
Convolution gets a bad rap these days.
- Thread starter
- #193
Builder 2010
Staff Sergeant
Thanks!
I tried using the jewelers saw, but it wasn't worth the trouble. Went back and did it by scoring the lines and snapping. Took my time and the results were good. I cleaned up the holes and curves with the Dremel with the smaller sanding drum, and did deburring and it's ready for the slotting. I'm going to slot all the frames glued together so regardless of their specific precision to holding the lines, they will all be equal. I cut one mid-frame out of the 0.040" sheet, but stopped at that one. I was concerned about running out of the thicker stock for the rear bulkhead. I can get away with the 0.030" stock for the cross-frames.

I attached the Aft BH to the styrene and began cutting it out. This image shows closeup of how to do a scored diameter hole in styrene. After scoring with multiple passes with the dividiers, I scribed cross-line all the way through which provides a place to grab with some pliers to snap out the pieces. The hole requires a little sanding drum work to clean up the edges and do final fit on the shaft seal.

The print of the Main Air Extractor came out beautifully. The pictue shows two of them. I only need one. One is a better than other slightly, and I'll use that and put the other in the surplus pile.

In the same run I printed the four remaining tubes from the TG condenser to the heat exchanger. There were two on each TG and are slightly different. The valve bodies and their handles came out really nicely.

I re-drew and improved the diamond plate I used for the 5". This was originally downloaded from the SketchUp 3D Warehouse. The original size of bumps was too big for 1:48 and I shrunk them. For this application I shrunk them a bit too small. That said, the orginal artist didn't group or convert the bumps to Components. With SU Components, if I change the configuration of one bump, all of the bumps change regardless of where they are or how many plates were drawn. I'm printing the flooring in 2' X 4' pieces. I made them pretty thin and adding some cross reinforcement to help mitigate warping. I'm printing out 20 of them and it's going on the Machine tomorrow.

I tried using the jewelers saw, but it wasn't worth the trouble. Went back and did it by scoring the lines and snapping. Took my time and the results were good. I cleaned up the holes and curves with the Dremel with the smaller sanding drum, and did deburring and it's ready for the slotting. I'm going to slot all the frames glued together so regardless of their specific precision to holding the lines, they will all be equal. I cut one mid-frame out of the 0.040" sheet, but stopped at that one. I was concerned about running out of the thicker stock for the rear bulkhead. I can get away with the 0.030" stock for the cross-frames.
I attached the Aft BH to the styrene and began cutting it out. This image shows closeup of how to do a scored diameter hole in styrene. After scoring with multiple passes with the dividiers, I scribed cross-line all the way through which provides a place to grab with some pliers to snap out the pieces. The hole requires a little sanding drum work to clean up the edges and do final fit on the shaft seal.
The print of the Main Air Extractor came out beautifully. The pictue shows two of them. I only need one. One is a better than other slightly, and I'll use that and put the other in the surplus pile.
In the same run I printed the four remaining tubes from the TG condenser to the heat exchanger. There were two on each TG and are slightly different. The valve bodies and their handles came out really nicely.
I re-drew and improved the diamond plate I used for the 5". This was originally downloaded from the SketchUp 3D Warehouse. The original size of bumps was too big for 1:48 and I shrunk them. For this application I shrunk them a bit too small. That said, the orginal artist didn't group or convert the bumps to Components. With SU Components, if I change the configuration of one bump, all of the bumps change regardless of where they are or how many plates were drawn. I'm printing the flooring in 2' X 4' pieces. I made them pretty thin and adding some cross reinforcement to help mitigate warping. I'm printing out 20 of them and it's going on the Machine tomorrow.
Excellent work so far!
- Thread starter
- #195
Builder 2010
Staff Sergeant
The Steam powered lube pump printed correctly this time, but I broke a pipe in cleanup. Picture will come after I fix it. I also got good prints on the aux air ejectors and the 9 step ladder needed for the entry stairs that come down from Broadway into the engine room.
I got the aft bulkhead and finished up ready for drilling. Unlike the fore BH, I held off drilling this and waited until all the frames so I could temporarily glue them all togther. Using the #11 to scribe all the curves really worked out well in the end. Had to change blades frequently.
I then cut the individual frames out. I used MicroMark pressure sensitive adhesive.to temporarily hold the patterns to the styrene. Occasionally, some cement stayed behind that was easily removed with Goo Gone.

I did not drill or slot any of them.
I then temporarily glued the stack to the aft BH in readiness for drilling all at the same time.

Before gluing the stack to the BH, I clamped them together and trued up the ends so they were all the same size on the 1" belt sander. I used little dolleps of Testor's tube cement to hold the stack together. The holes were located on the BH with a smalll 1/16" drill that will center the big drill. I wish I hadn't drilled the first BH yesterday. After I drill these, I will cut out the cross frames and do the same thing to them. I will cut all the slots while the frames are still stacked guarenteeing that all them are in the same place. Actually, since the floors will cover all but the outer edges of all this framing, I really don't need to include all the cross-frames. I probaly will use them because, I'm a) going to cut them anyway, and b) the entire model is being fastened to this floor (as in the real ship) and having it solid and stable will not hurt. It will not, however, have to protect against topedo attack.
Started drawing the electrical equipment on the upper mezzanine deck. I finished the lighting tranformers that have louvered surfaces. Had to figure a way to draw reasonable louvers and think I got it.

I'm now drawing the electrical console. I have a good image of it, but not it's sizes.

I got the aft bulkhead and finished up ready for drilling. Unlike the fore BH, I held off drilling this and waited until all the frames so I could temporarily glue them all togther. Using the #11 to scribe all the curves really worked out well in the end. Had to change blades frequently.
I then cut the individual frames out. I used MicroMark pressure sensitive adhesive.to temporarily hold the patterns to the styrene. Occasionally, some cement stayed behind that was easily removed with Goo Gone.
I did not drill or slot any of them.
I then temporarily glued the stack to the aft BH in readiness for drilling all at the same time.
Before gluing the stack to the BH, I clamped them together and trued up the ends so they were all the same size on the 1" belt sander. I used little dolleps of Testor's tube cement to hold the stack together. The holes were located on the BH with a smalll 1/16" drill that will center the big drill. I wish I hadn't drilled the first BH yesterday. After I drill these, I will cut out the cross frames and do the same thing to them. I will cut all the slots while the frames are still stacked guarenteeing that all them are in the same place. Actually, since the floors will cover all but the outer edges of all this framing, I really don't need to include all the cross-frames. I probaly will use them because, I'm a) going to cut them anyway, and b) the entire model is being fastened to this floor (as in the real ship) and having it solid and stable will not hurt. It will not, however, have to protect against topedo attack.
Started drawing the electrical equipment on the upper mezzanine deck. I finished the lighting tranformers that have louvered surfaces. Had to figure a way to draw reasonable louvers and think I got it.
I'm now drawing the electrical console. I have a good image of it, but not it's sizes.
- Thread starter
- #197
Builder 2010
Staff Sergeant
Here's the "better" steam-driven lube pump. It's not attached yet to the MRG foundation, just sitting there being photographed.

I still have put on it's valve handwheel.
I drew the electrical distribution console. It's ready to go to the slicer and then printing. I detaled all those little handles with the hope that they'll print. With the recent success making tiny detais, they may just work out. As for the gauge dials… making 1:48 individual gauge face decals using inkjet decal paper has not worked out so well. The decal print is over-coated with some form of laquer to keep the water-soluble ink from running, but with samll decals, it happens anyway and the resolution gets destroyed. I will try. Ryan's going to get me some good images of them.

Another view as if you were standing next to one of the turbo-generators.

Now for some more sobering stuff. I may be a fabulous, amazing modeler, but I can still screw up. Today I did.
I was so excited about getting the stack drilling of all the frames done, that I drilled the first two large holes in the entirely wrong place. I had drilled 1/16" holes at the ends of each of the slot positions and drilled the same as pilot holes for the big holes down lower. I drilled the two smaller holes on the extended slots at each end and then proceeded to drill the big holes in the tiny hole at the top of the first two slots, completely screwing up all the pieces in the entire stack. This error will not be seen in any but the two end bulkheads, but that's bad enough.

I have two choices to fix… well actually three. I can fill the two errant holes in the bulkheads and with putty and craftiness, make them invisible. Or I can add one more correctly drilled non-bulkhead frame one bay in from of each end, showing a bit of the 3rd skin in each fire room space. Lastly, I could remake the bulkheads. The problem with #3 is I don't have enough 0.040" stock left to make them and it's expensive. I also don't relish doing all that handwork needed to create them. I'm going to go for the patch first. If it works, I'm done. If it doesn't I can go to Plan B and still make a respectable model. Choice 3 would be the last resort. Unlike remaking 3D printed parts where the Machine does most of the heavy lifting, doing hand-crafted parts over involves labor and I'm basically lazy.
I still have put on it's valve handwheel.
I drew the electrical distribution console. It's ready to go to the slicer and then printing. I detaled all those little handles with the hope that they'll print. With the recent success making tiny detais, they may just work out. As for the gauge dials… making 1:48 individual gauge face decals using inkjet decal paper has not worked out so well. The decal print is over-coated with some form of laquer to keep the water-soluble ink from running, but with samll decals, it happens anyway and the resolution gets destroyed. I will try. Ryan's going to get me some good images of them.
Another view as if you were standing next to one of the turbo-generators.
Now for some more sobering stuff. I may be a fabulous, amazing modeler, but I can still screw up. Today I did.
I was so excited about getting the stack drilling of all the frames done, that I drilled the first two large holes in the entirely wrong place. I had drilled 1/16" holes at the ends of each of the slot positions and drilled the same as pilot holes for the big holes down lower. I drilled the two smaller holes on the extended slots at each end and then proceeded to drill the big holes in the tiny hole at the top of the first two slots, completely screwing up all the pieces in the entire stack. This error will not be seen in any but the two end bulkheads, but that's bad enough.
I have two choices to fix… well actually three. I can fill the two errant holes in the bulkheads and with putty and craftiness, make them invisible. Or I can add one more correctly drilled non-bulkhead frame one bay in from of each end, showing a bit of the 3rd skin in each fire room space. Lastly, I could remake the bulkheads. The problem with #3 is I don't have enough 0.040" stock left to make them and it's expensive. I also don't relish doing all that handwork needed to create them. I'm going to go for the patch first. If it works, I'm done. If it doesn't I can go to Plan B and still make a respectable model. Choice 3 would be the last resort. Unlike remaking 3D printed parts where the Machine does most of the heavy lifting, doing hand-crafted parts over involves labor and I'm basically lazy.

T Bolt
Colonel
Amazing!
Great work so far!
Users who are viewing this thread
Total: 1 (members: 0, guests: 1)


