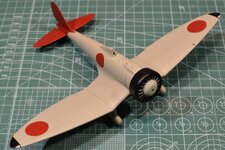
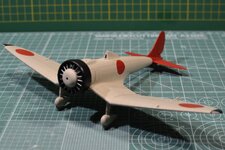
1/48 Finemolds Kyu-Shi Ka-14 Prototype

Ad: This forum contains affiliate links to products on Amazon and eBay. More information in Terms and rules

Grant Barr

Senior Airman
Seeing I have completely lost my mojo with the other project I have running at the moment, the Italeri Stuka, I thought it might be good to do a quick and dirty build of another kit that does not have quite so many build issues.

So here I go with the Ka-14 from Finemolds. I have never built a kit by this manufacturer, so it's a whole new world. Upon opening I must say that the sprues look very crisp with only slight mold lines and zero flash. The plastic is quite a bit harder than a lot of new manufacturers use these days (not a bad thing) and the finish is VERY smooth and shiny. Decals look pretty good and I managed to grab some after-market seat belts made from paper. I've not used these before either, so I'm really curious to see how they go.
01_Ka-14 Box Art.JPG
02_Ka-14 Sprues & Seat Belt Addons.JPG

Looking forward to getting into this one, so many firsts for me represented by this build (never finished a Japanese aircraft before - might have started one or two many years ago however).

With luck this one will help me in renewing interest in finishing the Stuka.

More to come soon.
 
Some progress has been made. As is the norm, cockpit was first up. For some reason I completely forgot to take any shots of the cockpit painted but before installation into the fuselage. None-the-less this first shot is for all the main components, assembled where appropriate and ready for paint. In the absence of finding information to the contrary, I went with the recommended cockpit green from the instructions (Mitsubishi cockpit green, I think).
03_Ka-14 Cockpit Components.JPG

Once I got the paint dry I was quick to pop it into the fuselage and stitch it all together. I must say that this Finemolds kit assembles beautifully, with no major gaps, misalignments or general phaffing about! It's a great contrast to the Italeri Stuka which is giving me no end of challenges! (Not to mention testing my patience).

Once it was all stitched up, and after I got the wings on (again with no major fit or alignment issues) I remembered to take a couple of shots. You may recall I included a set of after-market paper/fibre seatbelts. Again, I failed to take shots as I was painting them, but I am really happy with the way they turned out. As you can see via the shot from the front, they took to the paint quite well and folding them into shape only required some bending and I used a tiny bit of water to soften them for shaping and let them dry hard in place. Definitely more fragile than PE belts, but one heck of a lot easier to install and manipulate.
04_Ka-14 Installed Cockpit.JPG
05_Ka-14 Instrument Panel.JPG

It is worth noting that the kit comes with a decal for the instrument panel, which they say to place onto a smooth instrument panel blank, rather than the one with raised details. So, of course I decided to see if I could get the decal settled down into the raised detail panel. As you can see it kind of worked out OK. If I look closely with a magnifier I can see where the decal isn't properly settled or where it might have some tiny tears from being stretched too far, but from a naked eye perspective it works out just fine.

The next couple of shots are just wider views of the model now that the fuselage is complete and the wings have been mounted.
07_Ka-14 Fuselage & Wings Assembled RHF Qtr.JPG

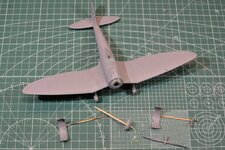
The only place I have struck an issue with fit is the underside of the gull wing section joint where the strengthening rib runs. The end piece which juts out past the trailing edge is moulded to the top wing, with the rest of the rib on the lower wing panel. This left a tiny little gap which I filled with a teeny wedge of 0.25mm thick plastic card. I've got a slightly blurry zoom at the point in question. Once its shaped to match the rib, you won't even know there was a gap there.

08_Ka-14 Fuselage & Wings Assembled LHR Underside.JPG


I have done a few other small bits and pieces that I have either not photographed or have not loaded to the PC from the camera. With luck I will get some time this weekend to get the undercarriage mounted and some paint on.

I am impressed with how well this kit has fit together. It has been a pleasure to build it. Not sure I'd call it a "shake and bake" kit, but it's pretty darn close.

That'll do me for tonight, thanks for stopping by!
 
Thanks guys, it is hopefully a very quick build on my standards...

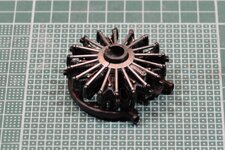
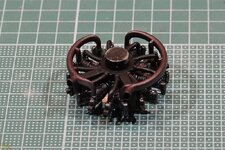
Got the engine together and slapped some paint on.
09_Ka-14 Engine Assembled & Painted Front.JPG 10_Ka-14 Engine Assembled & Painted Rear.jpg
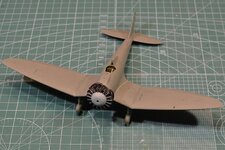
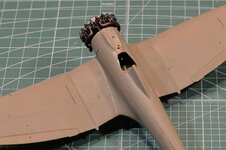
I couldn't help myself but mock up the engine on the fuselage, which you can see now incorporates some landing gear.
11_Ka-14 Engine Mocked Up on Fuselage.jpg 12_Ka-14 Engine Mocked Up on Fuselage Rear.jpg
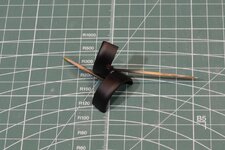
And now we get to the point where my plans, and speed of build took a wee detour. When I put the undercarriage together I painted the wheel hubs the requisite aluminium colour, and thought I'd be efficient and paint the prop front surfaces and hubs at the same time. I don't like the way acrylic metallic colours work, so I decided to use my Creos Aluminium - all good so far.

The paint dries, as paint does, and I thought "Gee, the finish looks a little grainy. Perhaps I should polish the finish back a bit to improve the look". Big mistake, but also helpful in a way.

You may recall I said the finish of the plastic is very shiny. Turns out it is "too shiny"!!!! The slightest application of finger pressure to the painted surface resulted in the whole thing just rubbing off. The paint just could not bond to the plastic - there is absolutely nothing for it to gain purchase. I've never encountered this with enamels - normally it will stick fast to anything.

My solution, somewhat laboriously was to lightly sand all painted surfaces and then to prime them with Mr Surfacer 1000 to make sure everything sticks.
13_Ka-14 Main Components Primed.jpg
Needless to say this set me back a bit, but I reckon I'm on track again to finish this one up pretty quickly.

Thanks again for looking in.
 
Last edited:
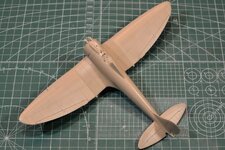
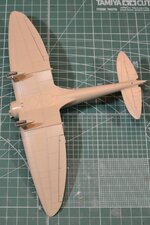
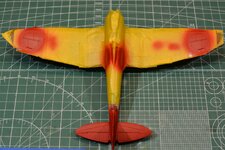
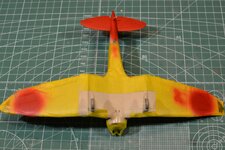
Following my small setback with the non-stick paint, the Mr Surfacer has dried and a light sand back has given me a nice strong foundation for the main base colour. I have no idea if the colour is correct, the instructions called for IJA Grey Green which for Vallejo is 71.325. To my eye, its definitely more grey than green and in my photos almost looks pinkish (although I can assure you it is definitely a very pale grey IRL).
14_Ka-14 Main Colour Clear Sealed Top.jpg 15_Ka-14 Main Colour Clear Sealed Bottom.jpg
I've also had time to paint the cowls and the wing tips. When I did the test fit of the cowl over the engine I noticed that it had some badly moulded impressions of a fastening cover strap, so I thought I should actually put some on. If you look closely at the edge for the cowl you can hopefully see the joint strip I've added. I'm also pretty happy with the black colour - just tinged with some blue to make it look the part.
17_Ka-14 Masking for Red & Black.jpg 16_Ka-14 Engine Cowling Black.jpg
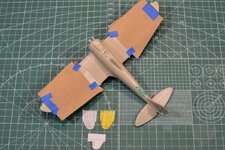
Having done the black bits it was time to lay down the red tail and hinomaru. I cut the hinomaru masks from frisket paper with the circle cutter and the fuselage arc in front of the tailplane, and then plastered the rest with some Tamiya tape. I'm hopeful that there wont be any paint bleed under the tape/frisket, easily fixed if it does though.
18_Ka-14 Red Tail & Hinomaru Top.jpg 19_Ka-14 Red Tail & Hinomaru Bottom.jpg
That's all for tonight. Hoping to get this one finished in the new few days. Thanks for dropping by.
 
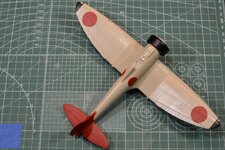
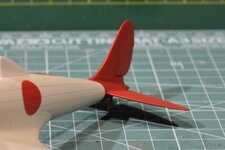
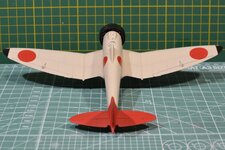
More progress to report. I managed to get all the masking tape off and I must say I am pretty chuffed with how it has all turned out. I did get some minor bleeding around the wing hinomaru but this is simple to rub off with a shaped toothpick dipped in Windex.

I am particularly pleased with how the fuselage arc in front of the tail assembly turned out, hence the close up. My biggest fear was that the arc that I worked out from fuselage point measurements, whilst 2 dimensionally may be correct, just would not translate into the right shape in a three dimensional world. Bugger me but it worked!! :lol:\\:D/

20_Ka-14 Unmasked Top Rear RHS.jpg21_Ka-14 Unmasked Top Front RHS.jpg22_Ka-14 Unmasked Front LHS.jpg23_Ka-14 Unmasked Tail.jpg24_Ka-14 Unmasked Top Rear.jpg

I also managed to do some other bibs and bobs today, but have not yet taken photos. I'll share these once done.

Getting close to finishing now. Really keen to get some of the basic sticky-outy bits on now and lay down a coat of clear polyurethane to protect the paint. As this aircraft was a prototype, and from all accounts was only in this guise for a short time (the prototype was quickly modified into one of six early test mules), I am thinking that it would not look overly used or abused. I will likely highlight the panel lines with some pale grime but any more would probably not be representative.

Compared to my Stuka this has been a really fun, quick build. Looking forward to uploading some finished shots when its done. Thanks to all for looking in!
 

Users who are viewing this thread

Back