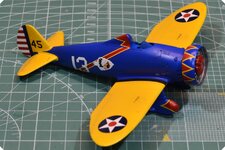
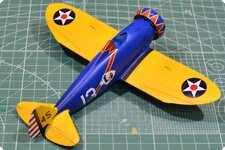
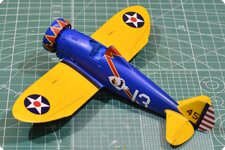
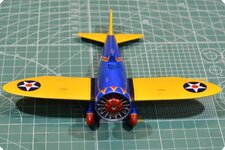
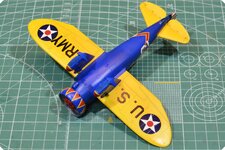
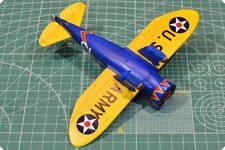
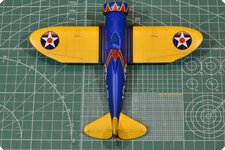
1/48 Hobby Craft Boeing P-26A

Ad: This forum contains affiliate links to products on Amazon and eBay. More information in Terms and rules

Vic Balshaw Vic Balshaw - holy crap!!!! I just read through your threads from nearly 10 years ago. I have to say there is no way I will be able to do this for my P-26, I have some of the materials required but I have absolutely none of the skills and patience required. I'll probably stick with my original plan to use the old stretched sprue method but I have a number of other biplanes in the to-do list that are prime candidates for your techniques. I'll be bookmarking your threads for future reference! Hope the weather up in the nation's capital is Ok - you guys escaped most of the flooding right?

Cheers.

You're too kind but tanks for the accolade. Can't remember where I got the little coil wires from that connect the rigging to the wings or airframe, I still have a few left and will look to see if I can hunt out the scours assuming it is still in existence. All good up here weather wise, autumn is setting in with the tree giving off a small interpretation of New England in the fall. Chucking id down at the moment but in this area, the rain is always good and thankfully as yet, no flooding.
 
Can't remember where I got the little coil wires from that connect the rigging to the wings or airframe
Thanks Vic - I hear you about the rain. I originally come from further up in NSW (the New England region), so I know how much good rain is always appreciated. As for the coil wires, you provided the website in one of your posts (SE.5 thread I believe) - Bobs Buckles. I'm placing an order today for the 5 or 6 biplanes in my current build list.

Cheers
 
Thanks Vic - I hear you about the rain. I originally come from further up in NSW (the New England region), so I know how much good rain is always appreciated. As for the coil wires, you provided the website in one of your posts (SE.5 thread I believe) - Bobs Buckles. I'm placing an order today for the 5 or 6 biplanes in my current build list.
Cheers
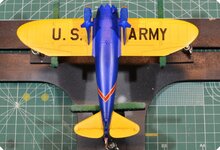
Oh, that's fantastic Grant, I would never have thought of checking my old thread and would have just been trolling through the internet in the hope of finding them. 🙃
 
While waiting for the replacement decal set I have done bits and pieces to this project.

I have laid down a few more decals which have not been without their issues. I have to say the decals themselves are wonderful, but I have found the multi-coloured ones tend to be a bit thicker than those that are single coloured. This gives the thicker ones issues with settling down nicely into the various nooks and crannies - additionally as the multi-coloured decals tend to be on the more curved sections it gives me the "double-whammy" of not settling into crevices as well as puckering around the curves.
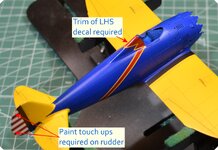
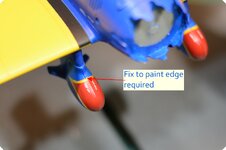
74_P-26A Underside Decals 1.JPG75_P-26A Topside Decals 1.JPG76_P-26A Spat Decals 1.JPG77_P-26A Engine Front Cowl 1.JPG78_P-26A Engine Cowl Decals 1.JPG79_P-26A Engine Cowl Decals 2.JPG
As noted on a couple of shots - some touch ups and thinning of paint edges is required. You can also see on the engine cowl ring where the thicker decals are just not settling back into the compound curved shape. I suspect that I will need to do the same to the cowl as I did to the spats - remove the decals and mask/paint them on. It's a lot more work but I really don't want the kit spoiled just because I couldn't get the decals to play ball.
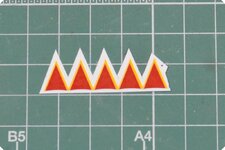
80_P-26A Engine Cowl Decal Pattern.JPG
I've saved the bottom section of the cowl decals and will pop it into the scanner so that I can make a mask template to help with painting. Fingers crossed it will work out OK. I'll make a start on the mask template tonight while I let the last couple of MicroSol coats soak the decals. I might get lucky and they start to settle in - :dontknow:!

Thanks to everyone for hanging in there with me - hoping to get this one done soon. (Famous last words?? Got rigging to do yet...)
 
Thanks again to everyone for the encouragement - it is helpful when I get to the difficult bits.

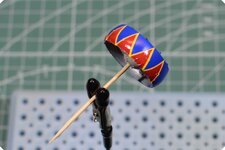
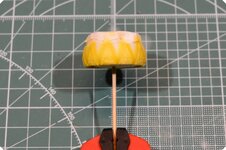
Latest update - one of the difficult bits! Since Monday's update, I have managed to remove the decals and mask and paint the engine cowl. Some progress shots I took along the way are below.
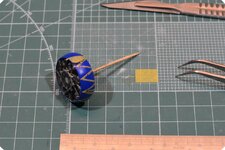
81_P-26A Engine Cowl Masking 1.JPG 82_P-26A Engine Cowl Masking 2.JPG
As I mentioned Monday I was thinking about making a template from a scanned copy of the remaining unused decal. On closer inspection I realised it would just be quicker to take some accurate measurements of the cowl ring and scale out a triangle piece of tape that I could use as a guideline for the narrow strips of tape that formed the outside edges of each painted triangle. You can see this triangle piece in the first photo. I must have been pretty close with my measurements as I was less than 0.5mm out once all 11 triangles were set out. A simple tiny adjustment to the bottom three triangles fixed this tiny discrepancy. As you can see in the second photo, once I got the edge strips in place I just cut 11 triangles to fill the gaps.

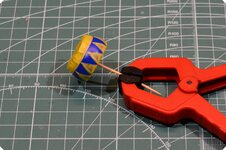
83_P-26A Engine Cowl Undercoat & Yellow.JPG
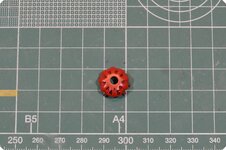
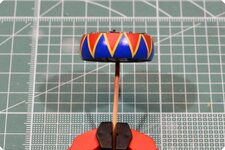
Here I have already painted white undercoat as a base to help the colour show properly and I have then sprayed on some very fine yellow edge lines. After this step I cut 22 small strips of tape 0.75mm wide to mask the yellow lines and leave the final triangle shape to be filled in red. I neglected to get any shots of this, but the final outcome is below.
84_P-26A Engine Cowl Painted 1.JPG
Gotta say I am pretty chuffed with how it turned out. It was a "shed" load of masking and cutting tiny, tiny pieces of tape but I think that the result is worth it. I've noted that some of the paint edges will need to be touched up where the tape has managed to pull the paint a little. Once the paint hardens fully I will give it a very light sand with some super fine Micro Mesh pads so the edges will disappear under the next clear coat. This should give it that "painted on" effect :lol:.

85_P-26A Engine Cowl Painted Dry Fit 1.JPG 86_P-26A Engine Cowl Painted Dry Fit 2.JPG
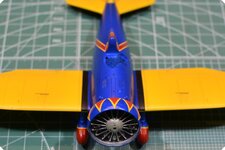
I was pretty keen to see how it looked and to double check that the paint colour remained a good match to the decals. The two photos above show the engine dry fitted to the fuselage - again I'm really happy with the outcome. The triangles even look to line up properly with the top one pretty much running along the centre line of the fuselage (it is a squidgy bit to the right in the last photo - I might be able to tweak this a bit when the final fixing to the fuselage is done).

Calling it a night now - as always, my thanks to everyone for looking in on my little project.
 
Thanks Wurger Wurger , Crimea_River Crimea_River , fubar57 fubar57 , and Vic Balshaw Vic Balshaw - I'm glad you liked it!

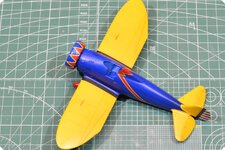
I am still waiting on the replacement decal set from Starfighter Decals (they're somewhere between the US and Australia atm) but I have now done all the remaining decals. A whole bunch of shots below (engine is dry fit only).
87_P-26A Interim Decals RHSF 1.JPG 88_P-26A Interim Decals RHSR 1.JPG 89_P-26A Interim Decals LHSR 1.JPG 90_P-26A Interim Decals Head On 1.JPG
91_P-26A Interim Decals RHSF Under.JPG 92_P-26A Interim Decals LHSF Under.JPG 93_P-26A Interim Decals Top.JPG
It's starting to look the biz! I do have one concern however. If you look closely at the fuselage side decals you can see where the white is showing through the red/yellow decal stripe underneath. I am considering giving this a couple of very thin light coats with white paint, but I really don't want to stuff it up at this late stage. Any advice or prior experiences with this issue would be most welcome. Once the decals are all done I will give it a coat of gloss clear to make sure all surfaces have a consistent level of shine.

I've also drilled a couple of holes lengthwise into the fuselage sides to facilitate the gun tubes that run up between the engine cylinders. I have cut 2 lengths of 0.4mm brass rod in readiness for installation with the engine once the replacement decals are done.

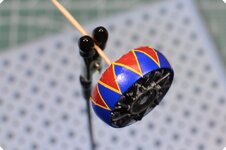
The next steps are to repaint the prop (wasn't 100% happy with the first attempt) finish painting the tyres and get the remaining sticky-outy bits ready for final installation. I am tossing up whether to scratch build the windscreen panel. I have plenty of 0.13mm clear acetate sheet that I can use - surely this can only look better than the really thick and clunky looking moulded one with the kit. I'll have a think about how I might do this tonight...

Thanks again for looking in - I hope you are enjoying this build half as much as I am. :thumbleft:
 
A beauty Grant. The transparency of the white decals is not uncommon unfortunately and I can't suggest anything to remedy the situation at this stage other than the option that you've already identified. Painting over the underlying colours with white is certainly possible but will take a steady hand and a very fine brush with thin paint. There's a risk that your white covering will look different than the surrounding white of the decals too and so it may need to be blended in. It may well not be worth the effort and may not get the result that you hope for. In future, such risks can be avoided by masking and painting a white patch at the decal location before applying the decal but that suggestion is the too late for you now.
 

Users who are viewing this thread

Back