AAAAAAAARGH dodgy decals! What to do?

Ad: This forum contains affiliate links to products on Amazon and eBay. More information in Terms and rules

36feet10inches

Staff Sergeant
1,077
654
Jan 25, 2009
Newark, UK
I'm working on a Royal Indian Airforce Spit like this one:

Spit-Chakra96.jpg


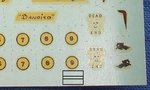
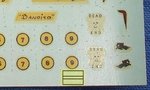
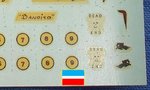
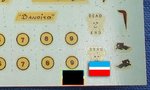
The kit is Fujimi, which is fine and dandy, and I've put a fair bit of work into up to this stage. I'm using Model Alliance decals from their "late Griffon PR" sheet, which are great quality and all that... but some of the decals are completely the wrong size!

IMG_0103.jpg


The "96" marking, striking as it is, is way too big, which I could probably live with, but the fin flash is so small it looks comical. It's not even like they're shown the wrong size on the profile supplied with the sheet. Now I'm not a rivet counter by any means but something resembling dimensional accuracy would be nice. What am I supposed to do, measure every decal before even starting the kit? I feel like just writing the bloody thing off.

:evil::evil::evil:
 
THe fin flash isn't any problem. Can you remove both incorrect fin flashes from the fin sides?
 
Do you have no longer wanted pieces of decal sheet?.Also any areas of decal sheets where decal markings aren't printed usually.Most of them are margins of decal sheets.
 
Do you use an airbrush or a brush for painting? I mean if you have an airbrush..:)
 
No problem. Your painting looks very nice even if it was made with a brush. Wait for a while for my piece of advice.
 
OK. Here you are.

The first step is to find out the fin flesh dimensions.Use a ruler for that.You need dimensions for rectangle so it shouldn't be difficult for you.
 

Attachments

  • decal2.jpg
    decal2.jpg
    43.9 KB · Views: 161
Step second, take the unwanted pieces of decal sheets.
 

Attachments

  • decal.jpg
    decal.jpg
    74.2 KB · Views: 174
  • decal1.jpg
    decal1.jpg
    59.5 KB · Views: 176
Step third, pencil the fin flash on the free piece of a decal sheet.
 

Attachments

  • decal1a.jpg
    decal1a.jpg
    51.6 KB · Views: 180
Last edited:
Step fourth, apply with a brush a gloss cote at the fin flash area.
 

Attachments

  • decal1b.jpg
    decal1b.jpg
    51.5 KB · Views: 172
No Harrison, you are not at all.

Step fifth, fill the fin flash sketch with corrct colours.You can paint these a little over these penciled lines.The only thing you have to take cary of are the white strip edges.What is more I suggest starting painting with the colour.Of course these paints should be applied when the previous is already dry. If you don't have enough room on these pieces of decal sheet you can paint strips of these three colours and then cut them off with a scalpel ( certainly their dimensions should be correct ) and later put these strips together on the fin.
 

Attachments

  • decal1c.jpg
    decal1c.jpg
    51.1 KB · Views: 171
Last edited:
wotjek

Couldnt he just put his fin design on a clear decal sheet, using paintbrush Pro or similar, and print out. Should produce drafts on plain paper firtst, to get scaling right, and if using an inkjet, use a sealant to prevent ink from running. The white would require painting directly onto the model.

Sorry, not trying to be a smarty, just occurred to me to be simpler than the method you suggest.....or am I kidding myself???
 
It's OK.

The main question is if Conkerking has the clear decal sheet.If yes he can use this one for the purpose of course.The second question is whether he has a printer.But what if not?
Of course there is a few ways of making own decals. Alll of them have advantages and disadvantages. The way is the basic one that can give quite nice decal markings without unnecessary additional expense I think.
 
Last edited:

Users who are viewing this thread

Back