Username : Jayl
First name : Jason
Category : Advanced
Scale : 1/72
Manufacturer / Model : AMP Victory 357 Hawk
Intruduction from instructions:
In 1929, Thomas T. Brown published an article in the prestigious 'Science and Invention Magazine'. The articled title was simple - "How I Control Gravity." - in-which he claimed that he could so by using 'electrogravitics'. He placed a Coolidge X-ray vacuum tube on a balance scale. When the tube's positive electrode was pointed upwards, its mass seemed to decrease. When it was pointed downwards, its mass seemed to increase. He elaborated that, with a sufficiently-powerful engine generating enough voltage, any object could be rendered weightless.
This caught the attention of the Americans and Russians. After WWII, the Russians established a special sector under the Institute for Physical Problems. The sector became independent as the Gravity Control Propulsion Research Centre. It conducted large-scale experiments and showed that a 500kg block of solid graphite didn't weigh its normal 4903N(ewtons), but 3236N.
The next step was to do the same thing outside of a laboratory. So, the Victory 357 was developed. It was basically an Ekranoplan with three small jet engines for horizontal propulsion, and a huge 15,500 HP Kuznetsov NK-12 generator that provided enough electricity to the electrogravitic elements to reduce the vehicle's weight from 160,000N/16315kg down to 85,000N/8667kg. The Victory 357 proved the technology and was quite nimble, but it has little space for crew, cargo or payload.
On to the build. Pretty typical short run kit, Ill fitting, soft details, etc.... I do like the look of it so I decided I'll give it a go.
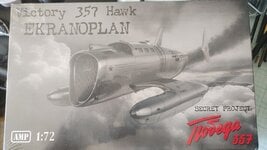
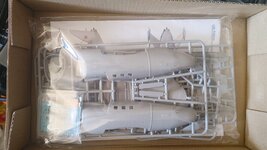
The interior is really pretty basic, and anything behind the pilots seats should probably be filled with a generator and batteries to power the huge magnets needed. Windows are pretty small so I'll not do much to it.
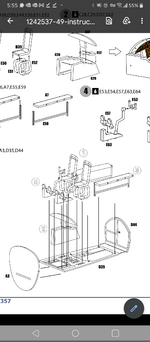
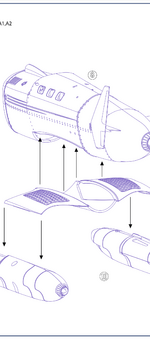
The instructions show more detail than is actually included.
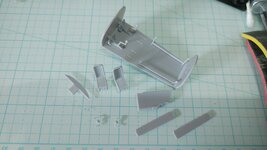
They also show texture on the "wing" that isn't there.
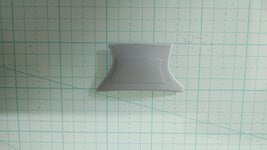
I've ordered some textured plate PE that I'll attach.
The exterior would look too much like a flying beer keg if I didn't break it up somehow so I've added rivets and replaced some of the soft detail.
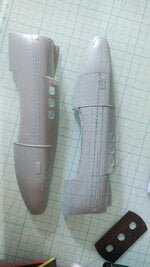
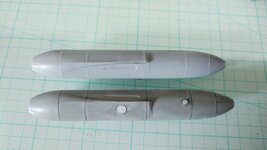
With the long weekend I hope to have it closed up, all rivet lines done and being prepped for paint at the end of the day Monday.
First name : Jason
Category : Advanced
Scale : 1/72
Manufacturer / Model : AMP Victory 357 Hawk
Intruduction from instructions:
In 1929, Thomas T. Brown published an article in the prestigious 'Science and Invention Magazine'. The articled title was simple - "How I Control Gravity." - in-which he claimed that he could so by using 'electrogravitics'. He placed a Coolidge X-ray vacuum tube on a balance scale. When the tube's positive electrode was pointed upwards, its mass seemed to decrease. When it was pointed downwards, its mass seemed to increase. He elaborated that, with a sufficiently-powerful engine generating enough voltage, any object could be rendered weightless.
This caught the attention of the Americans and Russians. After WWII, the Russians established a special sector under the Institute for Physical Problems. The sector became independent as the Gravity Control Propulsion Research Centre. It conducted large-scale experiments and showed that a 500kg block of solid graphite didn't weigh its normal 4903N(ewtons), but 3236N.
The next step was to do the same thing outside of a laboratory. So, the Victory 357 was developed. It was basically an Ekranoplan with three small jet engines for horizontal propulsion, and a huge 15,500 HP Kuznetsov NK-12 generator that provided enough electricity to the electrogravitic elements to reduce the vehicle's weight from 160,000N/16315kg down to 85,000N/8667kg. The Victory 357 proved the technology and was quite nimble, but it has little space for crew, cargo or payload.
On to the build. Pretty typical short run kit, Ill fitting, soft details, etc.... I do like the look of it so I decided I'll give it a go.


The interior is really pretty basic, and anything behind the pilots seats should probably be filled with a generator and batteries to power the huge magnets needed. Windows are pretty small so I'll not do much to it.

The instructions show more detail than is actually included.

They also show texture on the "wing" that isn't there.


I've ordered some textured plate PE that I'll attach.
The exterior would look too much like a flying beer keg if I didn't break it up somehow so I've added rivets and replaced some of the soft detail.


With the long weekend I hope to have it closed up, all rivet lines done and being prepped for paint at the end of the day Monday.
Last edited by a moderator:
