Username: Destrozas
First name: sergio
Category: Intermediate
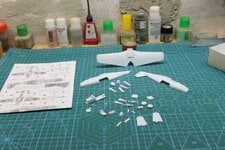
Manufacturer: Intech
Model: North American P-51MKIII T52
scale: 1:72
Add-ons: None

This will be my memory of the greatest Polish aviation ace with his 22 1/2 kills, he fought from the beginning of the war until his last day, with 9 decorations between Poland and Great Britain. CDr. Stanislaw Skalski
On September 16th he was named Allied aviation ace after achieving his 6th kill, becoming the first Allied ace, during the Battle of Britain he fought and was shot down and wounded with the 501st Squadron. in 41 he transferred to command the 306th polish squadron at "Torun", in 42 he flew in the 312th and 317th squadrons, and went on to instruct in the 58th unit, in 43 he formed the "Skalski circus" participating in operation husky, at the end of 43 and 44 he returned to northern Europe fighting in the 131st and 133rd polish wings, intervening in d-day, after this he went to the EEUU to study command personnel, giving lectures on flight tactics and air combat to replacement pilots until march 45 when he returned to command of the 133rd wing... His war record was 321 combat sorties, 18 confirmed kills 3 shared and 4 probable and 2 possible. After the war he refused to continue as a pilot for the RAF and returned to Poland in 1947, where he was an inspector of flight technology. In 1948 he was arrested on charges of espionage and was not released until 1950 (Stalin's madness reappears). Sentenced to death in 1950 he was in prison until 1956, when he was exonerated of the charges and released. (I don't want to get into politics in this forum, but these years of Soviet repression only fit in the mind of an anti-socialist dictator like Stalin, who never wanted to understand and enforce Lenin's ideology.)
In 1957, already as a lieutenant colonel, he served with jets, but more on the ground than in the air. In 1968 he was named general secretary of the Polish Aeroclub, already as a colonel.
In 1972, with the rank of general, he was enrolled in the reserve. In 1957, he published a book of memoirs entitled Black Crosses over Poland (Polish: Czarne krzyże nad Polską). He was a member of the Society of Fighters for Freedom and Democracy - the official organization of veterans of the Polish People's Republic.
In 1980, he took part in the activities of the nationalist and communist Patriotic Alliance Grunwald. In 1988, he was promoted to major general.
In the 1990s, he became active in politics. In 1991, he unsuccessfully ran for the Senate with the support of the Christian Democratic
Labour Party. He supported the protests of the Agricultural Trade Union Self-Defense (Związek Zawodowy Rolnictwa "Samoobrona"), and in 1992 he was one of the founders of the populist political movement Self-Defense, led by Andrzej Lepper. In 1993 he ran unsuccessfully for the Sejm. The data on Skalski's last years are contradictory.
Skalski flew these aircraft according to records:
Flying PZ" P.11c (No. 8.66, c.66), Hurricane Mk.I (P5194; V6644; V7230, SD-F); Spitfire MK.I.Ib, Spitfire Mk.Vb, Spitfire Mk.V.V. Spitfire Mk.IX (EN475,ZX-1; EN247,ZX-5; EN315,ZX-6), Mustang III (FZ152, SS (Stanislaw skalski????))
It's a pity I can't find out which Spitfires don't have a code so I can put them on the list to be made, as I'm already looking for the ones I have the code for...
I was inspired to look for this aircraft to honour in my display case (like so many others) after reading Jackson, Robert (1979). Fighter! The Story of Air Combat 1936-1945. London: Artur Barker Limited. ISBN 0-213-16717-4. A book that I really liked for its human side.
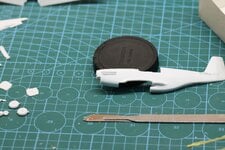
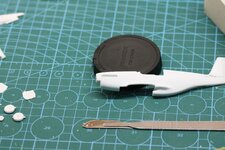
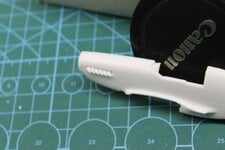
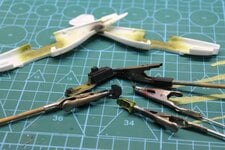
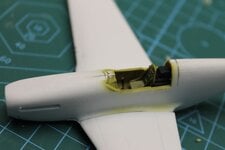
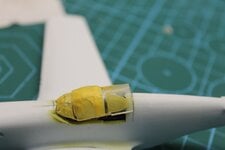
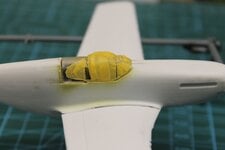
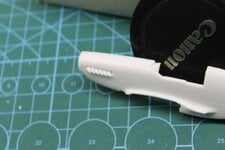
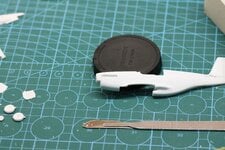
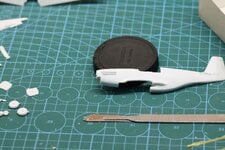
the blisters of the model are that simple...


First name: sergio
Category: Intermediate
Manufacturer: Intech
Model: North American P-51MKIII T52
scale: 1:72
Add-ons: None
This will be my memory of the greatest Polish aviation ace with his 22 1/2 kills, he fought from the beginning of the war until his last day, with 9 decorations between Poland and Great Britain. CDr. Stanislaw Skalski
On September 16th he was named Allied aviation ace after achieving his 6th kill, becoming the first Allied ace, during the Battle of Britain he fought and was shot down and wounded with the 501st Squadron. in 41 he transferred to command the 306th polish squadron at "Torun", in 42 he flew in the 312th and 317th squadrons, and went on to instruct in the 58th unit, in 43 he formed the "Skalski circus" participating in operation husky, at the end of 43 and 44 he returned to northern Europe fighting in the 131st and 133rd polish wings, intervening in d-day, after this he went to the EEUU to study command personnel, giving lectures on flight tactics and air combat to replacement pilots until march 45 when he returned to command of the 133rd wing... His war record was 321 combat sorties, 18 confirmed kills 3 shared and 4 probable and 2 possible. After the war he refused to continue as a pilot for the RAF and returned to Poland in 1947, where he was an inspector of flight technology. In 1948 he was arrested on charges of espionage and was not released until 1950 (Stalin's madness reappears). Sentenced to death in 1950 he was in prison until 1956, when he was exonerated of the charges and released. (I don't want to get into politics in this forum, but these years of Soviet repression only fit in the mind of an anti-socialist dictator like Stalin, who never wanted to understand and enforce Lenin's ideology.)
In 1957, already as a lieutenant colonel, he served with jets, but more on the ground than in the air. In 1968 he was named general secretary of the Polish Aeroclub, already as a colonel.
In 1972, with the rank of general, he was enrolled in the reserve. In 1957, he published a book of memoirs entitled Black Crosses over Poland (Polish: Czarne krzyże nad Polską). He was a member of the Society of Fighters for Freedom and Democracy - the official organization of veterans of the Polish People's Republic.
In 1980, he took part in the activities of the nationalist and communist Patriotic Alliance Grunwald. In 1988, he was promoted to major general.
In the 1990s, he became active in politics. In 1991, he unsuccessfully ran for the Senate with the support of the Christian Democratic
Labour Party. He supported the protests of the Agricultural Trade Union Self-Defense (Związek Zawodowy Rolnictwa "Samoobrona"), and in 1992 he was one of the founders of the populist political movement Self-Defense, led by Andrzej Lepper. In 1993 he ran unsuccessfully for the Sejm. The data on Skalski's last years are contradictory.
Skalski flew these aircraft according to records:
Flying PZ" P.11c (No. 8.66, c.66), Hurricane Mk.I (P5194; V6644; V7230, SD-F); Spitfire MK.I.Ib, Spitfire Mk.Vb, Spitfire Mk.V.V. Spitfire Mk.IX (EN475,ZX-1; EN247,ZX-5; EN315,ZX-6), Mustang III (FZ152, SS (Stanislaw skalski????))
It's a pity I can't find out which Spitfires don't have a code so I can put them on the list to be made, as I'm already looking for the ones I have the code for...
I was inspired to look for this aircraft to honour in my display case (like so many others) after reading Jackson, Robert (1979). Fighter! The Story of Air Combat 1936-1945. London: Artur Barker Limited. ISBN 0-213-16717-4. A book that I really liked for its human side.
the blisters of the model are that simple...


