Airframes
Benevolens Magister
When you can post pics, I'm sure one of us can offer suggestions.
Follow along with the video below to see how to install our site as a web app on your home screen.
Note: This feature may not be available in some browsers.
Ad: This forum contains affiliate links to products on Amazon and eBay. More information in Terms and rules

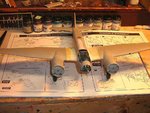
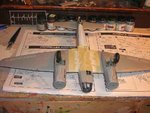
The main rule of modelling says "fit three times but glue once".Hadn't you noticed it before you put these fuselage halves together?Why I asked about.... because it is much easier to re-engrave these lines correctly before these halves are glued together.Now it is a little bit harder but possible.You will need a needle or scalpel razor and a strip of metal which is flexible ( a can of beer is a of straight and oval edges).Then try to fit the "ruler" to the fuselage curve in order to get a right line position.You can fix the strip to the fuselage with masking tape for instance.Then use a needle to engrave the line going along the "ruler" edge.
BTW There are offered special line engraver knives by Trumpeter.These are a very useful tool.
There's also a new set of individual engraving tools, including a rivet 'punch', from Tamiya. You can also use label tape, like the 'DYMO' labelling system, as a ruler.
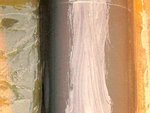
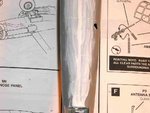
I noticed you are using a lot of what appears to be rather messy putty for a fairly small joint. Have you considered using a 2-part epoxy putty, such as 'Milliput'? You can also do as Wayne and I do, by filling the joint only with Superglue, then rubbing down that area, avoiding most of the surrounding areas and, if it's a small joint, mix talcum powder with gloss varnish, until it's a gooey paste, and brush that into the joint. It will find its own level, and dry hard, needing very little, if any, sanding.
Why is it easier to fix the engraving before the gluing?
He he he.... there is no model we cannot to assemble or correct....
Keep working on..