Wiking
Airman
Guys/Gals,
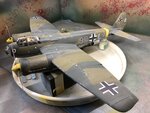
I'm building a 1/32 Ju-88, looking for recommendations or examples how to model the propellers in motion.. I'm thinking the current state-of-the art has evolved beyond discs of clear acetate.. But that's my best start - maybe airbrushed with a "fade" shadow of the prop blades.. something with Photo-realistic appearance is preferred, vs cartoon-ish, if that's any help.
Electric motors is not an option for it's intended use.
Thank you,
- Art
")