MPM 1/48 Heinkel He-177 "Grief"

Ad: This forum contains affiliate links to products on Amazon and eBay. More information in Terms and rules

mandoman

Airman 1st Class
243
1
Jan 29, 2006
corn contry USA
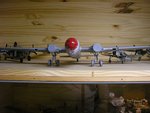
I'm not sure if this is a legitimate review, as I'm no expert at model building, but I do have a few observations. This kit has taught me the meaning of "modeling". Difficult doesn't quite describe this kit. I don't believe I've come on a model kit, that wasn't an all resin kit, more designed NOT to fit together. It would be interesting to know if I'm the only one that has discovered this. I don't think there were any pieces of this kit that went together without a major amount of trimming, puttying, cutting, and just plain remaking the parts......except for the wheels. This model has been on my work bench for over a year, now, and even though I FINALLY got the wings, and landing gear mounted (and that was a real trick), it's still slightly lopsided. I suppose I could be a good part of the problem, as I'm not the smoothest model builder by any means. It's a puzzle to me, though, that two haves of one fuselage seem to be so unaligned, or the cockpit so obviously NOT meant to fit into the spot designated. Even after getting the cockpit into place, after much trimming, and aligning, when I went to put the two fuselage halves together, I had to cut the cockpit even more so the two parts would connect. Then, after all the aligning, and balancing, and checking, when I unstrapped the fuselage from gluing them together, the cockpit was no longer sitting level. It isn't off too bad, but it's unbalanced, and that is very irritating. I had so much difficulty putting the two halves together, or should I say prepping the two haves to go together, that I guess I shouldn't be surprised at the results, but I WAS surprised......and a bit pissed off. I'm leaving it as is, simply because I haven't got the heart to try separating the fuselage to fix it. Well, it's certainly an ongoing project, and I'm now wrestling with the front canopy sections (which don't fit......and I REALLY MEAN they don't fit). I finally had to super glue the top canopy section on, while as gently as possible, spreading it apart to actually sit on the two edges of the fuselage where it was suppose to fit. I feel extremely fortunate that it didn't crack, or break while I did that, and even then I ended up trimming, sanding, and puttying around it so it looks like it's suppose to be there. I'm working on the nose section now. It is following the ongoing pattern of not fitting where, and how it was meant.

I'll say some more on this project as I try to close in on some kind of finished product. :rolleyes: :D
 
I'd heard there were a few fit problems with this kit, but this sounds major! Perhaps you got a 'Monday morning' kit .......
 
C'mon Kirk show us your labour of love....:D

Okay, but don't make fun of me. I really am trying, and if I can correct the glitches, I will. The word "Grief" has taken on a whole new meaning for me with this kit.

Airframes said:
I'd heard there were a few fit problems with this kit, but this sounds major! Perhaps you got a 'Monday morning' kit .......

Well, you must remember the builder is not the smoothest. It may be just my own incompetence, but I just built a P-51 Mustang, and am finishing up on a C-47, and I think those are looking pretty good, for me. I do realize that the He-177 is a notably more difficult kit than those other two, though. :)
 

Attachments

  • Heinkel He-177Grief.JPG
    Heinkel He-177Grief.JPG
    457.2 KB · Views: 283
  • Heinkel He-177Grief4.JPG
    Heinkel He-177Grief4.JPG
    501.2 KB · Views: 269
Thanks guys. It really is lopsided, though. Not by much, but enough to notice when you look right down the center. I'm thinking of gluing a very thin strip of styrene plastic around the wheels of the low side, and then sanding them down so they blend in with the tire. Don't know if it will work, but I feel I have to do something. It's a challenge.
 
I know this kit: There are indeed problems, but it felt very sound on the outside symmetry of the big components. They also fit together rather well despite the lack of locating pins, including the wheel well components. The wings felt very strong despite the simple butt-join... Though they look a bit simple, the parts do the job of boxing-in the wells, leading edge intakes, and setting the correct gear angle consistently, the same with the prop blade pitch as well...

The cockpit parts are indeed very averse to getting things together, and I found this, like you, incredibly pronounced on the cockpit side consoles, where it pays to do a huge amount of carving.... The fuselage is the exact correct lenght of 22 m., but looks slightly too deep; don't let that bother you, as there is nothing to be done about it...

MPM's He-177 exhibits much better symmetry, and thus basic workmanship, than the similar-sized B-29 monster by Monogram: That took several kits to straighten out, and is the worst symmetry nightmare I ever stumbled through... (Note: ALL of the following is inherent to the Monogram B-29 moulds, and not peculiar to one pressing. None of these problems exist on their B-17G):

One of the many failed build attempts:

P30612821.jpg


Heavy use of pliers finally fixed the kit #5 or 6(?) front end's mismatching nose curves, but only with the tail of the kit #6 or 7(?) did I finally manage to make the "mystery crooked" tail marginally straight...:

P5313130.jpg


Tail is 1 foot short (6 mm), and tailgunner doghouse 2 mm too long, so when the doghouse is shortened, at the in-between edge of its bigger side window, adding the separate tail helps adding the now missing 8 mm....

Nose cone is off-center, cockpit opening rotated clockwise from true, fin incurably tilted with base off-center, and tail taper out-of-round creating strange assymetrical taper transition bulges, when looking towards the rear....:

P53031171.jpg


Nose radiuses symmetry fixed (note stress marks):

P1072415.jpg


Mystery tail assymetry: Veers to the same side, even when seen from either the top or the bottom!!!! I somehow fixed it with a 7th kit tail, not understanding anything about anything...:

P90920111.jpg

P90920101.jpg


I assure you I spotted none of these horrors on the He-177: The MPM plastic is pleasant to work with, and makes for a stout rigid model despite the size. Even the angled gear legs don't really need to be strengthened from what I remember.

I don't think the tilted cockpit will be noticeable through the many painted frames.

Your work is going very well, and I am eager to see it finished...

Gaston

P.S. I just thought this similar-looking kit might be of interest... Sorry for the long disgression...
 
Um, I couldn't have said it better myself..........in fact, I couldn't have said it the way you did at all, Gaston. That about nails it, though it looks like your build is far more accurate than mine. I used thin styrene strips between the nose canopy, and the top canopy/bottom fuselage section, and then puttied, and am still sanding very carefully. So you found it to be curved, too? I'm not saying that's a good thing, but at least I can know my kit isn't unusual in that manner. What scale is that one you showed?
 
1/48th.

I was just using here the 1/48th Monogram B-29 as an example of something far worse than (what I remember of) the 1/48th MPM He-177 (which I abandoned building years ago for reasons unrelated to straightness: The slightly inaccurate excess fuselage depth among them)...

The B-29's crookedness steamed me up up so bad, for years on end, I just have to post these photos whenever it is marginally relevant...

I do remember the 1/48th MPM He-177 being (comparatively to the 1/48th Monogram B-29) quite straight and honest in symmetry...

Gaston
 
You're doing a great job with a rather difficult kit. I built it recently and found a lot of fit issues. The top of the fuse seam on mine curved inward on itself along the whole length and the rear gun position required a lot of putty. Looking forward to seeing more of yours ,cheers Trey
he177004.jpg

he177007.jpg
 
Last edited:
Yes I also had a mismatching spine problem real bad on about half of the seven or eight B-29s I bought: Spine height mismatching is the one problem that does somewhat vary on the B-29 from pressing to pressing, 2008 Chinese-moulded vintage being seemingly especially bad: 1/16" to more.

In that case (over 1/16" going 1/8") the model is almost not worth building...

Some of the Chinese moulded B-29s have since had a better spine match height issue, which is the case of the main body of my current build, but even so the spine is still "wavy", on both sides but more on the left, so there are still minor ups and downs that won't level with the other side: To minimize those I made liberal use of pliers, on the left side of the spine join mostly, "whitening" periodically the plastic from stress to shallow up the bottom of the "waves" to match the right side... Still used much putty...

To illustrate further Monogram's attitude towards symmetry on this one particular kit (fairly unique in severity among their kits): This comparison resulted from the point I choose to shorten the tailgunner doghouse by 2 mm (which requires lengthening the tapering portion of the tail by 8 mm, rear of the rear top bubble, to hit 99ft instead of the kit's 98 ft. ):

PC082310.jpg


Fixable but... And oh, Monogram only put 8 exhausts instead of the full 16....

Gaston
 
You guys are definitely ahead of me. I thought I was closing in on the end, but was counting chicks before they hatched. While trying to attach pitons on the underside of the wings, I accidently clipped my close in lamp, and knocked a couple off. To my total frustration, I also found that the bottom of the fuselage had split. I can't believe it. It was the wing that clipped the ligtht, but the fuselage split. I can fix it, but I'm taking a time out, and am now working on a nice Nakajima J1N1-Sa Night Fighter, by Tamiya. Those kits are excellent, at least I think they are. I'll get back to the He-177 eventually, after I've cooled about it a bit.
 
Mine split as well
he177decal005.gif


Frustrating for sure! My repair thankfully was'nt too hateful
he177landinggear2002.gif


Hope your repair goes smoothly,looking forward to seeing your beast finished!
 
AAAARHG!!! I thought I was closing in on a finish on this kit, and I really screwed up. I had been treating it with kid gloves up to this point, and I let my guard down just a little.....I hit the model against my overhead lamp. It didn't seem that hard, but on close inspection it looks like the seam on the under side of the fuselage cracked. On top of that, I knocked two of the pitons on one of the wings off into what I refer to as "The Great Black Hole", which is my basement floor. It seems like everything that reaches the floor disappears. I'll find them, and some how fix that crack, but AARHG!! :sad6:
 
Don't you just hate it when this sort of thing happens! Hope you find the parts and get things sorted.
 

Users who are viewing this thread

Back