Paasche VL - Airbrush Question

Ad: This forum contains affiliate links to products on Amazon and eBay. More information in Terms and rules

copcheck

Airman 1st Class
265
0
Mar 25, 2011
Clinton Township, MI
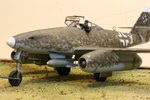
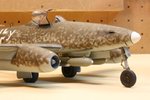
I recently upgraded my brush and bought this kit (all the wife would let me get away with).

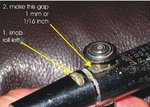
I am using the #1 needle and tip, but for some reason I cannot get the fine lines in order to do pre-shading or any fine detail for that matter. While I realize this brush is a time tested brush, and that it is by no means top of the line, I cannot figure out what I'm doing wrong.

I've tried 10lbs and even a little higher, however if I get my brush too close to do fine lines I get puddles very quickly.

Youtube search isn't yielding much.

Anyone have any links to may help me master this thing?

Thanks again.

I'll be back tomorrow with 20 more questions probably covered ad nauseam :D
 
I have a Paasche VL with 3 tips as well as an Iwata HP-C. I've achieved some fairly thin lines with the VL with the number 1 tip so I know it's possible. The main clue to me is your pressure which seems quite low. I normally spray at 15 to 20 psi. Puddling can occur from being too close, applying too much paint (go easy on the valve pull back), not moving quickly enough or any combination of these. I'm no where near perfect myself but am finding that, once the basic elements are established (pressure and milk-like paint consistgency), it's just a matter of plenty of practice after that. Spend a few sessions experimenting with different pressures and mix ratios on scrap plastic until you get the feel for the brush. It's a solid airbrush and should give you good results.

One feature you could look at is the thumscrew in front of the valve. With the pressure at about 20 psi, depress the valve but don't pull back. Instead, turn the screw whcih slowly pushes the valve back until you get a fine mist of paint coming out. This setting should help you control the paint.
 
Last edited:
I've had a VL for years. I use it mostly for larger areas as I never could get a fine line out of it, but if Andy can I'm sure it's possible. I find the fine lines easier with a gravity feed brush. Less pressure needed to get the paint to flow.
 
Just to show you what my VL was able to do, theses squiggles on my 1/48 Me 262 were done with the VL.
 

Attachments

  • 100109 Finished 10 Oclock Shot.jpg
    100109 Finished 10 Oclock Shot.jpg
    96.5 KB · Views: 267
  • 100110 Bonus 2.jpg
    100110 Bonus 2.jpg
    80 KB · Views: 249
I have been using my VL for sign writing shading and painting since 1970 something.

The thing I find most do wrong is not "seat" the needle when setting up. The little rolling adjustment nut in front of the valve button will open and close the amount of paint. With the needle loose, try rolling the nut a couple of turns so the button is not "seated" in the Closed or all the way forward position.

Then gently "seat" the needle against the nozzle and tighten the needle in place at the back end of the brush. This will set the paint feed to Zero! Now set the pressure to 15-20 lbs.

If you want a steady flow of paint, roll the nut to move the needle away from the nozzle, otherwise pull the valve back to increase the paint flow, push the valve down to increase air flow.

PM me if this doesn't work, or you have questions. Bill


Thank Bill! I have a couple other questions and sent you a PM.

Jon
 
Got a picture here that may make things a little easier to understand.

Looking at the airbrush from the front, roll the knob all the way right to close the gap at the front of the valve, then one or two rolls to the left to open a gap in front of the valve trigger to about 1mm or 1/16th of an inch.

Then while rotating the needle in your fingers, set it to the nozzle lightly but firmly. Then lock the needle in place. You are now ready to spray paint.

What this does is assure there is NO paint flow when depressing the trigger. This means as you move the trigger rearwards you can regulate the flow.

If you want the flow to be s steady stream, you just need to roll the know to the left to add paint flow. If you want to STOP the paint flow, roll the knob to the right to reseat the needle.

Give this a couple of goes and you will get my drift. Bill
 

Attachments

  • paasche.jpg
    paasche.jpg
    55.2 KB · Views: 367
Got a picture here that may make things a little easier to understand.

Looking at the airbrush from the front, roll the knob all the way right to close the gap at the front of the valve, then one or two rolls to the left to open a gap in front of the valve trigger to about 1mm or 1/16th of an inch.

Then while rotating the needle in your fingers, set it to the nozzle lightly but firmly. Then lock the needle in place. You are now ready to spray paint.

What this does is assure there is NO paint flow when depressing the trigger. This means as you move the trigger rearwards you can regulate the flow.

If you want the flow to be s steady stream, you just need to roll the know to the left to add paint flow. If you want to STOP the paint flow, roll the knob to the right to reseat the needle.

Give this a couple of goes and you will get my drift. Bill


Got it now.

Thank you very much!
 
I don't have a VL but I have found that, practice, practice, practice are needed. I spent a week spraying water, then added some food coloring to the water and played around for another two weeks or so. Then I used some extra paint in colors I'd never use to paint various, lines, squiggles, dot, etc. on some Styrofoam boxes. I've also found that 1 atm or 15psi is the lowest pressure I'd use. Additionally, while I hate to waste paint, before I do any painting on the model, I paint some more cardboard to be sure I have pressure, paint flow, distance, etc. set where I want them
 
I try not to use paper products when setting up for painting on a model as paper takes up paint very differently than plastic. I've found too often that going from paper to model produced very different results on the model so I try to use plastic card for this.
 
crimea, when i switched to paint i picked up a bunch of those Styrofoam boxes used in restaurants for left-overs. that gave me a 3-D shape to practice moving my brush over while maintaining a constant distance.
 

Users who are viewing this thread

Back