Actually the triangulated polys for people like Gnomey and me are what we're after as we're game modellers...
Nice model.... ooooooohhhh
Simon
p.s.
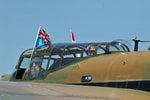
these are my babies
http://homepage.mac.com/simon_julie/ETO/flypast.jpg
Nice model.... ooooooohhhh
Simon
p.s.
these are my babies
http://homepage.mac.com/simon_julie/ETO/flypast.jpg
") Still it is an excellent model. What are you going to use it for? Display?
Still it is an excellent model. What are you going to use it for? Display?