Scratch build Boeing F4B-4 (3 Viewers)

Ad: This forum contains affiliate links to products on Amazon and eBay. More information in Terms and rules

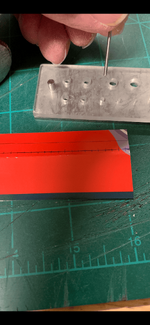
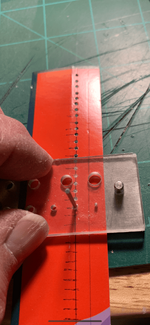
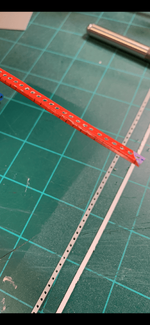
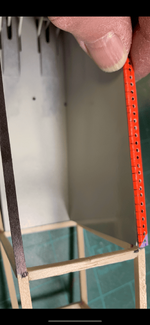
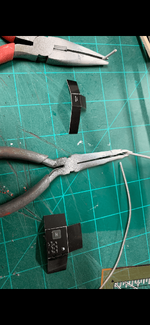
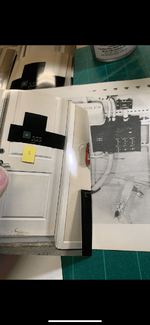
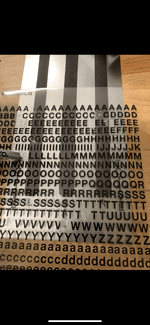
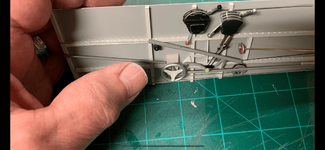
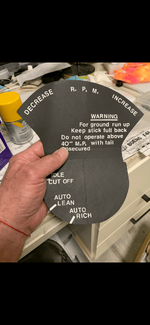
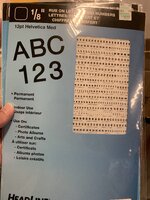
Next, the holes to the cardstock were measured & a small modeler's punch & die set was used to create holes.

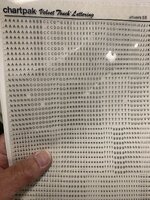
Unlike the plastic strips, paper doesn't take to drills without making a mess with paper fibers scattered around the drilled holes.

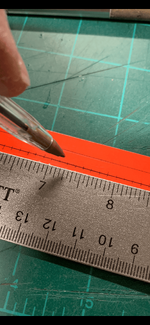
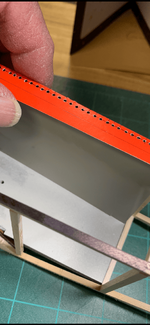
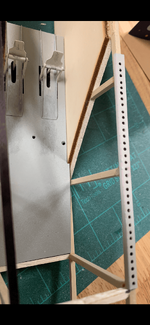
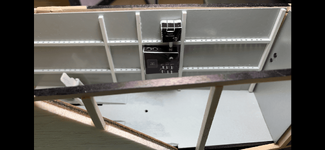
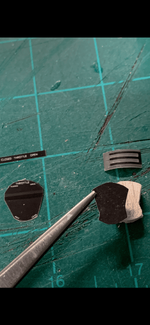
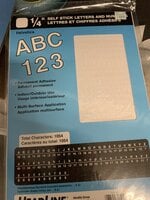
The cardstock was then given final measurements & cut to size.
 

Attachments

  • IMG_9146.png
    IMG_9146.png
    573.1 KB · Views: 2
  • IMG_9145.png
    IMG_9145.png
    486.9 KB · Views: 1
  • IMG_9144.png
    IMG_9144.png
    490.7 KB · Views: 3
  • IMG_9143.png
    IMG_9143.png
    451.8 KB · Views: 1
  • IMG_9142.png
    IMG_9142.png
    523 KB · Views: 1
  • IMG_9141.png
    IMG_9141.png
    406.7 KB · Views: 1
Next, came the accessories. I'm using the fuse box & switches in this example.

I simply make a large image of the box using black colored paper & rub-on dry transfer letters from a local arts & crafts store. From there, I taped it into the door & stood at a distance taking various pictures I felt would result in a photo of the artwork of the correct size.

From there, I would go to a local outlet where I could convert my digital images into glossy photos.

I admit it's time-consuming but it yields very high quality image that is much better than printing off of a printer. Even the tiny letters can easily be seen & read with clarity. I found this out the hardway when building & detailing my Mustang. So I learned from that experience & applied what works for me here.

The picture was then cut out of the photo & folded to size, glued & some wires were added to complete the setup.

I used this method throughout the cockpit build & got great results.
 

Attachments

  • IMG_9132.png
    IMG_9132.png
    329.4 KB · Views: 2
  • IMG_9134.png
    IMG_9134.png
    547.9 KB · Views: 2
  • IMG_9136.png
    IMG_9136.png
    359.4 KB · Views: 2
  • IMG_9158.png
    IMG_9158.png
    199.5 KB · Views: 2
  • IMG_9172.png
    IMG_9172.png
    348.6 KB · Views: 1
  • IMG_9129.png
    IMG_9129.png
    288.5 KB · Views: 1
Additional accessories.
 

Attachments

  • IMG_9172.png
    IMG_9172.png
    348.6 KB · Views: 1
  • IMG_9114.png
    IMG_9114.png
    414.4 KB · Views: 1
  • IMG_9153.png
    IMG_9153.png
    213 KB · Views: 1
  • IMG_9154.png
    IMG_9154.png
    293.7 KB · Views: 1
  • IMG_9174.png
    IMG_9174.png
    346.6 KB · Views: 2
The throttle was given the same treatment as the rest of the accessories. The image of the large paper throttle in my hand is actually from my old Mustang photo collection as I forgot to take a close up photo of the Boeing one.
 

Attachments

  • IMG_9096.png
    IMG_9096.png
    449.8 KB · Views: 2
  • IMG_9114.png
    IMG_9114.png
    414.4 KB · Views: 2
  • IMG_9152.png
    IMG_9152.png
    195.6 KB · Views: 1
  • IMG_9190.png
    IMG_9190.png
    346.4 KB · Views: 1
  • IMG_9218.png
    IMG_9218.png
    388.3 KB · Views: 2
Ultimately the throttle was removed as I kept knocking it off during handling. It will be glued back in place just prior to installing the cockpit coaming.
 
I like seeing new ideas and modifications of old ideas in your work. Where, or more accurately, what kind of shop does the photo work for the pieces you use on throttle, elec panel, etc.
That idea works well. At present, I am building an F11C-2 from a very old plan. At the time the plan was drawn, controlline model fuselages were often carved from a large balsa block. Since balsa is now very expensive and I have no desire to whittle on a large block, the templates were used as patterns to cut formers and bond them to a central keel. As you can guess, the plane will have to withstand "normal" flight stress and landing, therefore much of what you put inside yours would be too fragile. When I run into an obstacle, I usually postpone the next steps, so watching you may solve some problems.
 
Very impressed with the skills here and curious about the letters you are using, they look similar to what I know as Letraset which was a common product in the 70s and 80s. Is this what you are still using! :thumbright::lol:
 
I like seeing new ideas and modifications of old ideas in your work. Where, or more accurately, what kind of shop does the photo work for the pieces you use on throttle, elec panel, etc.
That idea works well. At present, I am building an F11C-2 from a very old plan. At the time the plan was drawn, controlline model fuselages were often carved from a large balsa block. Since balsa is now very expensive and I have no desire to whittle on a large block, the templates were used as patterns to cut formers and bond them to a central keel. As you can guess, the plane will have to withstand "normal" flight stress and landing, therefore much of what you put inside yours would be too fragile. When I run into an obstacle, I usually postpone the next steps, so watching you may solve some problems.
Good hearing from you & glad to know some of my ideas or techniques are holding your interest. I'll be more than happy to give a blow-by-blow series of the steps I took for making the throttle quadrant.

Insofar as modifying from a solid block to a more lightweight plank on keel/former construction, I can only offer suggestions.

The Curtiss F11C-2 sounds to be a very interesting biplane with open wheel spats. I believe the navy later re-designated it as BFC-2. If so, I have dozens upon dozens of detailed b+w photos of this aircraft up close & personal.

Let me know if interested.

Cheers,

Gary

Special Ed:
Mi don't know how far you've come on your F11C-2 (BFC-2) but there are plans of various scales out there for you to start directly on the plank on former/keel method of construction.

Quick edit:

There are also plans for scale rubber flight based on the Guillow's open frame style.
 
Last edited:
Special Ed, gentlemen:

This section will be dedicated to ( hopefully ) answer some of your questions. It will be a review of my previous posts of the throttle controls & lettering.
Very impressed with the skills here and curious about the letters you are using, they look similar to what I know as Letraset which was a common product in the 70s and 80s. Is this what you are still using! :thumbright::lol:
Vic;

You are correct in my use of rub- on dry transfer letters.

I just took a few photos of the labels of rub-on letters used in making the various accessories including the throttle. I also took a close up of their contact info, if it'll help any.

In the recent past, I tried ordering more, but they're only making large letters of 1/2" or larger these days. Apparently it's as a result of advances in printers & other forms of technology.

If you or anyone else should come across a company or vendor that still makes small transfer letters, I'd appreciate any info.

Gary
 

Attachments

  • IMG_9246.jpeg
    IMG_9246.jpeg
    1.9 MB · Views: 1
  • IMG_9245.jpeg
    IMG_9245.jpeg
    1.5 MB · Views: 1
  • IMG_9244.jpeg
    IMG_9244.jpeg
    1.1 MB · Views: 1
  • IMG_9243.jpeg
    IMG_9243.jpeg
    1.3 MB · Views: 1
  • IMG_9242.jpeg
    IMG_9242.jpeg
    1.2 MB · Views: 1
I have noted that you can still get the letters on ebay but they are not cheap and then you add postage...................My experience with older sets (this was decades ago) was not good as they tended to not rub off well, i.e. some part of the letter would not rub off. :lol: :lol:
 
Vic,

You're correct on all points. The ones I used in white, were peel off types. They were good. The black letters that were rubbed off were old ( probably by at least 10 years ) & they tended to break off or not rub off at all.

I found myself rubbing harder to get those rub-offs to transfer, but I was starting to damage the paper or whatever surface I was placing the letters.

I'll keep looking for any alternates.
 
Special Ed, gentlemen:

I'll start with the IFF box that was included in one of several avionics in the P-51 Mustang cockpit interior.

At first, I made the outlines of the box about the size of an A-4 piece of paper or 8 1/2" x -11" standard size noted here in the U.S. as if the flaps to the box were opened. This size made it easy for me to create the box. Then I picked out the size of the letters that looked "about right" for that box & added the letters.

From there, I stood at a distance I judged to result in the image to be the correct scale when printed on photographic paper at a local print shop or drug store. I then used my iPhone in camera setting & took about three or four pictures. I must admit that: I used several distances & yes, it's a waste of time, paper & money.

Still, given the clarity of the small letters that beat out any printer or film camera, it was worth it. I still have a photo showing the results side-by-side.

From there, I would cut out the image & glue the folds to form the box. If needed, I could add buttons &/or painted any additional details.

Hope the following photos help.
 

Attachments

  • IMG_3809.jpeg
    IMG_3809.jpeg
    1.2 MB · Views: 0
  • IMG_3824.jpeg
    IMG_3824.jpeg
    1.2 MB · Views: 0
  • IMG_3823.jpeg
    IMG_3823.jpeg
    965.5 KB · Views: 0
  • IMG_3822.jpeg
    IMG_3822.jpeg
    870 KB · Views: 0
  • IMG_3814.jpeg
    IMG_3814.jpeg
    1.4 MB · Views: 0
  • IMG_3818.jpeg
    IMG_3818.jpeg
    1.1 MB · Views: 0
  • IMG_3811.jpeg
    IMG_3811.jpeg
    962.1 KB · Views: 0
  • IMG_3810.jpeg
    IMG_3810.jpeg
    1.3 MB · Views: 0
Regards to the throttle & its components, it's really just a simple set of laminated cutouts with a throttle ( & mixture) control sandwiched in between.

As with almost everything else associated with the model & the accessories, comes research & information to use as guidelines. Here, I was lucky to find some very good reference sources for the throttle (WW2 aircraft.net).
 

Attachments

  • IMG_3504.png
    IMG_3504.png
    362.1 KB · Views: 0
  • IMG_3508.png
    IMG_3508.png
    318.9 KB · Views: 0
  • IMG_3515.png
    IMG_3515.png
    464.5 KB · Views: 0

Users who are viewing this thread

Back