1/48 Tamiya F4U-1 Bird Cage Corsair

Ad: This forum contains affiliate links to products on Amazon and eBay. More information in Terms and rules

:laughing3:
Thanks guys! Damn - I knew there was something wrong with having the kits visible... :facepalm:

In all seriousness - inner city living means space is at a premium. I envy you guys with the ability to have a small space somewhere that nobody else uses - I am using the dining room table in full view and have to set up/pack up every time I do some work (read - PITA). I am going to take the house issue as an opportunity to "declutter" and make space somewhere.

Now - who wants to buy 4 motorcycles??? :lol:
 
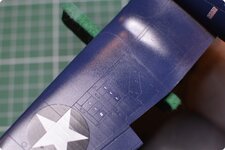
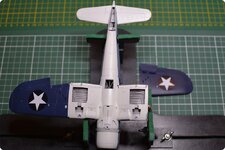
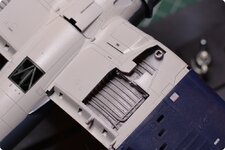
Some steady but minor progress to report. The wing roots have now been fitted to the fuselage and the wing radiator intakes fitted and tidied up a bit. I think I might do a bit more detailing here - undecided as to what and how just yet.

Undercarriage, wings, horizontal stabs and propeller now cleaned up with pin marks and mold seams removed. I've assembled the basic undercarriage legs and test fitted them into their respective positions. Similarly the outboard wings have been assembled and cleaned up a bit.

In looking at the reference photos I have I think that the salmon colour I created is too red - it just seems to be a bit too "bright". I am going to revisit my mix proportions and see what other colour I need to add to take the brightness back a couple of notches. Similarly, the primer colour in the U/C bays is a bit too white so I will mix up a revised colour for this and reshoot it.

As always - thanks for looking in and offering advice and encouragement.
F4U-1 Cleaned Up Sub-Assemblies.JPGF4U-1 U-Carriage Test Fit 1.JPGF4U-1 U-Carriage Test Fit 2.JPG
 
Minor progress has been made! I have now completed the undercarriage, all painted up and I made an attempt to "dirty up" the bits to make it look used.
F4U-1 Main U-C Bays.JPG F4U-1 U-Carriage Paint.JPG
This marks the very first attempt I have made in properly weathering a model. I have played with some of the more basic stuff like oil stains from various panels, but making details like this look dirty is all new. It took me forever and the result is OK, but I am happy.

I have also retouched the visible salmon primed parts but forgot to take some photos. I took Andy's [@Crimea_River] advice and started with white, but also adjusted the reds that I was using. Might be a touch too pink now, but I'll run with it.

Really wanting to get this one done now and move onto the next subject.

As always, thanks for looking in and for the supportive comments and suggestions. All advice is welcomed.
 
Good work there Grant. The brake line around the torque link might be a bit squarish. I think this section was actually a black hose with smooth curves.
 
The brake line around the torque link might be a bit squarish. I think this section was actually a black hose with smooth curves.

You're probably right Andy. The photo I was using shows it as quite square, but some others look less so. Logically this section would have to be a flexible hose, most likely black as you say. Easy enough to fix & I might try to round out the "squarishness" a bit. (Source - interweb).
F4U-1 Brake Line Reference.jpg
 
Been spending a lot of time cleaning up joins and small areas that need filling and sanding. In this process I have found there are two panels (one on either wing) that are recessed into the leading edge. They look like they could be landing lights - but I have no real idea on what they may be. I've added a photo of this area (source: Internet/LIFE Magazine photo) and hope that someone can help me understand what this is and how it should be represented.
F4U-1 Wing Leading Edge.jpg
Any guidance would be most welcome.

Thanks for looking in.
 
Excellent work - thank you gentlemen! I am tempted to go down the clear sprue path, but given I really want to get onto painting and weathering this bird the option of a gloss black panel might be the final outcome.

Cheers.
 
It's been nearly a month since my last update, but I have not been idle with this kit. My LHS finally got some Tamiya acrylic paint in so I was quick to jump on it and get the colours I had on back order for months. I really wanted to try the Tamiya acrylics so I can compare them with the Vallejo I used on the Me109.

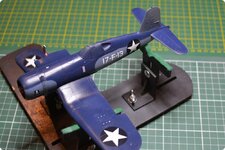
Photos below are after painting and laying down a clear coat for the decals to go on. I am reasonably happy with the result achieved with the Tamiya acrylics. I did notice two main things that are different to Vallejo; the first being that Tamiya is a lot "harder" when dry (resists scratching and pull off from masking tape) and the second being that I don't need items such as flow improver to stop the paint drying in on the needle.

Shots below with the majority of decals applied. I did end up using the stencils from a HGW Models decal set (not all of them - some are just plain tiny and too hard to use). I must say that, while the application is sometimes a bit fiddly, the end result is outstanding. Zooming in on the photos of the stencils shows just how much tiny, tiny detail they contain - very impressive.

F4U-1 Paint & Decals_1.JPGF4U-1 Paint & Decals_3.JPGF4U-1 Paint & Decals_2.JPGF4U-1 Paint & Decals_4.JPG

So, plenty of bits still to do but I feel like I am getting much closer to finishing.

As always, thanks for looking in on my ramblings. :sunglasses:
 

Users who are viewing this thread

Back